How Can We Help?
Spline Blueprint – Power Lines
You can import GIS vector lines into this blueprint using TerraForm to place lines of power/telephone poles (pylons) connected by wires. You can easily replace the static mesh for the poles with your own models.
It’s free for you to use and you’re welcome to modify it/include it in your own projects.
Included in this download:
- Power Line Blueprint.
- Example power pylon static mesh.
- Demo map including a landscape of Twin Mountain, NH (no material applied).
- GIS vector line data in the Twin Mountain area.
IMPORTANT
The vector data included with this download is from the Twin Mountain area we used in Tutorial 1. You’ll need the DTM from that sample pack to follow the examples below. You can get it here.
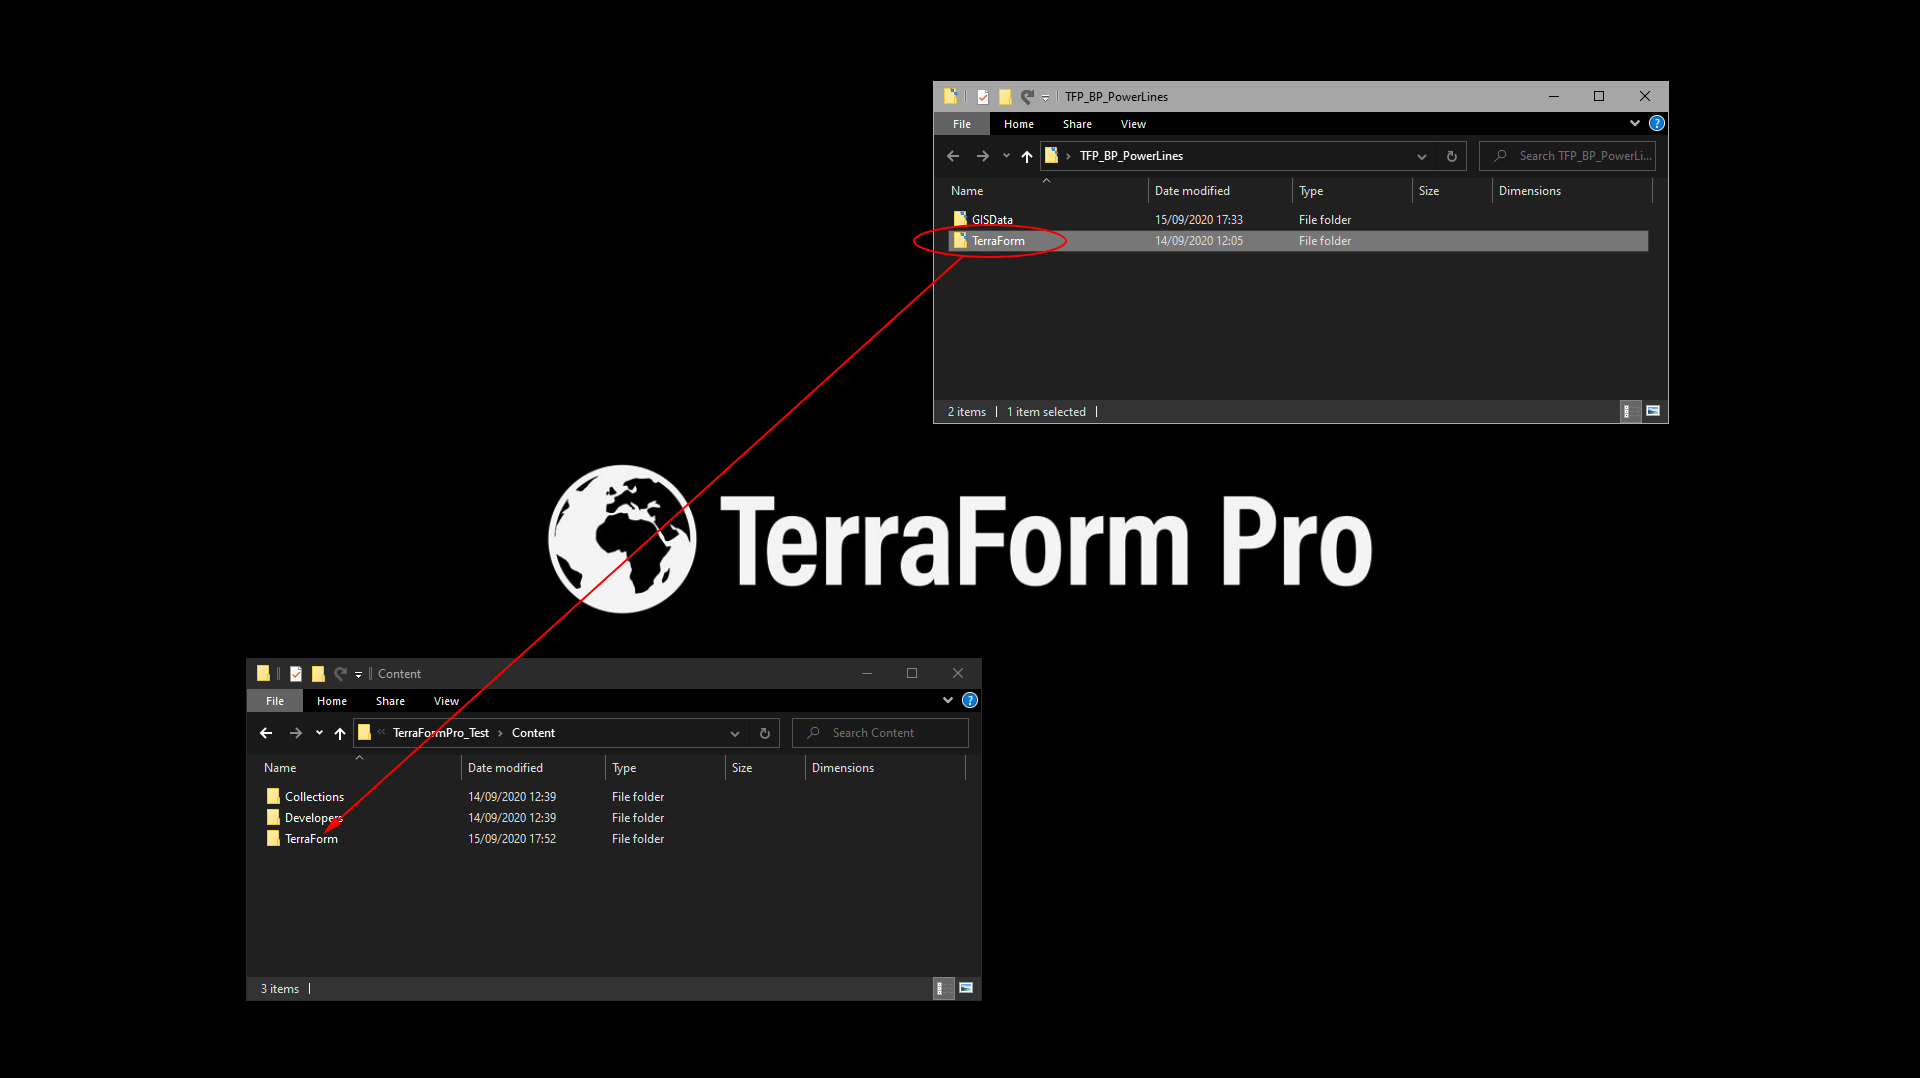
Adding to your Project
To add the blueprint to your project, extract the .zip file and copy the TerraForm folder to the Content folder of your project.
It’s free for you to use and you’re welcome to modify it/include it in your own projects.
>> QUICK ACCESS
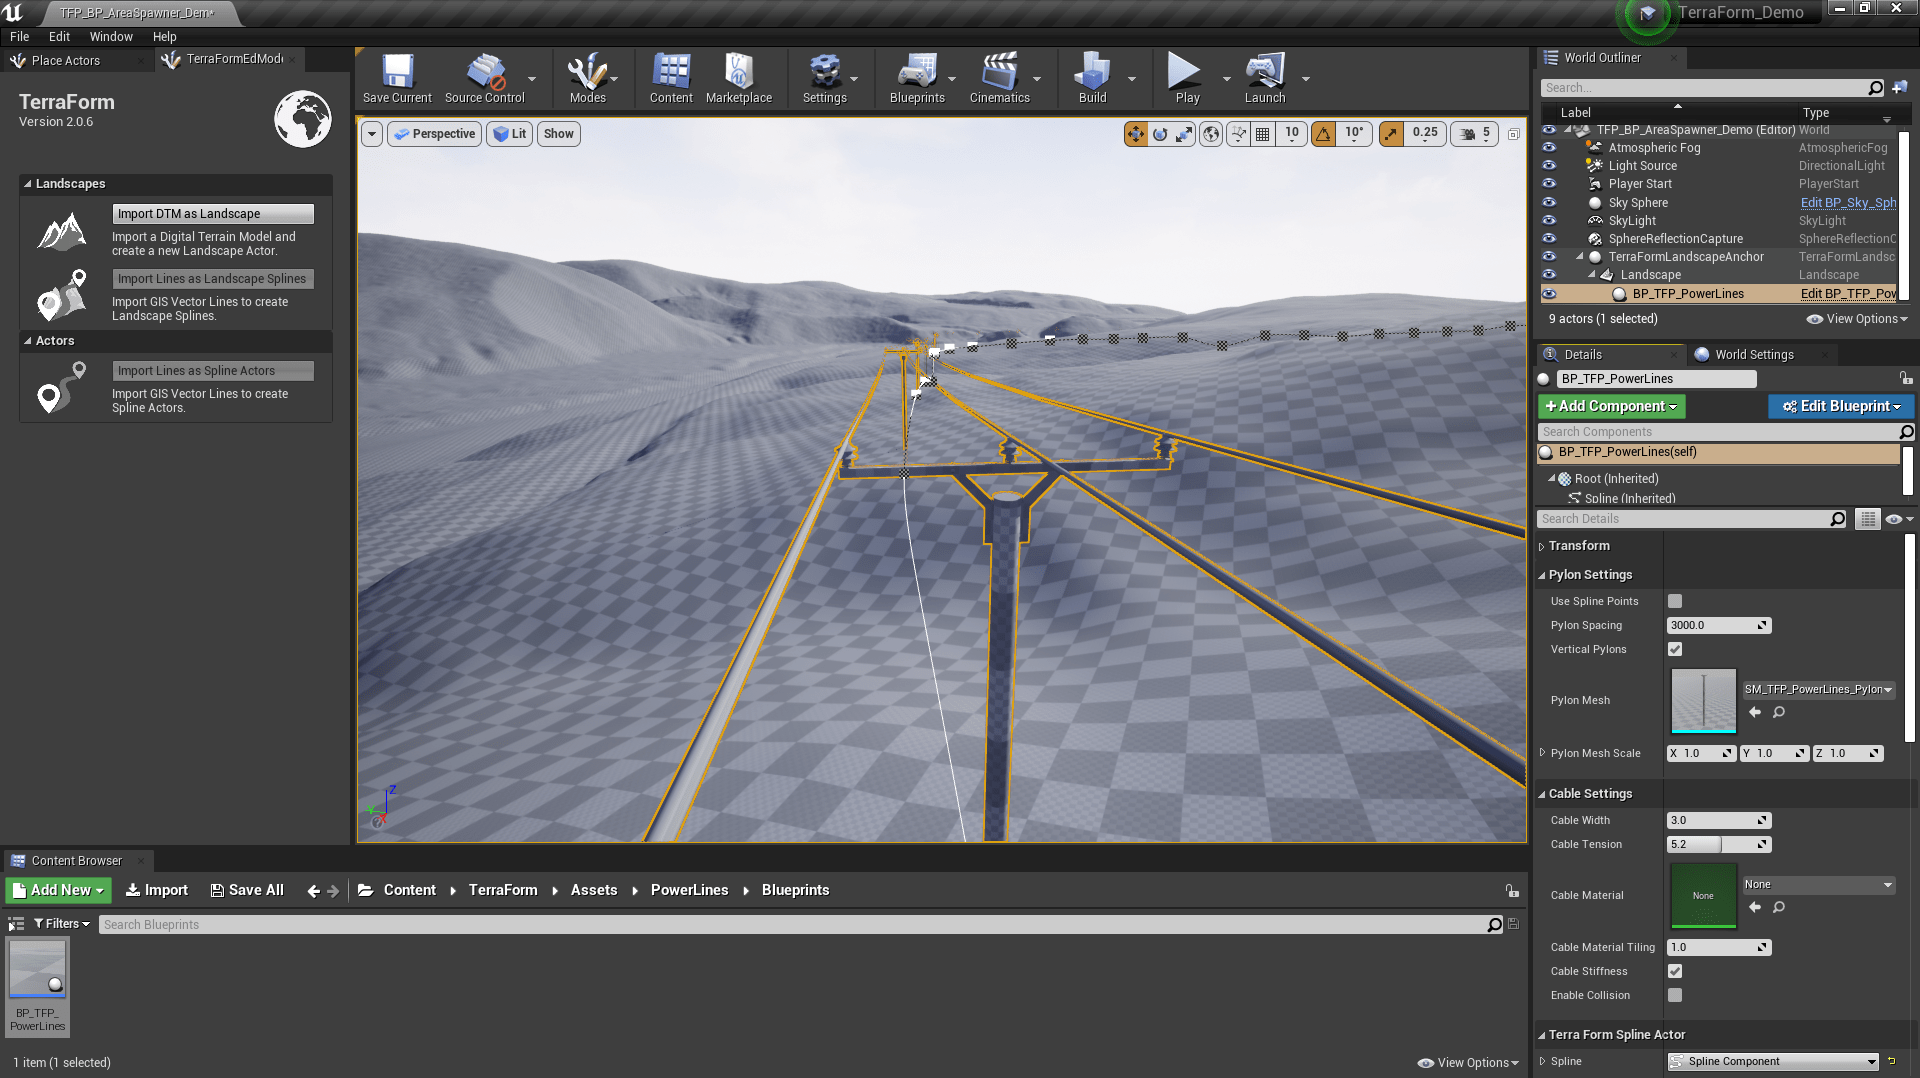
We’ve included a demo level (.umap) that you can load once you’ve added the blueprint folders to your project (Content > TerraForm > Assets > PowerLines > Maps > TFP_BP_PowerLines_Demo.umap). It contains the landscape with the area spawner blueprint already imported.
Importing GIS Data
We’re starting from the point of having already imported the DTM (see Steps 8 & 9 of Tutorial 1), but without applying a Landscape material.
- Select the Landscape.
- In the TerraForm panel, select Import Lines as Spline Actors.
- Use the Import Spline Actors window to navigate to the Vectors folder inside the GISData folder of the extracted TFP_BP_PowerLines.zip.
- Select TFP_TwinMountain_UTM19_NAD83_PowerLine.shp
- Hit Open.
In the Spline Actor Import Options window:
- Select BP_TFP_PowerLines as the Spline Class.
- Click Import.
It’s free for you to use and you’re welcome to modify it/include it in your own projects.

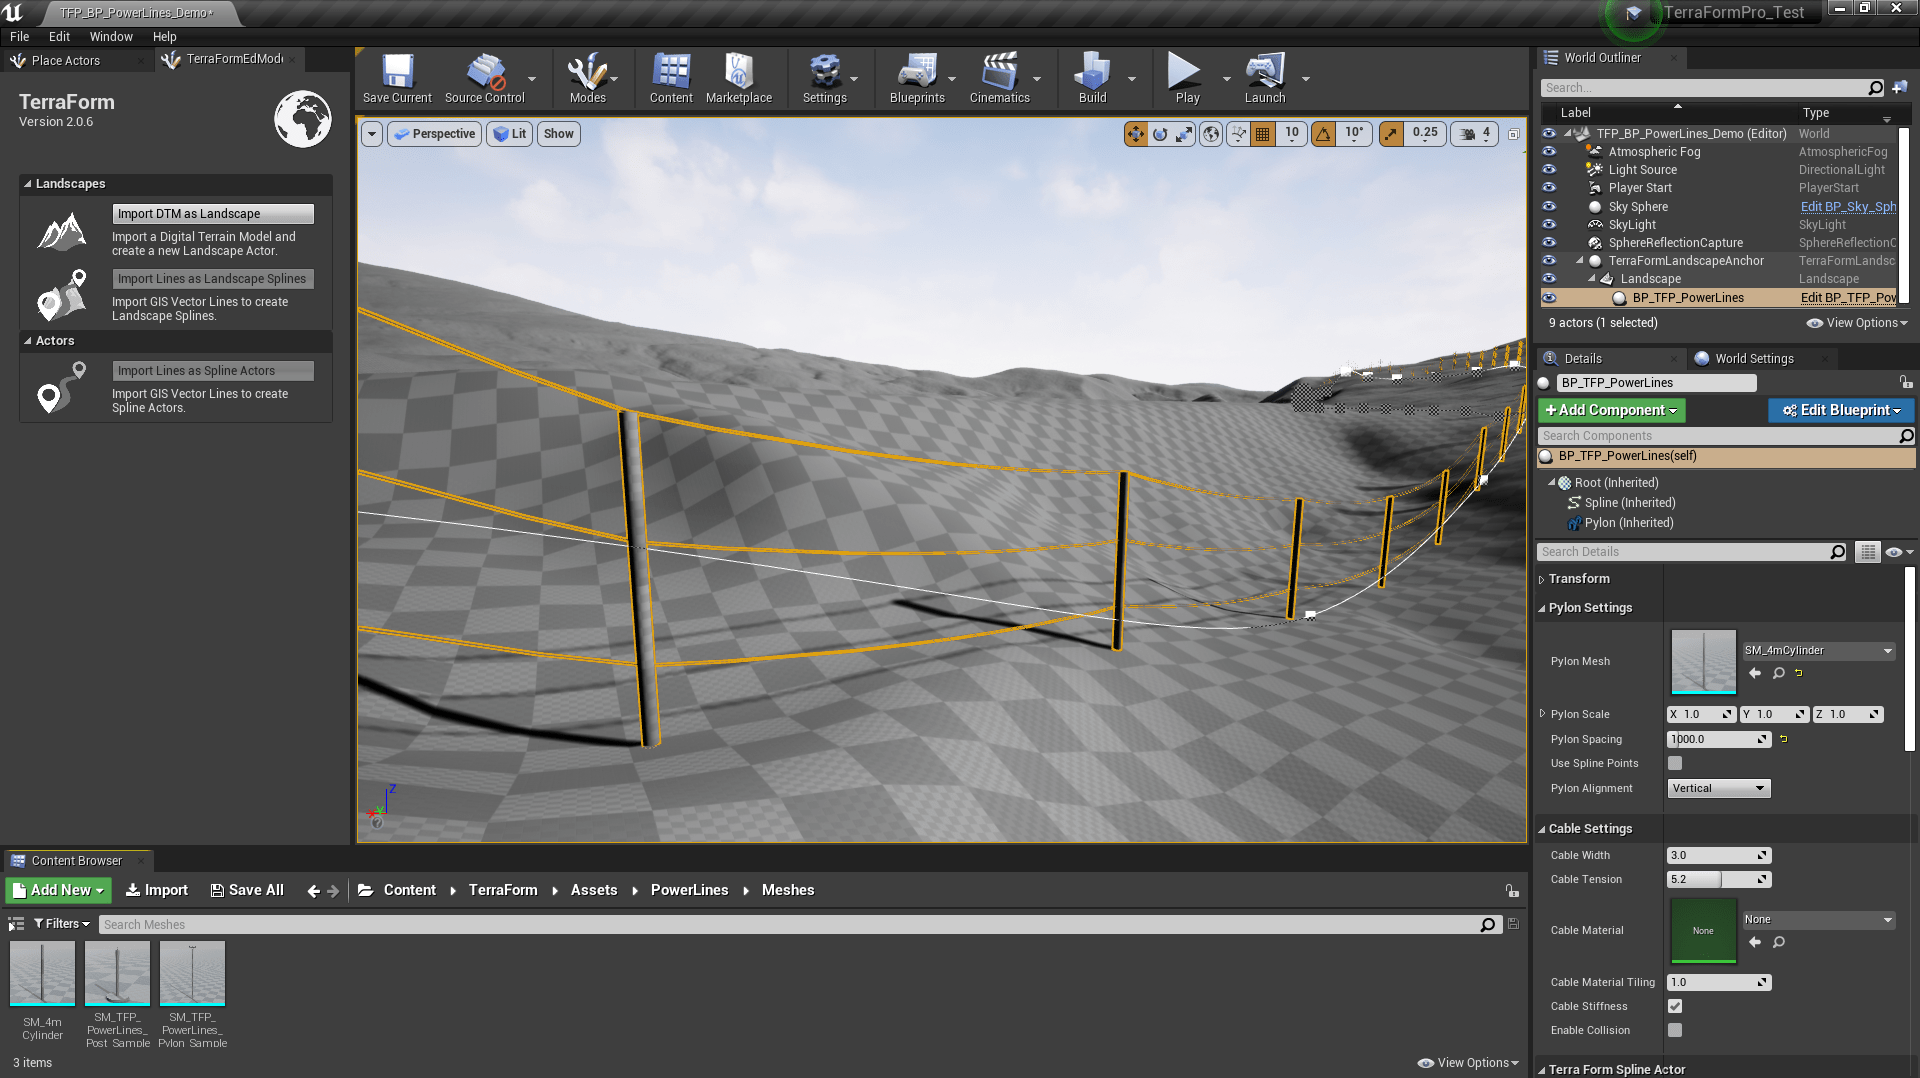
The blueprint loads using a basic pylon static mesh (with no material) and creates a line of power poles connected by wires. You can adjust the placement of the power line by simply dragging the spline points in the editor window.

Pylon Settings
Select the BP_TFP_PowerLines actor in the World Outliner to modify its settings:
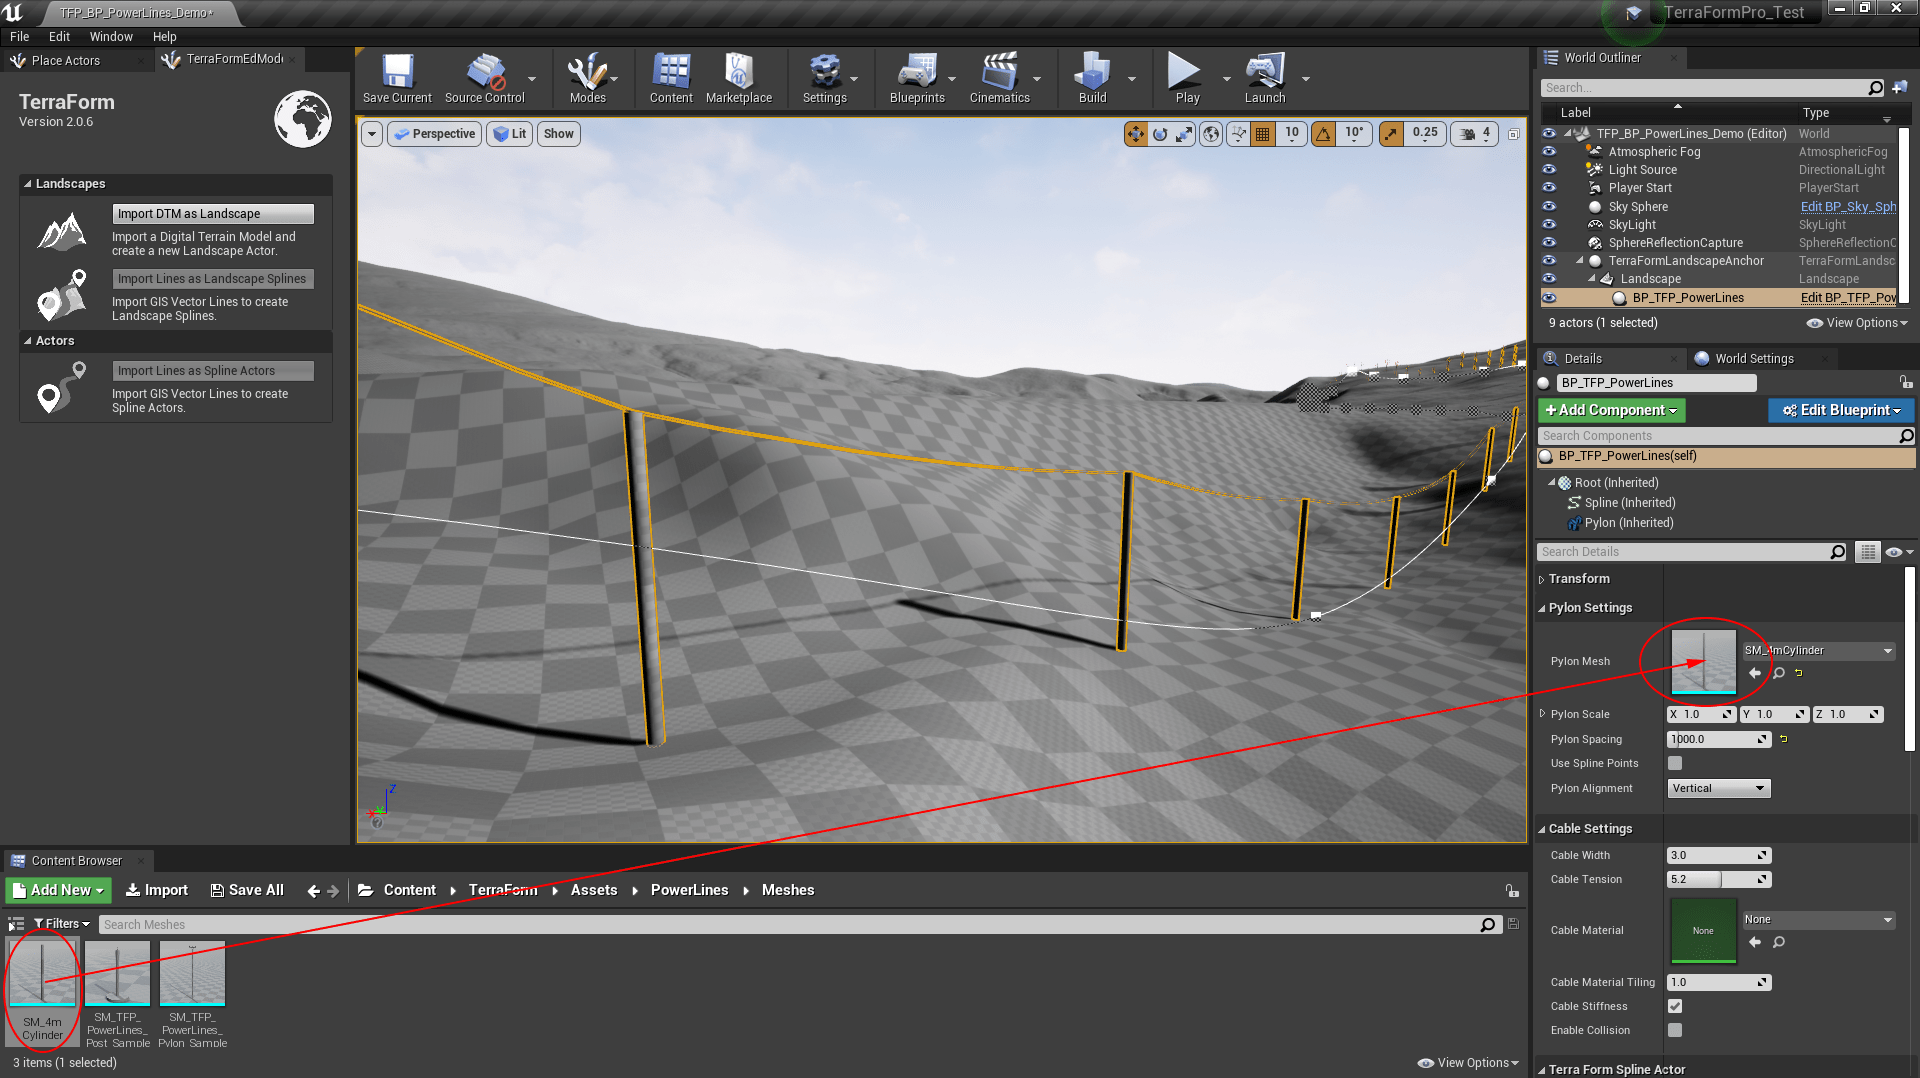
- Pylon Mesh: The static mesh actor used as a pylon. Drag your own static mesh here to override. (Note: Wires are connected to sockets in the mesh. See below for instructions how to set up sockets on your own static meshes.)
- Pylon Mesh Scale: Adjust to modify the scale of the pylons’ static mesh for this blueprint actor.
- Pylon Spacing: The distance between pylons. (Used only when Use Spline Points is unchecked.)
- Use Spline Points: When checked, the GIS vector line’s points are used to place the pylons. If unchecked, the Pylon Spacing value can be used to set the distance between pylons.
- Pylon Alignment: Vertical – forces all pylons to point vertically up. Align to Spline – pylons are aligned to the spline normal. Align to Landscape – pylons are aligned to the landscape normal.

Cable Settings
- Cable Width: Sets the width of the cable(s) in centimetres.
- Cable Tension: Adjust the tension between pylons. Depends upon the distance between pylons. Typically values between 5 and 6 give best results.
- Cable Material: The material to apply to the cable. Can be used to create cables, ropes, wire etc.
- Cable Material Tiling: The tiling of the cable material along the length of the cable.
- Cable Stiffness: Whether the UE4 cable stiffness function should be applied to the cables. May adversely impact performance when set.
- Enable Collision: Sets whether it is possible to collide with the cables. May adversely impact performance when set.

Creating Pylon Meshes
With this blueprint, you can use any static mesh as a pylon – download one from the market place, or make one of your own. All you need to do it add a socket (/sockets) where you want the wires to connect. BP_TFP_PowerLines will search for sockets within your pylon and connect cables between them along the length of your spline.
Here’s how to add a socket to a model. In this case, we’ll start with a simple 4m tall, 10cm radius cylinder object that’s already been imported into UE4 as a static mesh:
- Double-click on your static mesh object to open the static mesh editor.
- In the Socket Manager panel, click Create Socket.
- Give your socket a name (call it whatever you like).
- Drag it to where you want the cables to be connected to your static mesh (or type values into Relative Location.
- Save it.

To use your new pylon, just drag it into the Pylon Mesh setting.
Repeat the steps above to add more cables. Beware though – the more cables you add and the closer pylons are together, the more performance will be impacted.
NOTE
You may need to give UE4 a poke to update the mesh by dragging it onto the Pylon Mesh setting again.