How Can We Help?
10. Surfaces & Vegetation
Whilst we’re using a procedural method for surface texturing and vegetation, we still need to define where the different surfaces should appear using our layer masks. This section describes how to apply the layer masks and perform basic set up of the Procedural Landscape Ecosystem.
Step 1
Resize the Birch and Pine forest masks you created previously to the correct dimensions for the landscape. The first thing to do here is confirm the Overall Resolution of the landscape:
- Select the ‘Manage’ tool on the ‘Landscape’ modes panel.
- Click the ‘Selection Tool’ under ‘Landscape Editor’ and select ‘Change Component Size’.
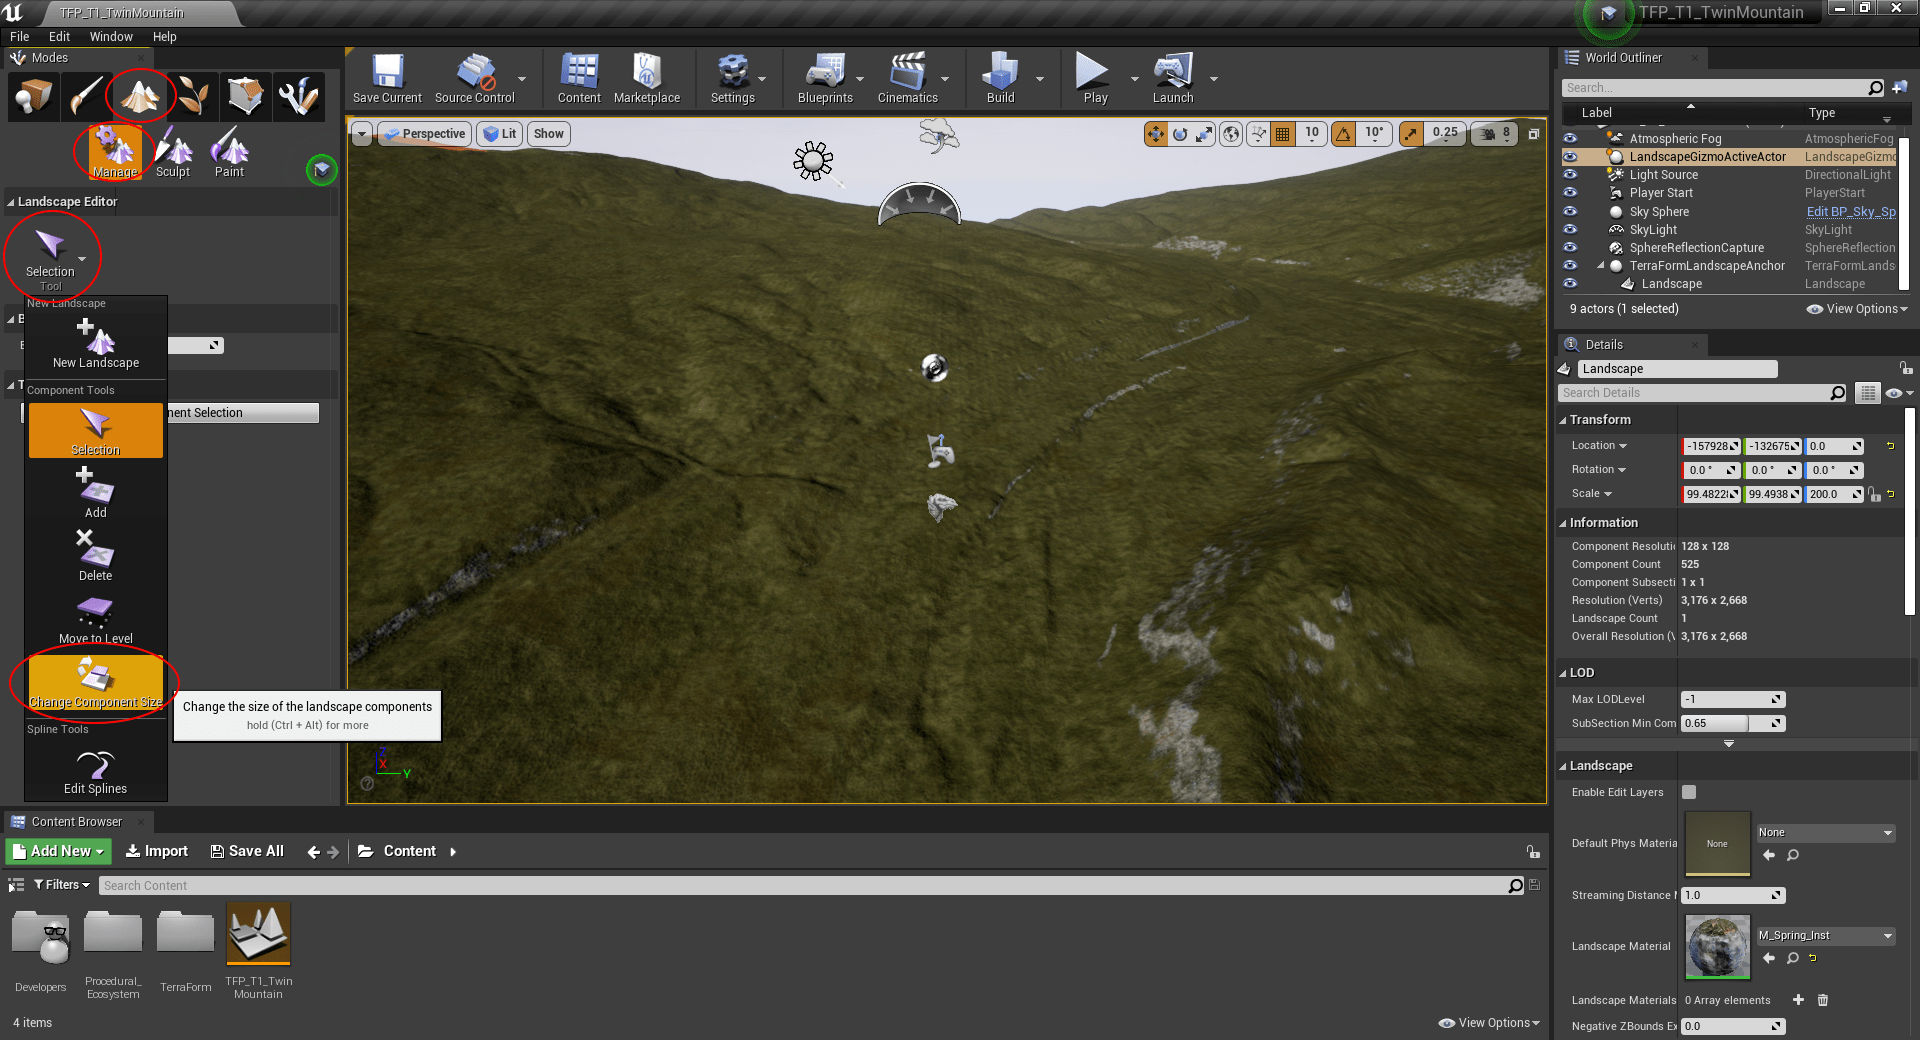
- The Overall Resolution in our model shows the dimensions are: 3176 wide by 2668 high. We’ll resize our masks to these dimensions.

Step 2
Resize the layer masks in Photoshop and save in Grayscale 8-bit format:
- Open Photoshop and then open the two mask .png files.
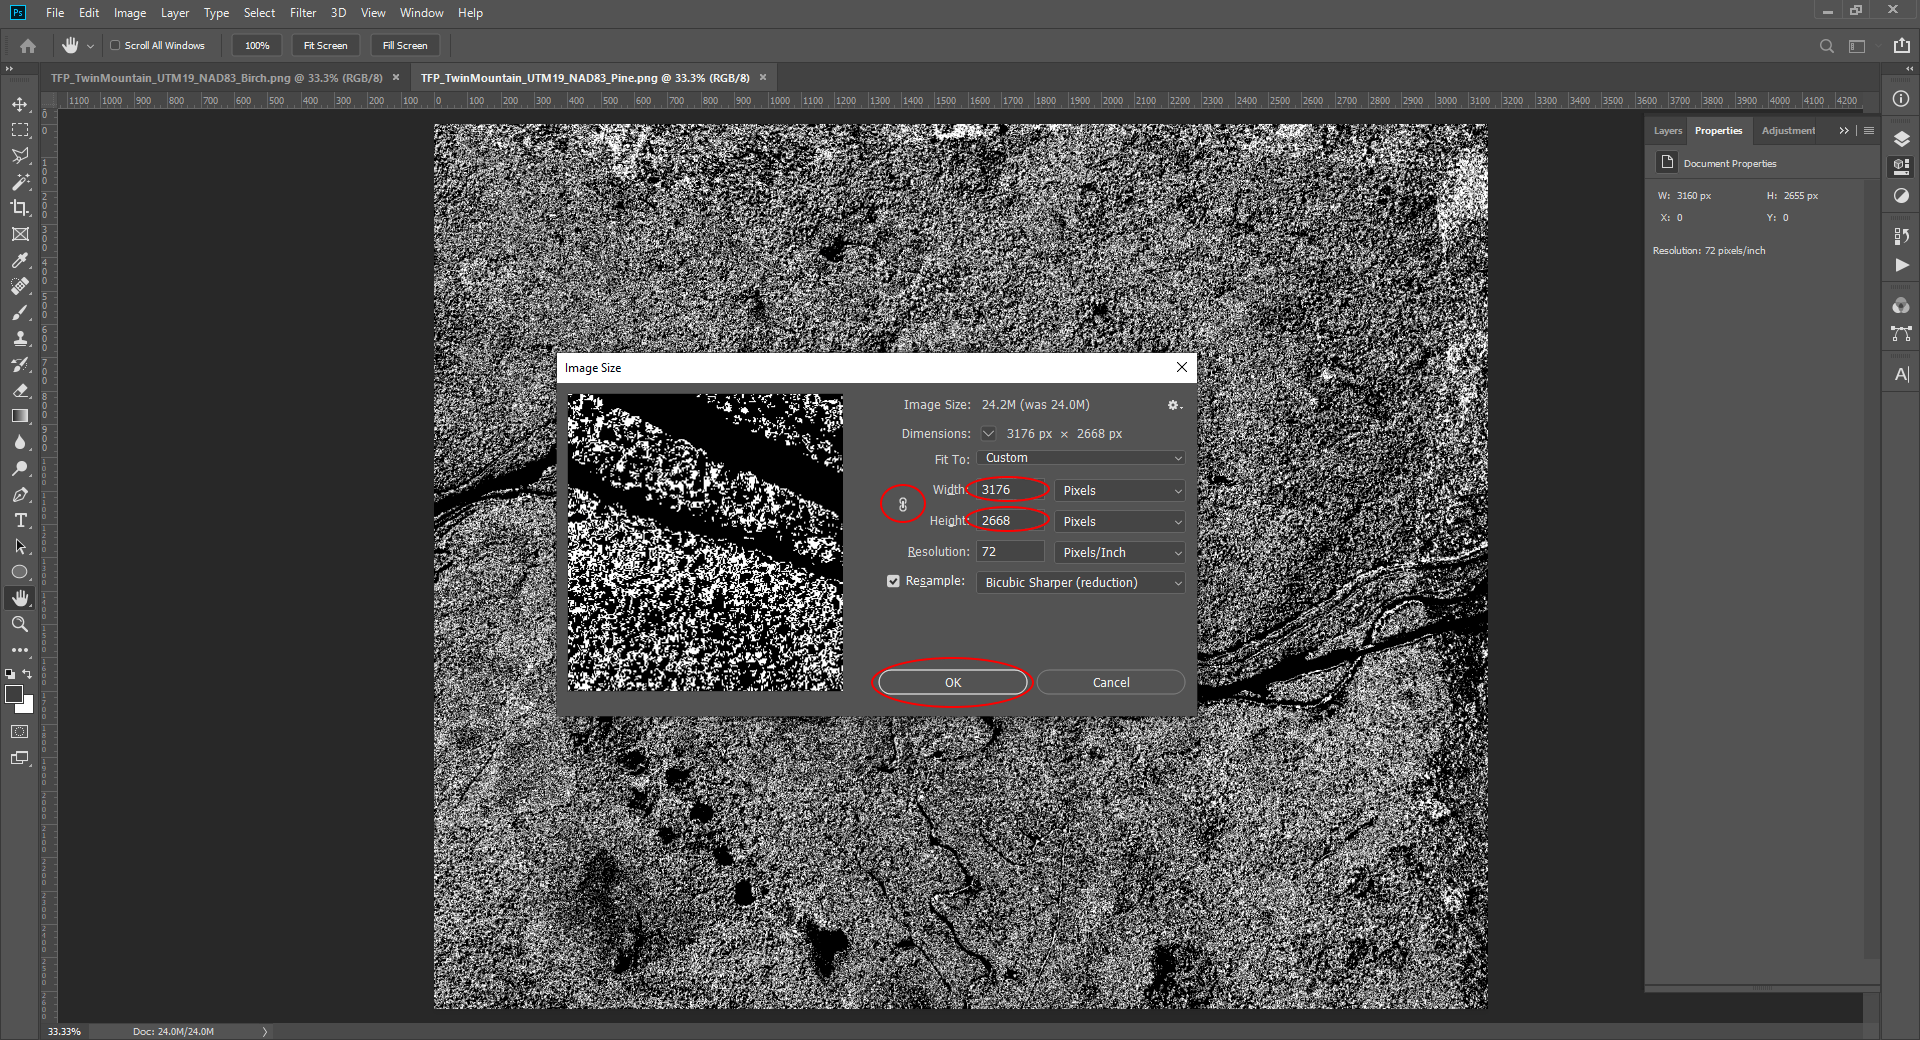
- Select the Pine mask and then on the main menu, select ‘Image’ then ‘Image Size…’
- Click the chain link to turn off ‘Constrain Aspect Ratio’, then input the width and height values in the appropriate fields.
- Click ‘OK’ to resize the mask.
- Check the mask is in ‘Grayscale 8-bit’ format. (In Photoshop: ‘Image’ > ‘Mode’ > ‘Grayscale’. Make sure ‘8-Bits/Channel’ is checked.)
- Save the new mask.
- Repeat for the Birch Mask.
Step 3
Import the Pine and Birch forest masks to the landscape layers in UE4:
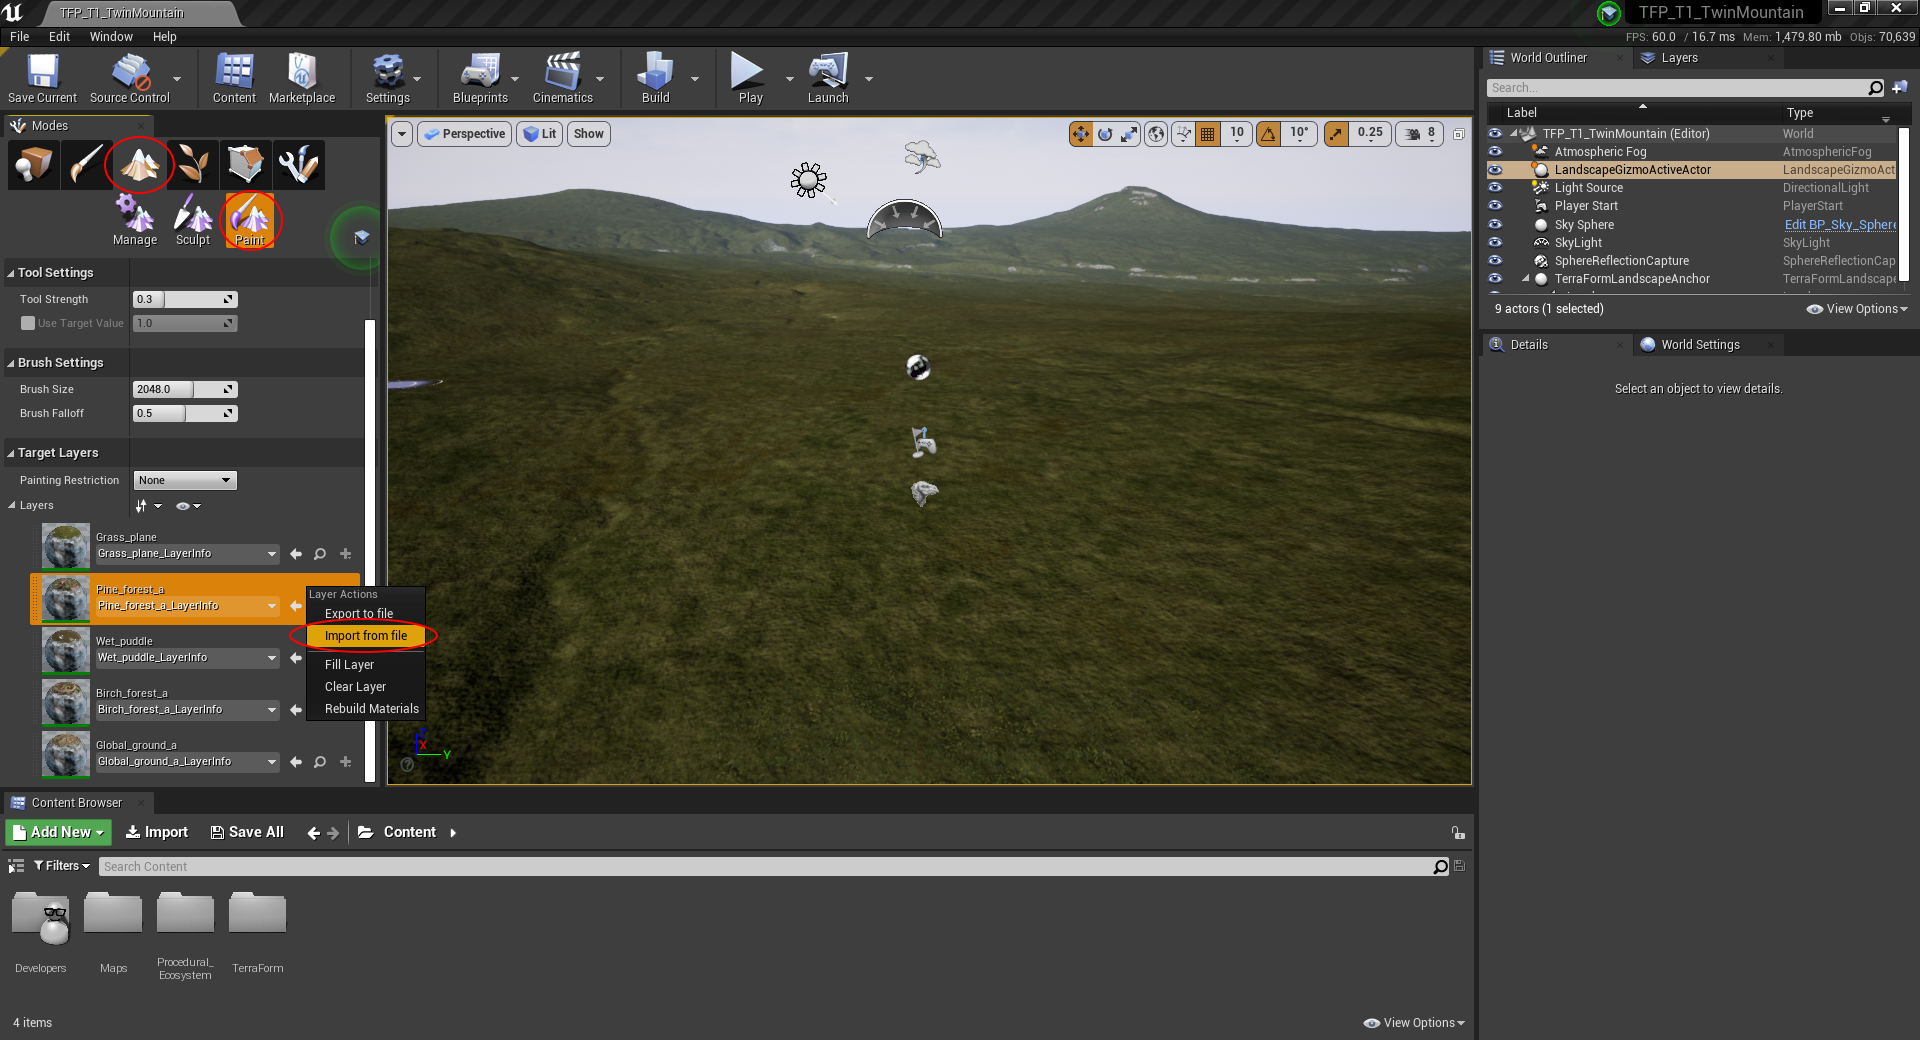
- On the ‘Landscape’ mode panel, select ‘Paint’.
- Select the ‘Pine_forest_a’ layer from the ‘Layers’ list under ‘Target Layers’.
- <Right-click> on the ‘Pine_forest_a’ layer and select ‘Import from File’.
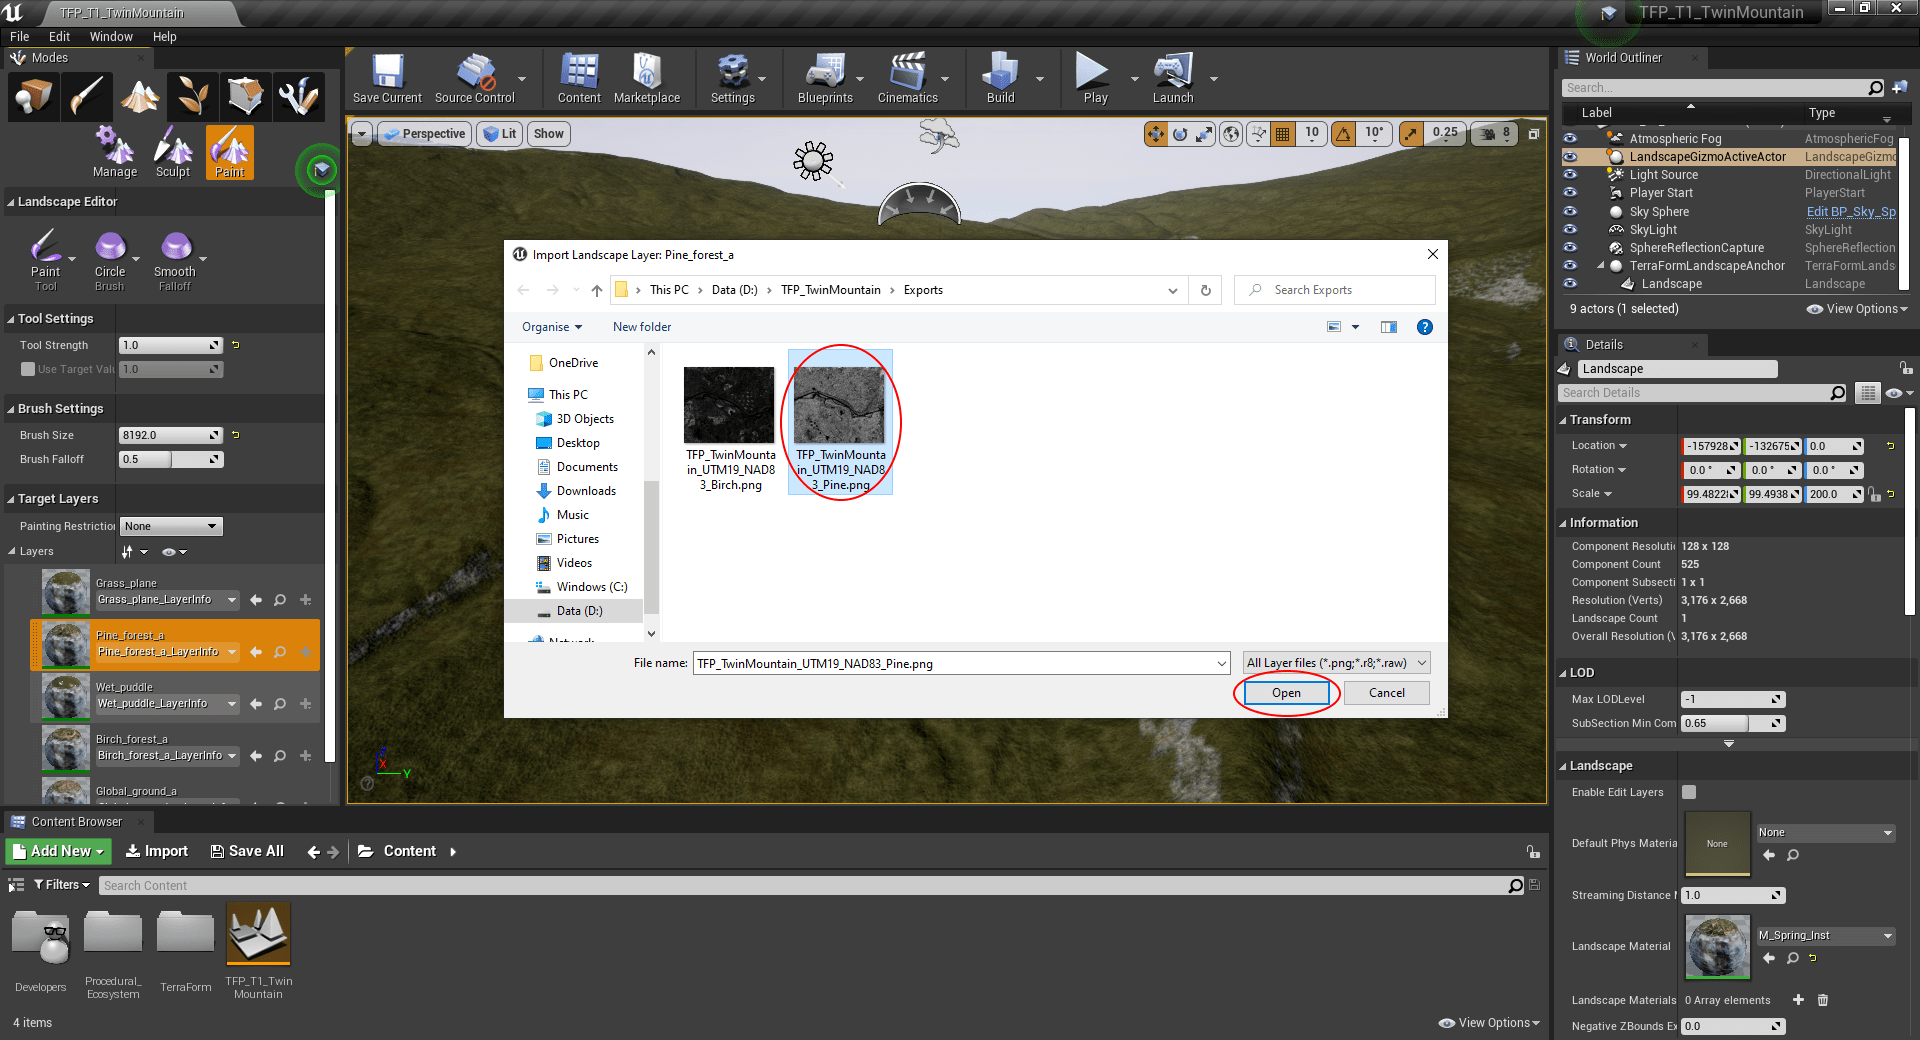
- In the broswer window that appears, select the .png mask for the pine forest.
- Click ‘Open’.
Step 4
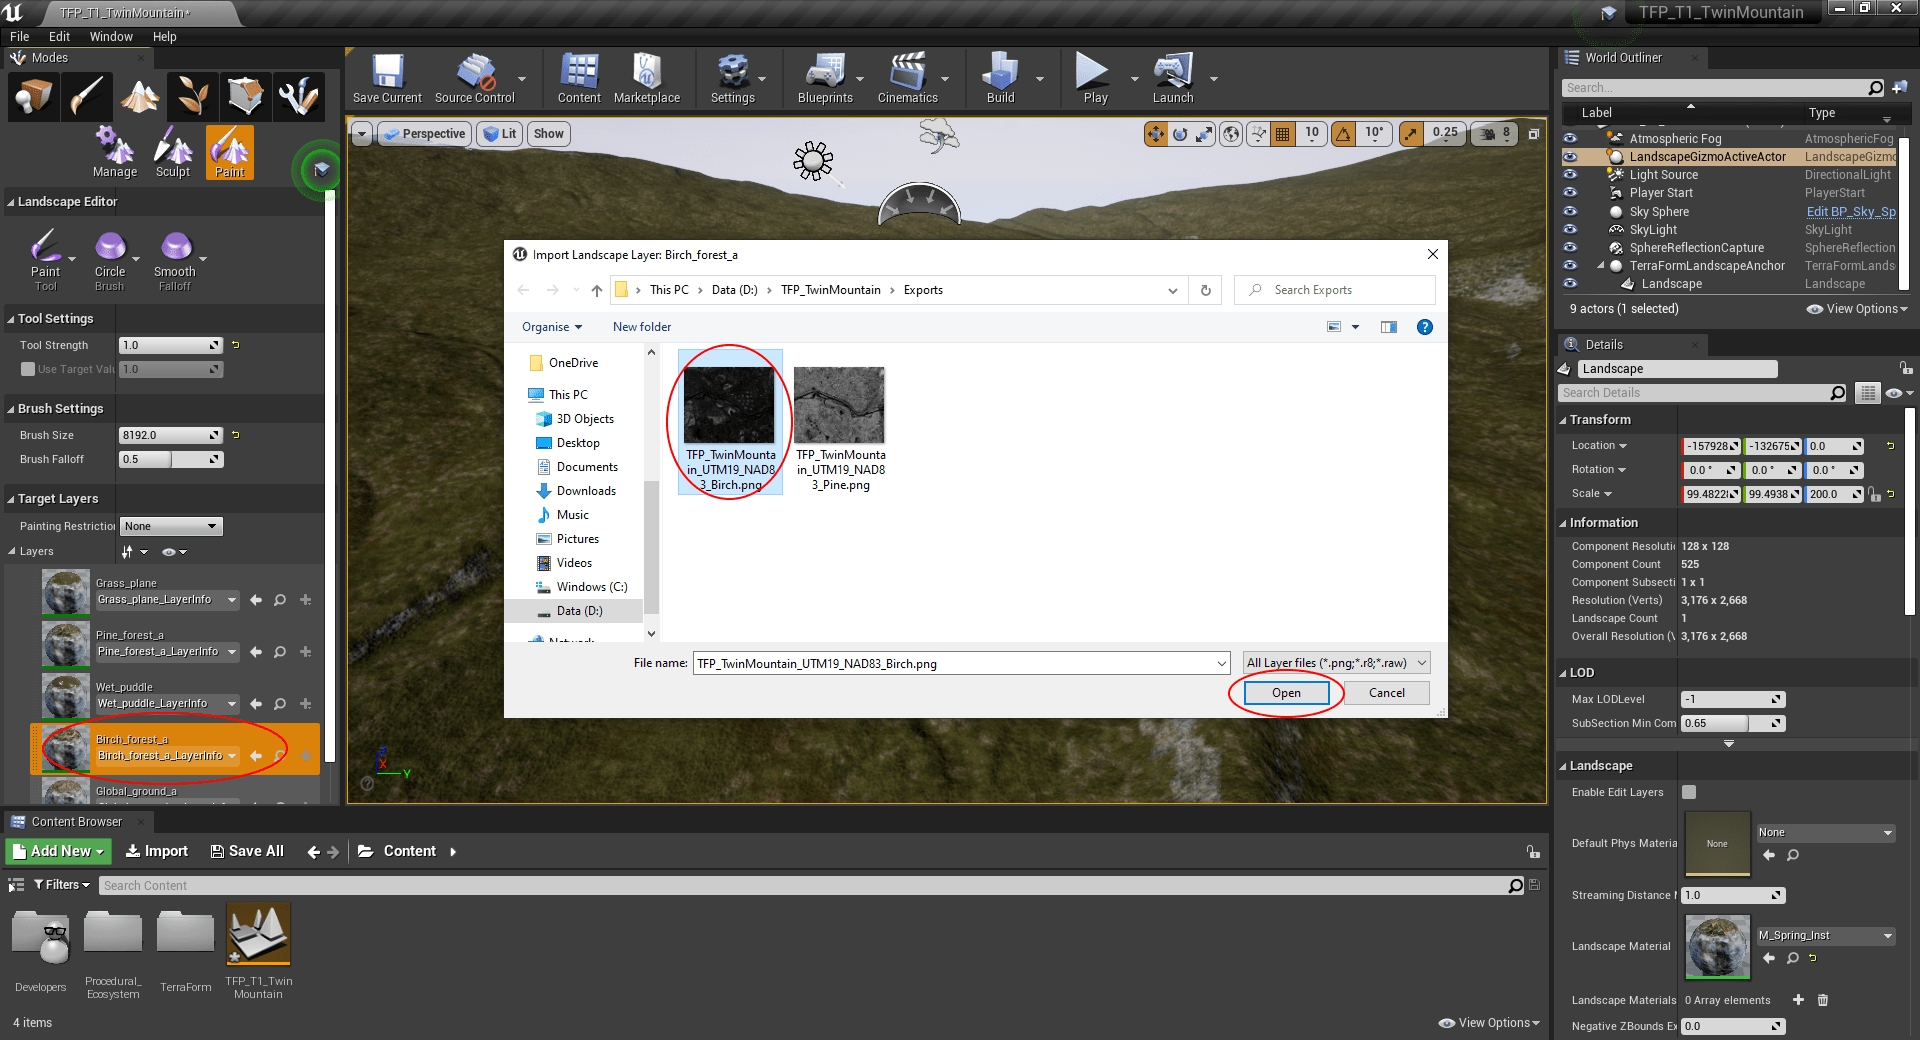
Import the layer mask for the birch forest:
- <Right-click> the ‘Birch_forest_a’ layer on the ‘Paint’ tab of the ‘Landscape’ mode.
- Select ‘Import from File’.
- Select the .png mask for the birch forest.
- Click ‘Open’.
Step 5
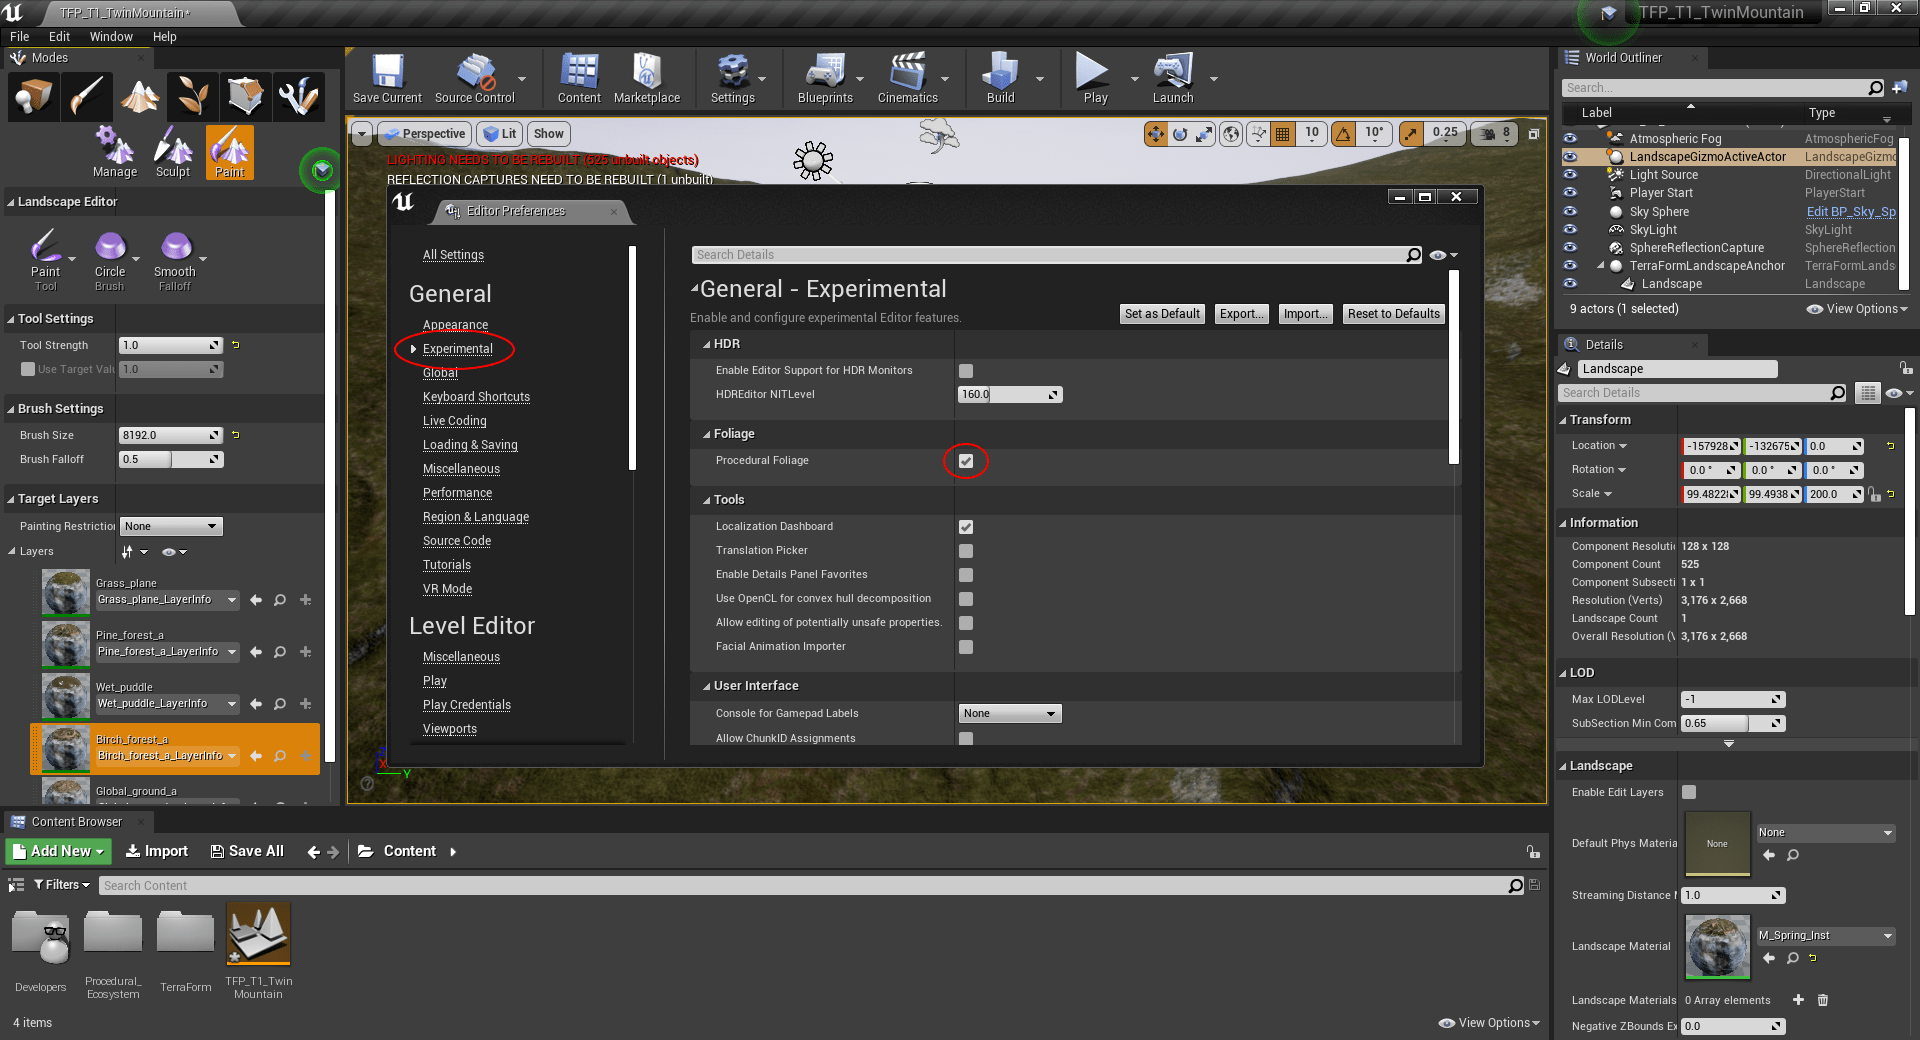
Turn on Procedural Foliage:
Now we’ve defined where the different surfaces should appear, we need to set up the vegetation. Since procedural foliage is experimental in UE4, the first thing we need to do is activate it in the Unreal Editor:
- ‘Edit’ > ‘Editor Preferences…’
- Click ‘Experimental’ in the ‘General’ section.
- Check ‘Procedural Foliage’ to enable it.
Step 6
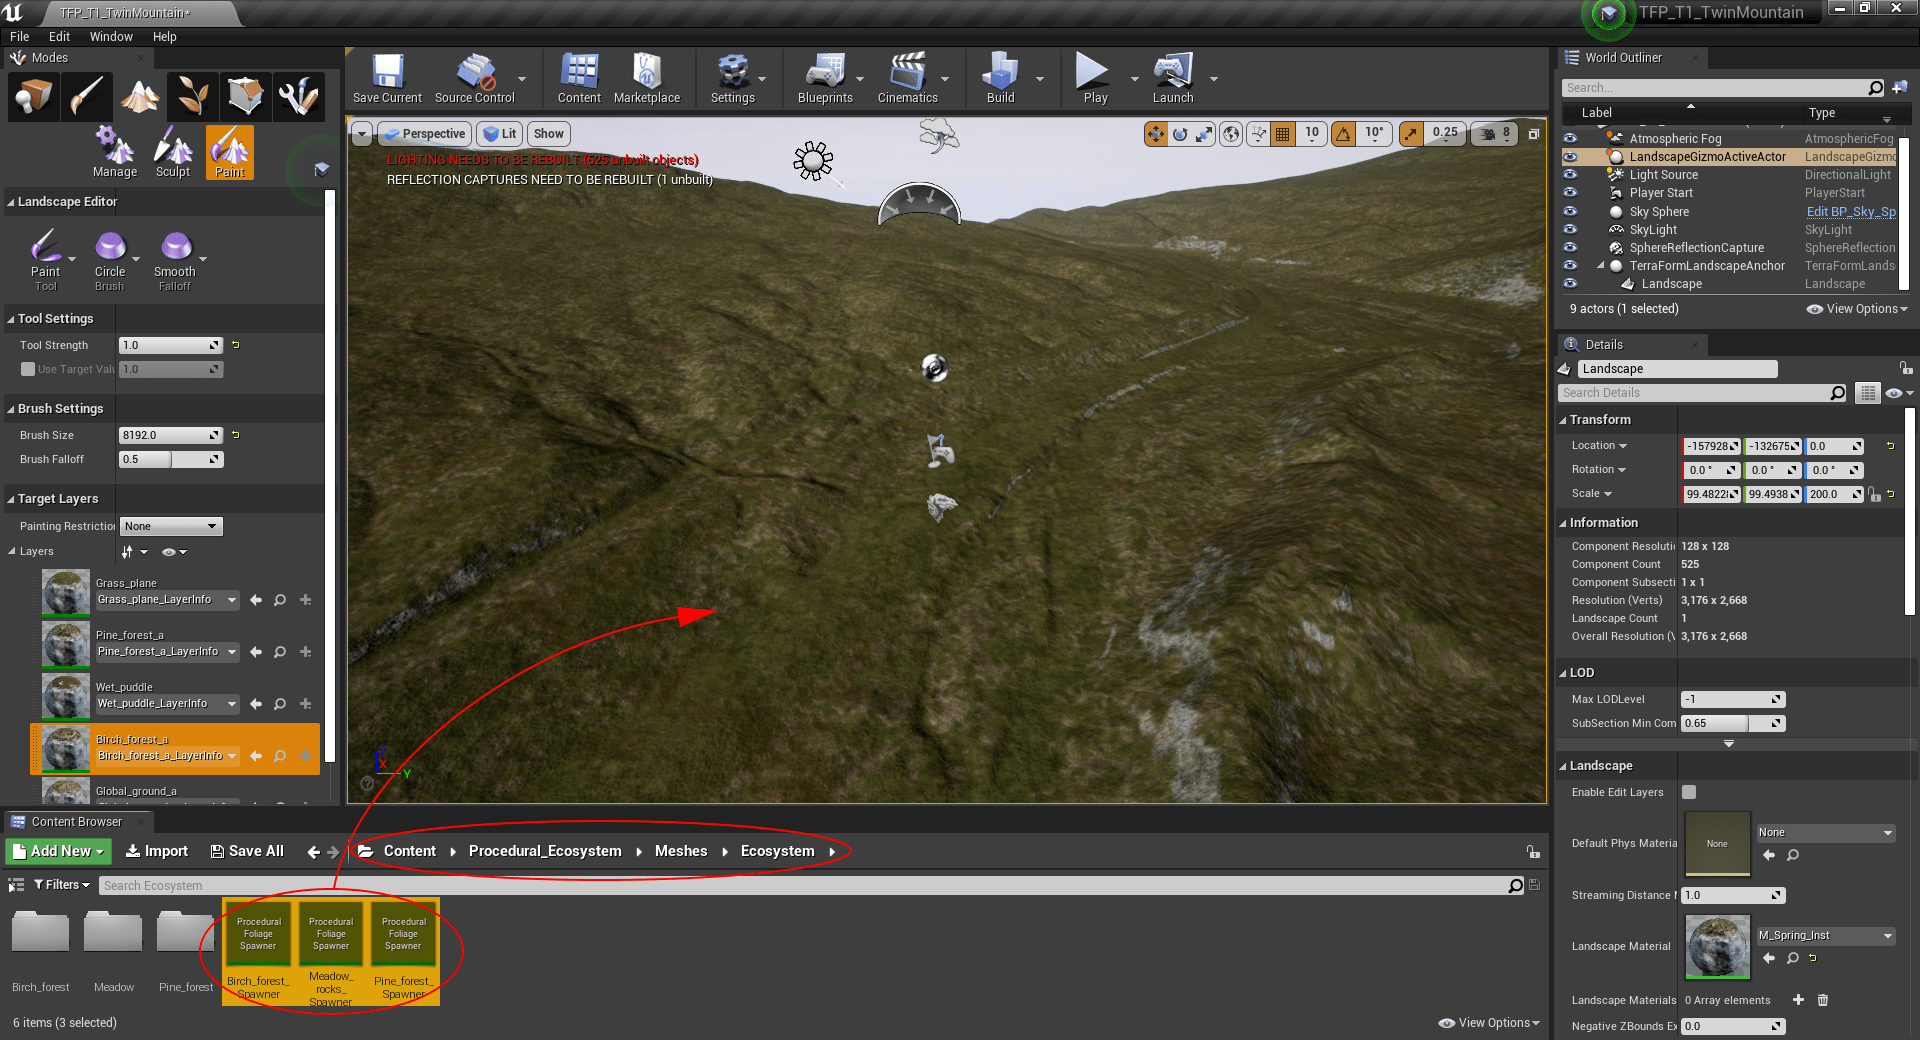
Apply Procedural Landscape Ecosystem’s foliage spawners to the landscape:
- Navigate to the ‘Ecosystem’ folder in the ‘Procedural_Ecosystem’ add-on.
- Select all 3 spawners and drag them into the Unreal Editor Viewport.
Step 7
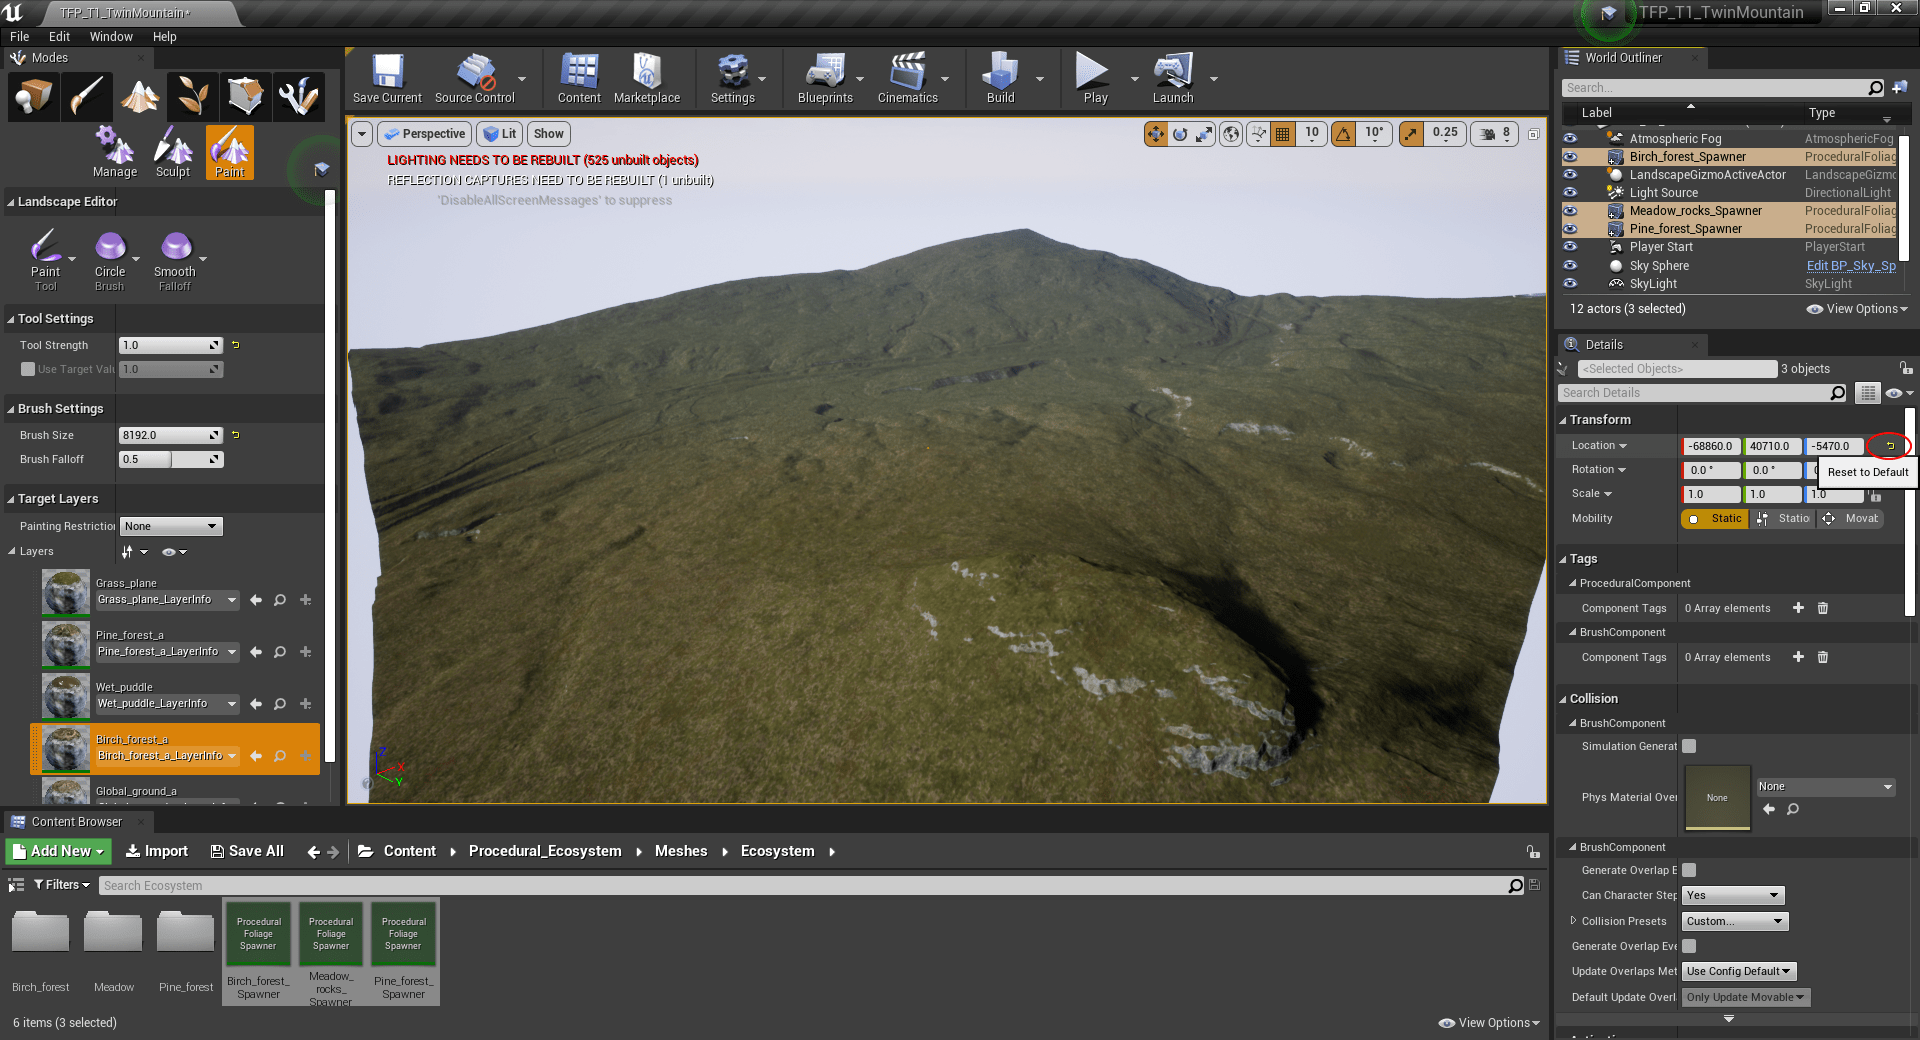
Move the spawners to the centre of the landscape:
- Select all 3 spawners (we can move them all together).
- TerraForm automatically centres your landscape to 0,0,0 when it imports a DTM, so all you need to do is move the spawners to 0,0,0 to centre them. The easiest way to do this is to click the ‘Reset to Default’ button next to the ‘Location’ values.
Step 8
Scale the spawners:
- Keep all 3 spawners selected.
- The default size of the spawners is 2m x 2m x 2m (width x length x height).
- We know that our DTM resolution is 1m. The DTM file we exported was 3160px by 2655px (3160m by 2655m). The height range is ~281m.
- Our scale sizes therefore need to be X=1580.0, Y=1327.5, Z=141.0 (rounding up).
- Enter these values into the ‘Scale’ parameter boxes.

Step 9
Run the spawners to generate the vegetation:
- Keep all 3 spawners selected.
- Scroll down the ‘Details’ panel to the ‘Procedural Foliage’ section and de-select ‘Allow Static Mesh’.
- Click ‘Resimulate’ to run the spawners.

- It may take some time to run the vegetation spawners, depending on your system’s specification and size of the landscape you’re creating.