How Can We Help?
4. Downloading Data
This section of the tutorial is all about how to get hold of the source data for your landscape. We’re building a terrain for the US, so the steps hereunder refer to downloading free data from USGS. If you already have your own data, you can skip this bit and go straight to Defining UE4 Landscape Extents.
WE NEED TO GET
- Digital Terrain Model (DTM) Data – this will be used for topography.
- Aerial/Satellite Imagery – this is used as a reference and to create masks for landscape surfaces.
- Transport Networks (roads, rail/power lines etc.) – we’ll use this to create infrastructure.
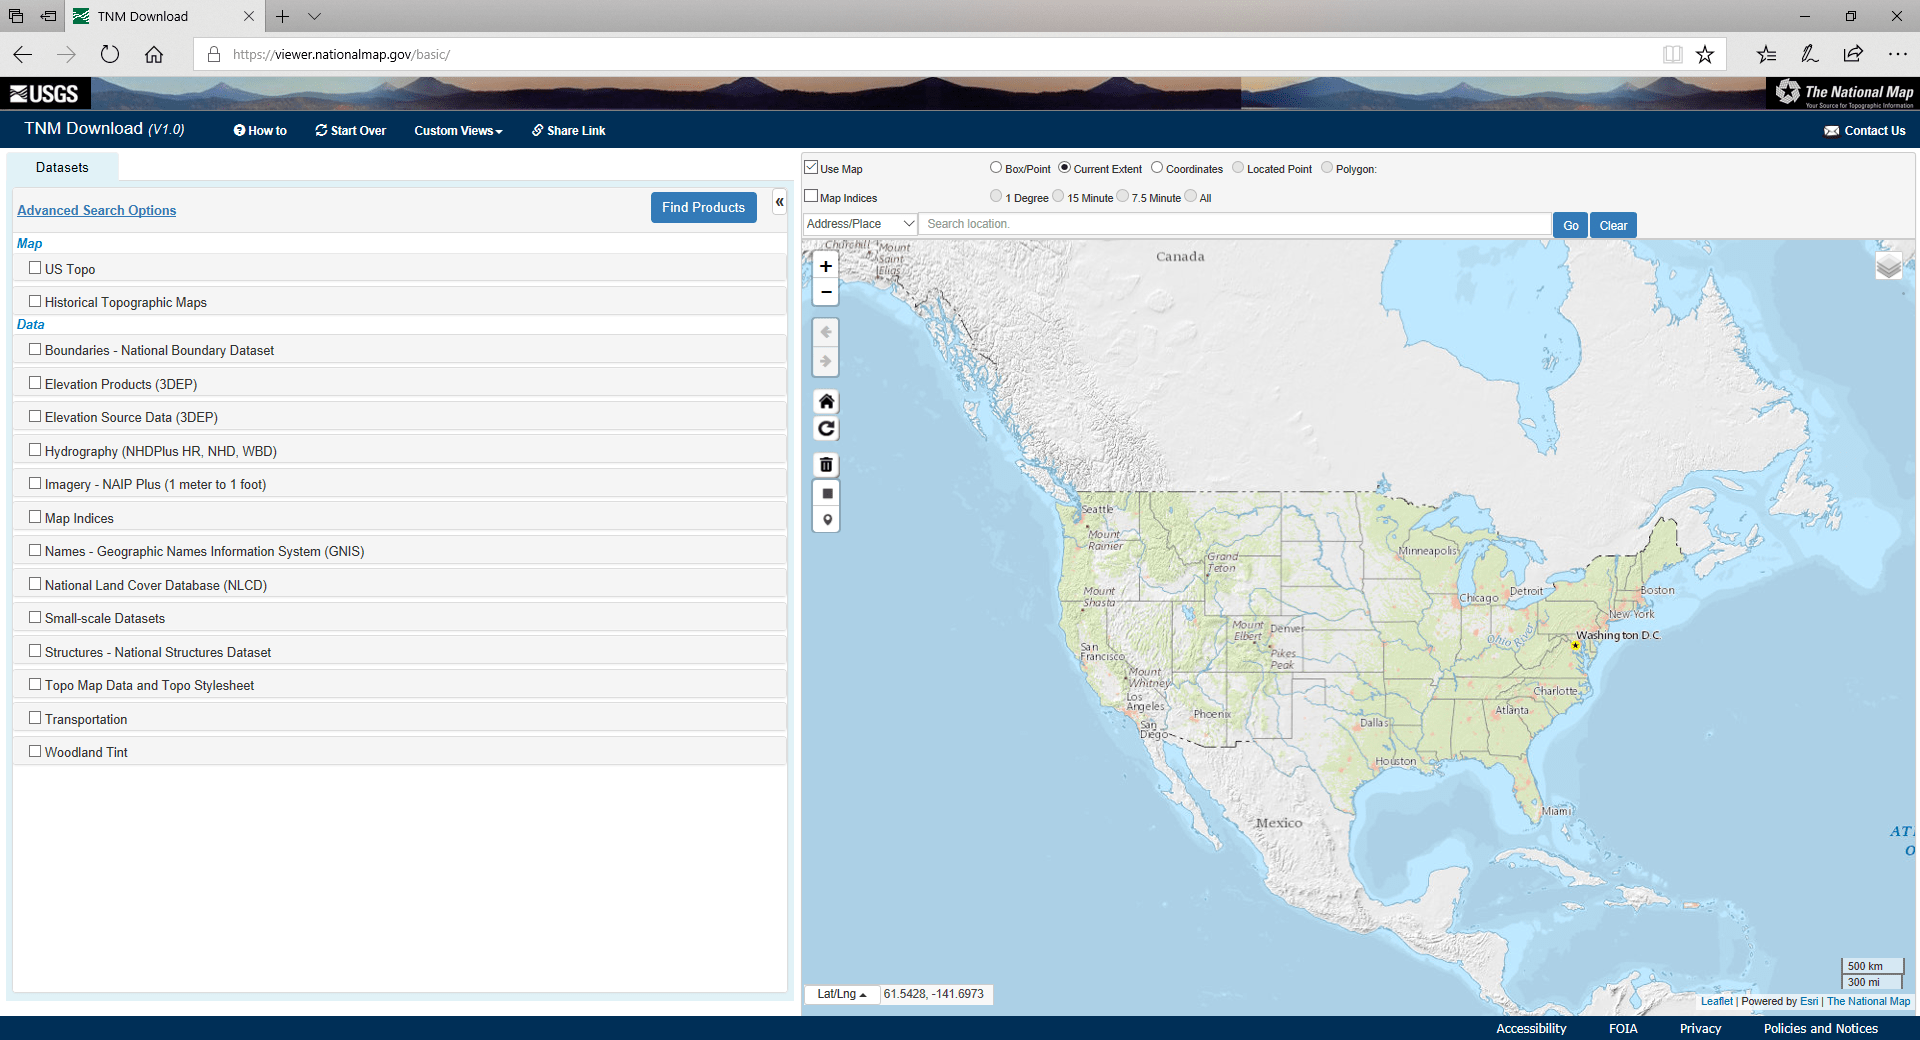
Step 1
Go to USGS National Map Viewer: https://viewer.nationalmap.gov/basic/
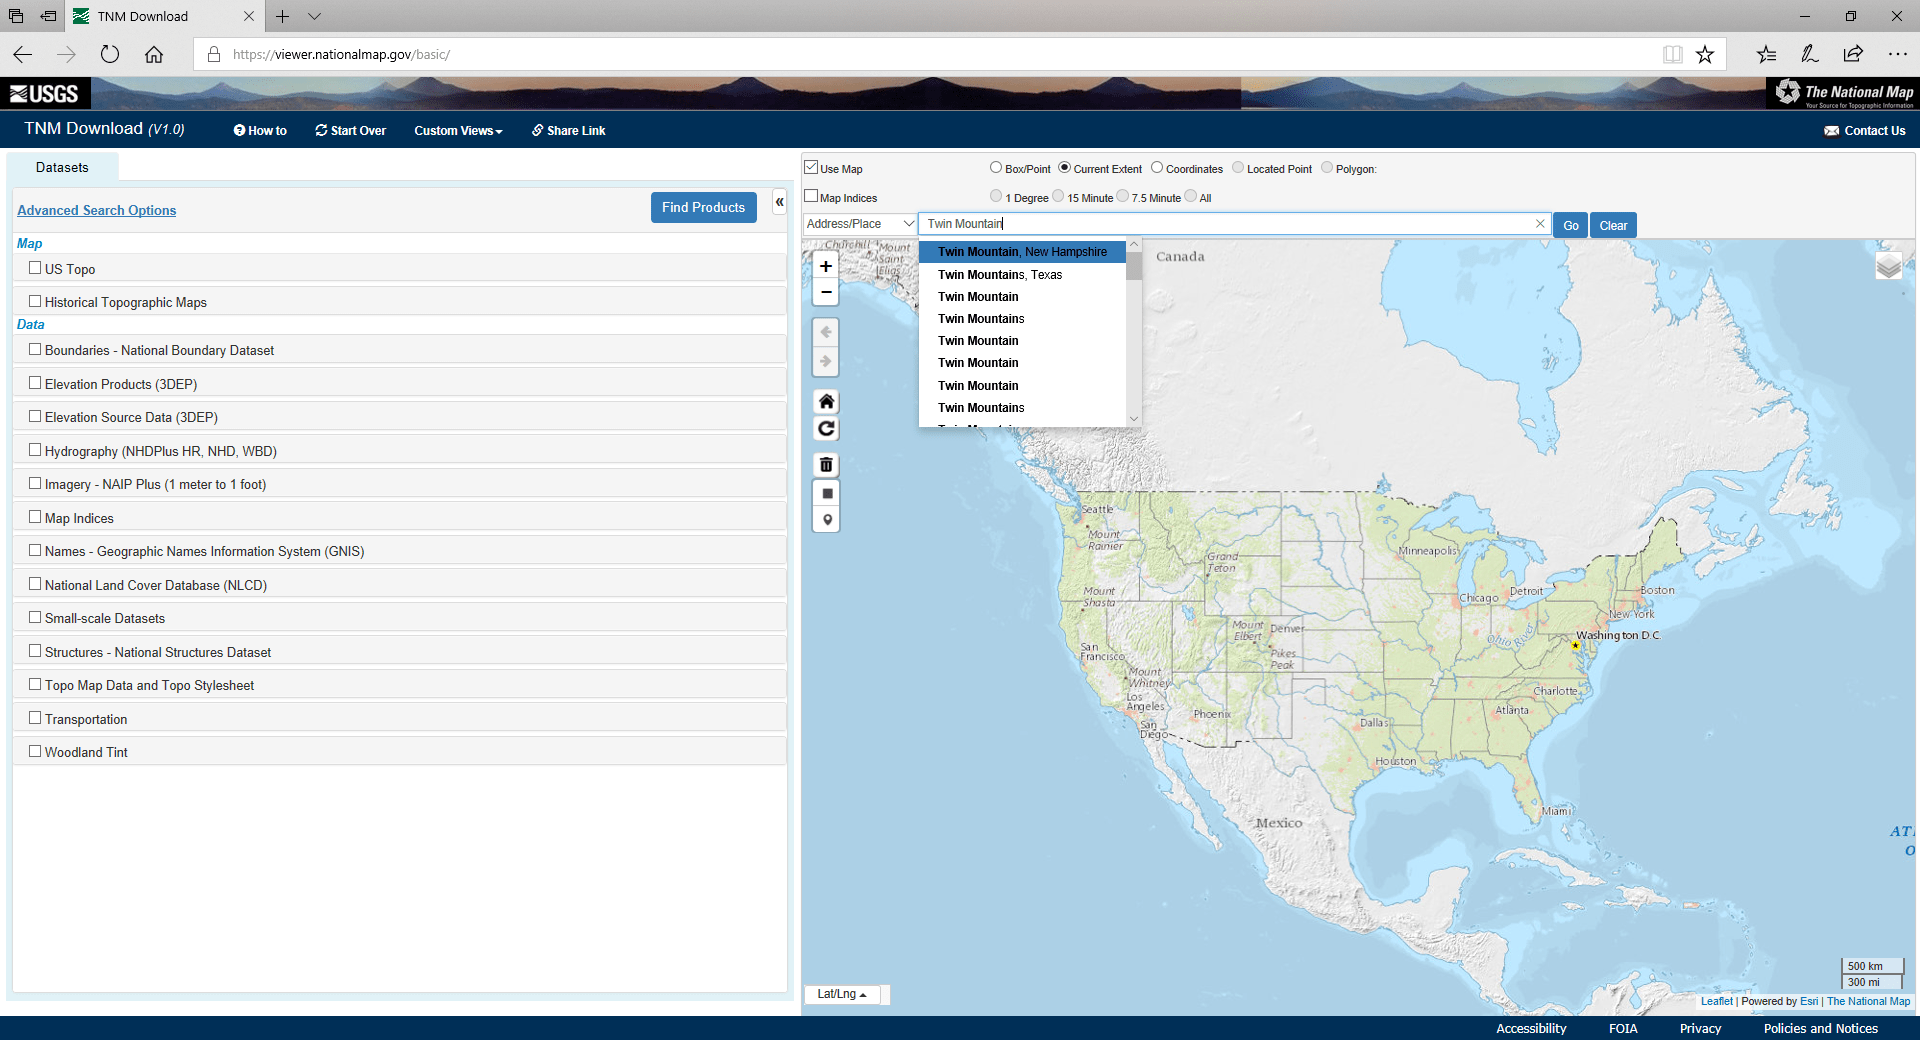
Step 2
Type in/select location:
- We’re going for an area called Twin Mountain near Mt Washington, NH.
Step 3
Select your area of interest (AOI):
- Navigate until you’ve found the area you’re interested in (using pan/zoom).
- Draw a box around it using the ‘Add Rectangle’ icon – click and drag in the map window (top left to bottom right).
- Ensure the area of data you’re downloading is larger than the area you want to create a landscape for – we’ll crop it to size later.

Step 4
Check availability of elevation data sources:
- Tick the box next to ‘Elevation Products (3DEP)’ (not ‘Elevation Source Data’).
- Click the ‘Show Availability’ link under the data subcategory.
- 1m data is really impressive and luckily covers our AOI.
- 1/3 arc second (~10m/pixel data) is available for the entire mainland US, so if you can’t get 1m data, that’s another option you can use.
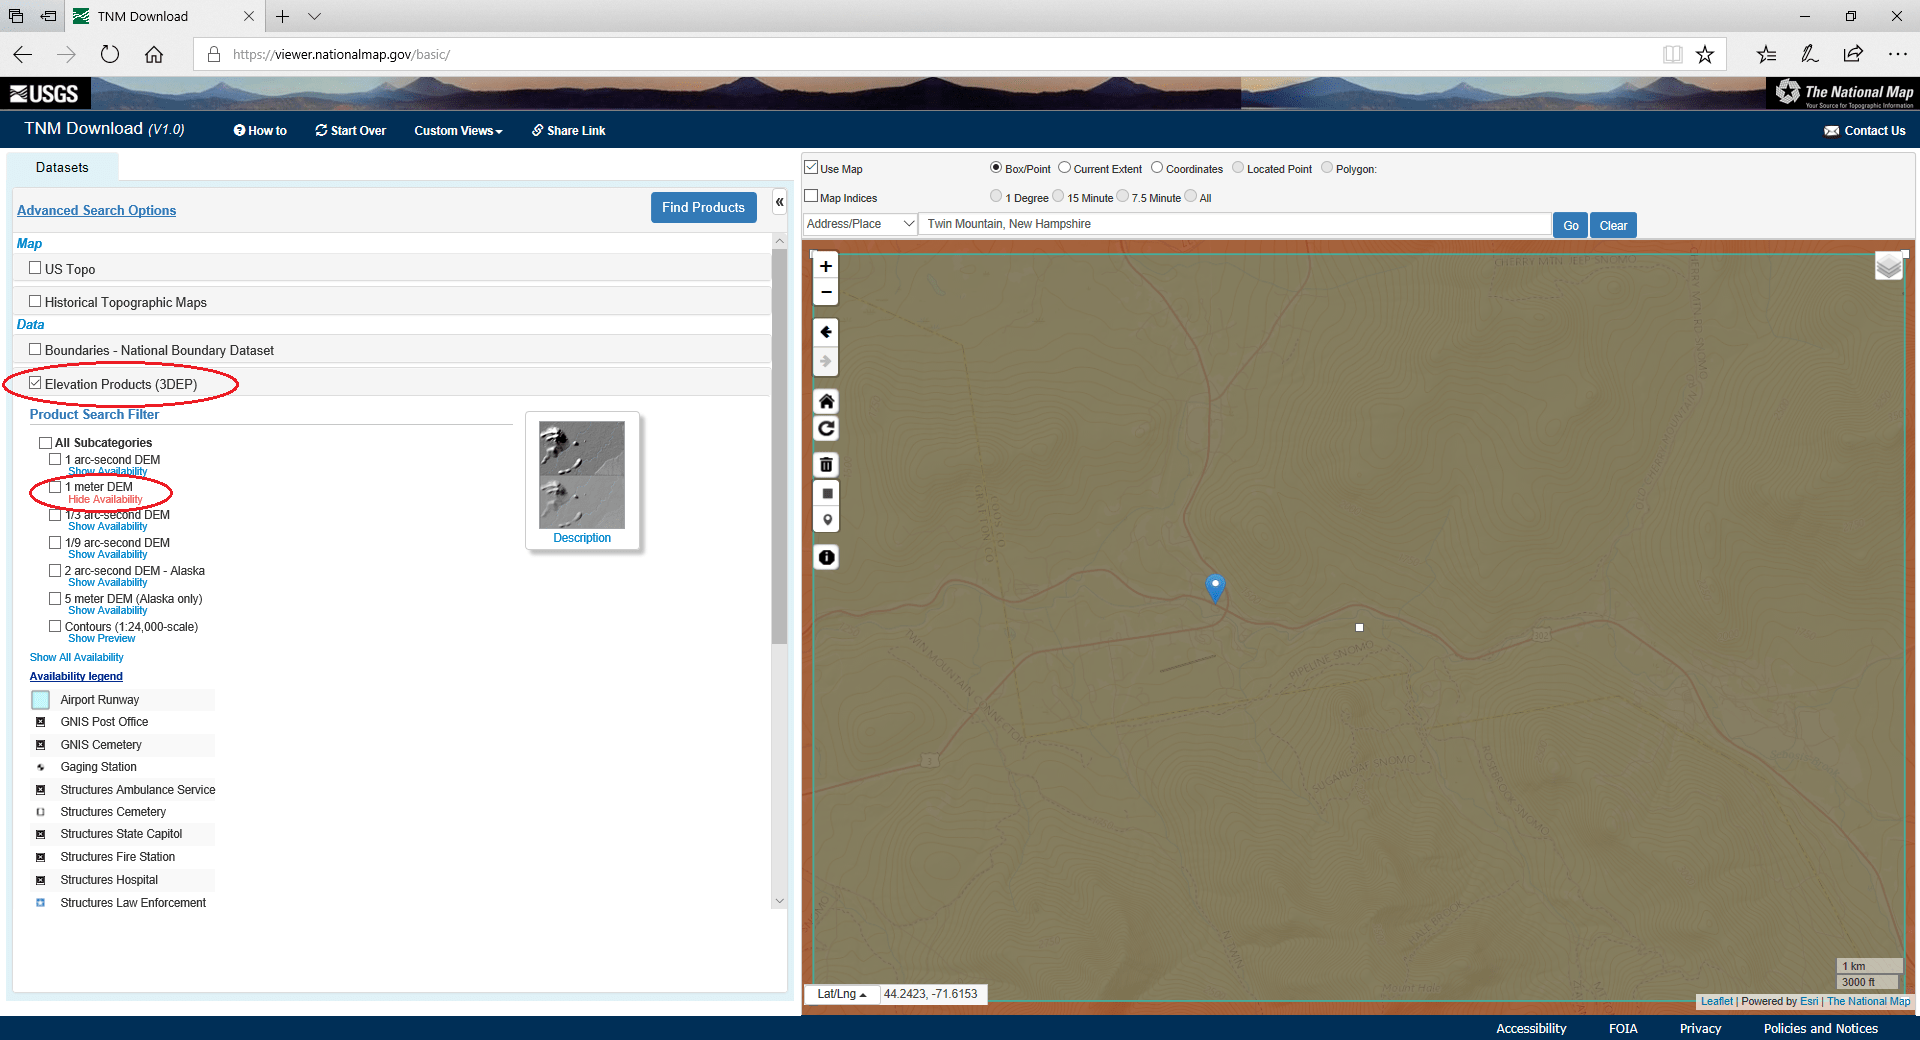
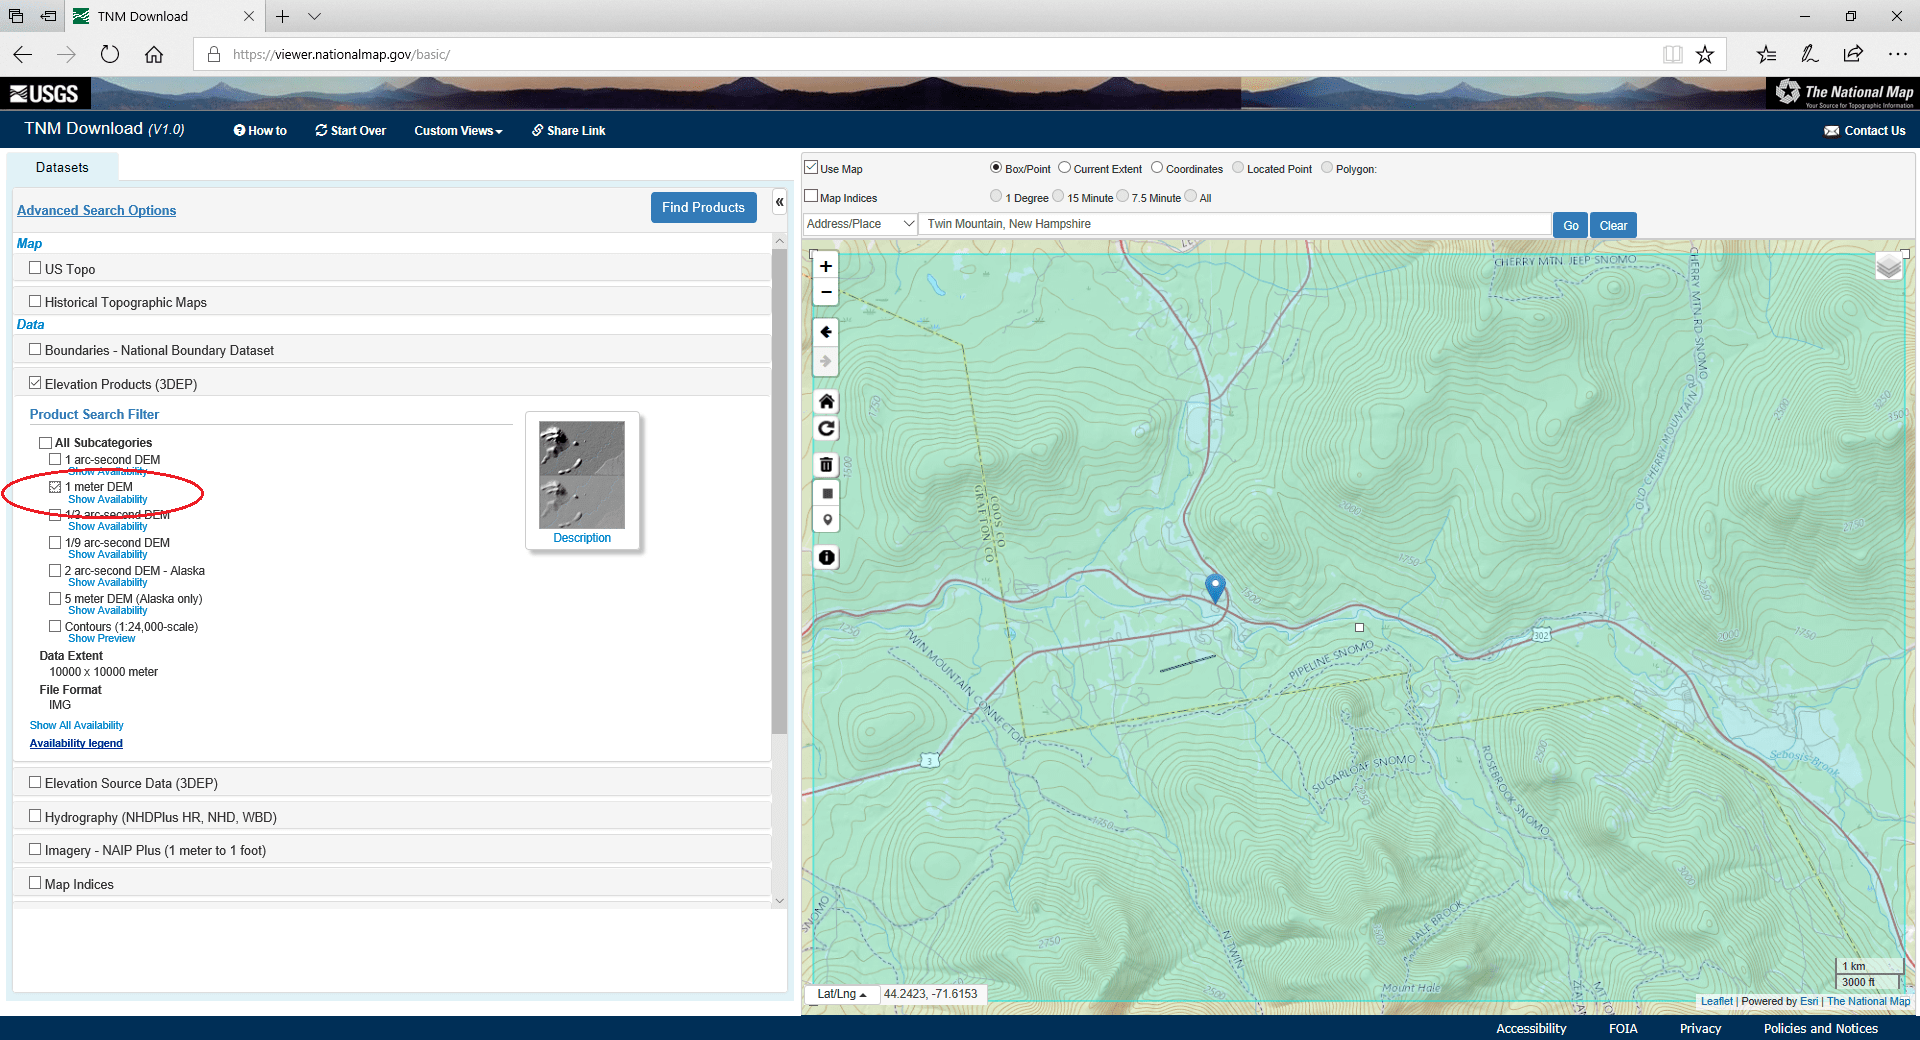
Step 5
Select the DTM products you want:
- Check the box next to the elevation source (in our case ‘1 meter DEM’).
- ‘Data Extent’ is set automatically by the website (‘10000 x 10000 meter’).
- ‘File format’ is also specified automatically (‘IMG’).
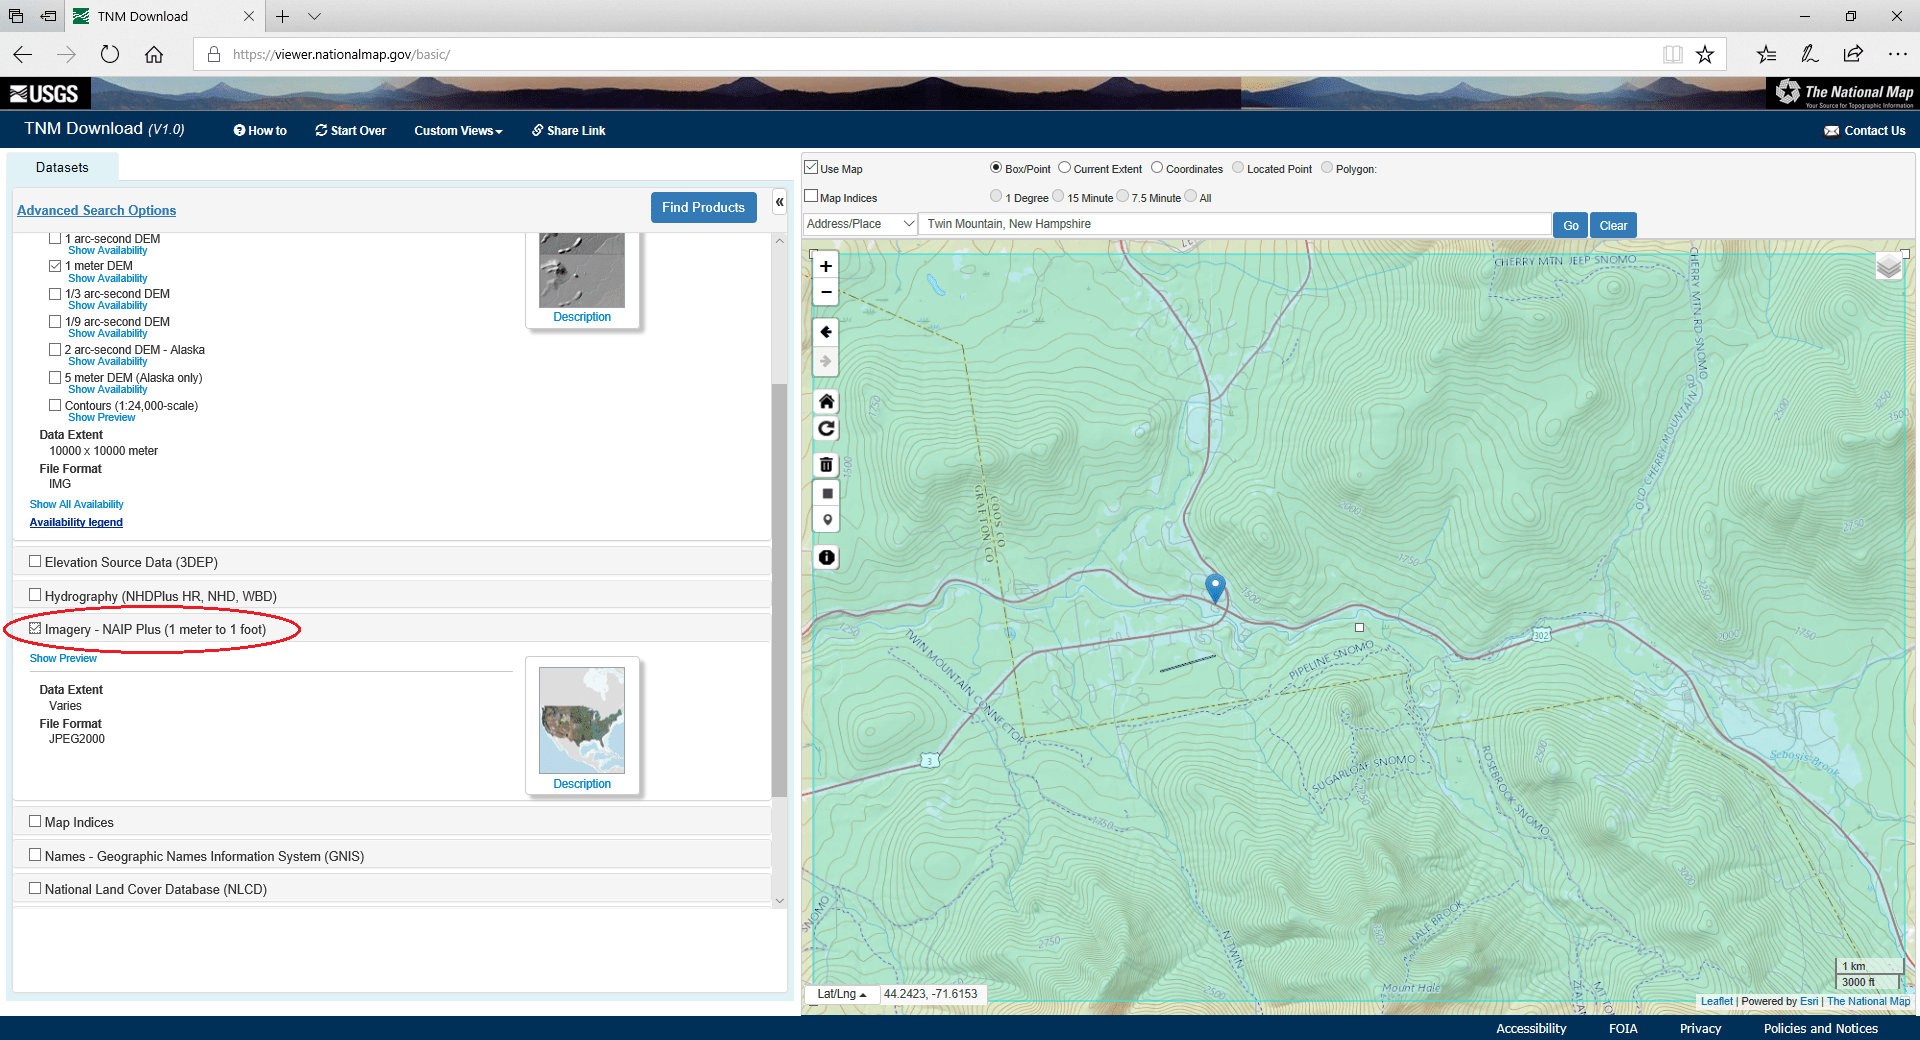
Step 6
Next let’s get some aerial imagery:
- We’ll use it to create masks for surfaces later.
- Check the box next to ‘Imagery – NAIP Plus (1m to 1foot)’.
- Availability and quality varies but you’ll find something you can use. Options will be presented to us later when we click ‘Find Products’.
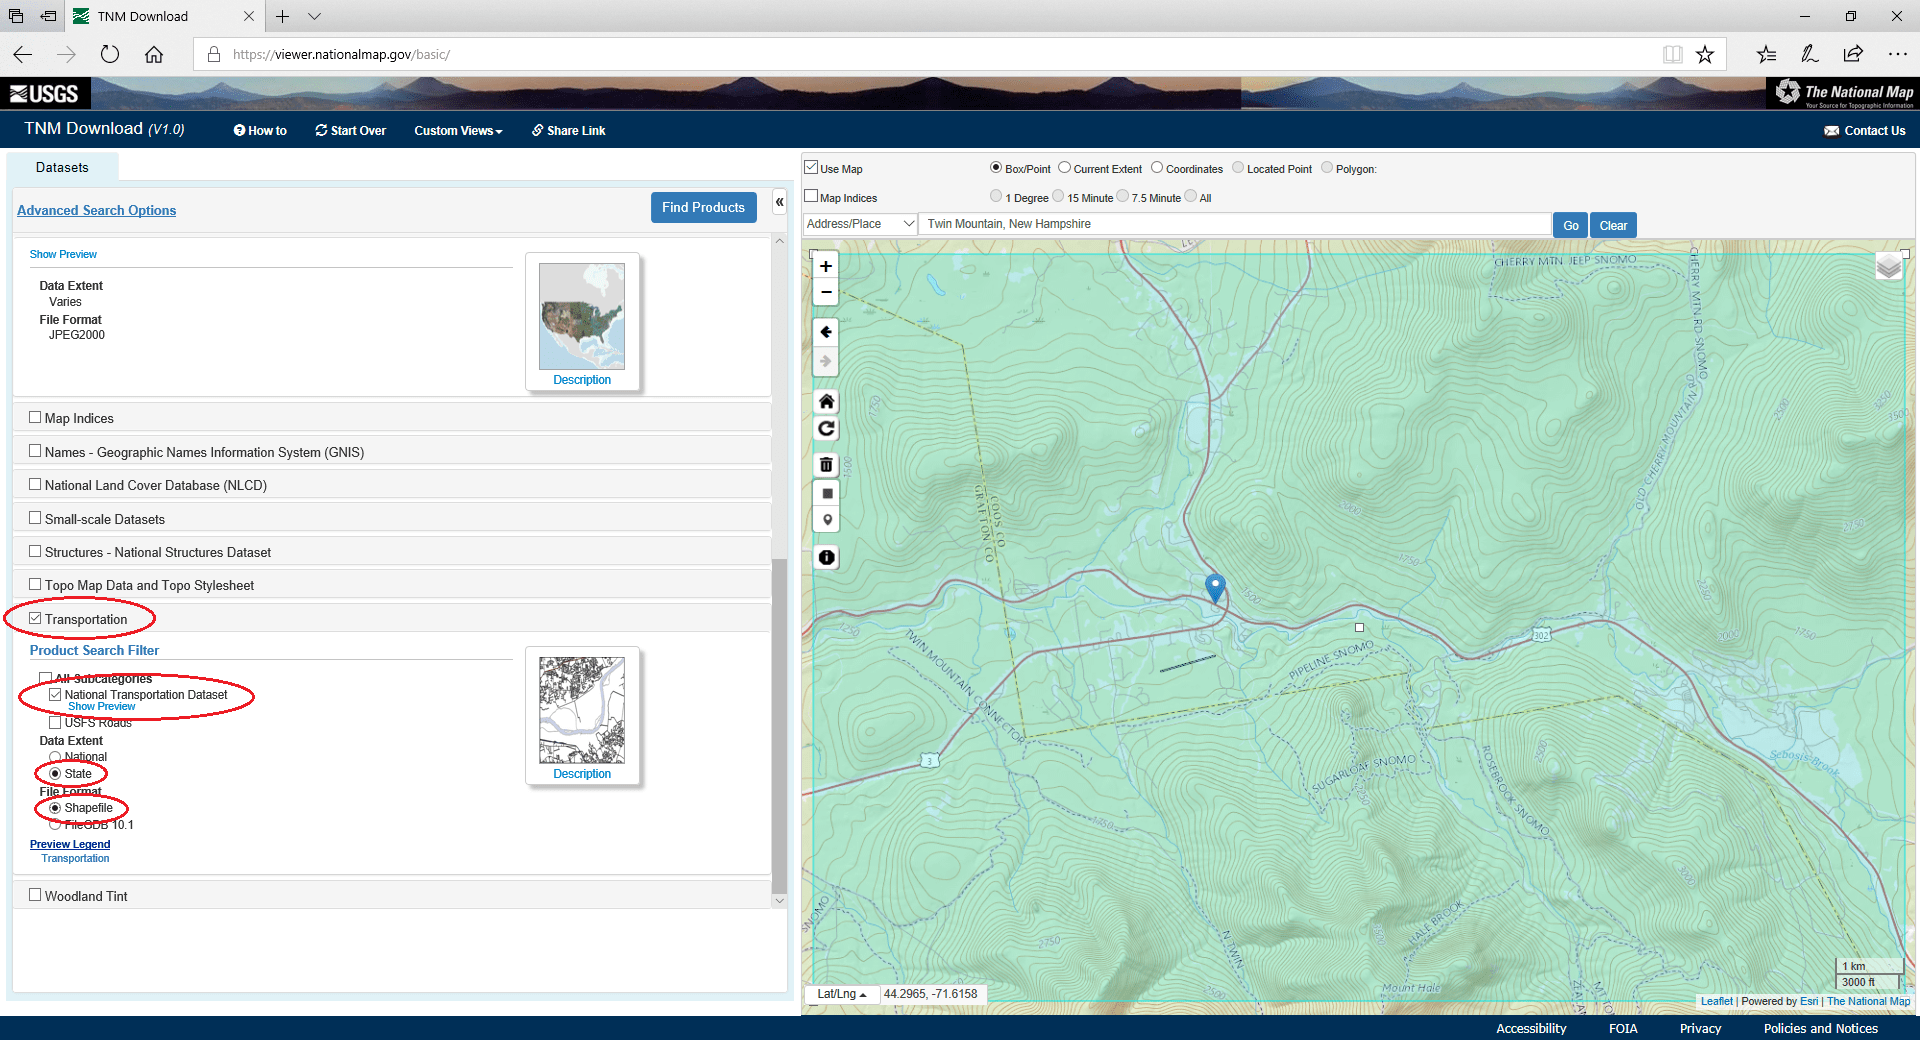
Step 7
Next we want roads, rail lines, and mountain trails, so we’ll add those to the search next:
- Check the box next to ‘Transportation’.
- Then select ‘National Transportation Dataset’
- Check ‘State’ under ‘Data Extent’.
- Then select ‘Shapefile’ under ‘File Format’.
Step 8
Now we need to do a search of the database to cross reference the AOI we’ve selected with the data products we’ve chosen:
- Click ‘Find Products’.
- You’ll get the following window showing what’s available based on your selections.
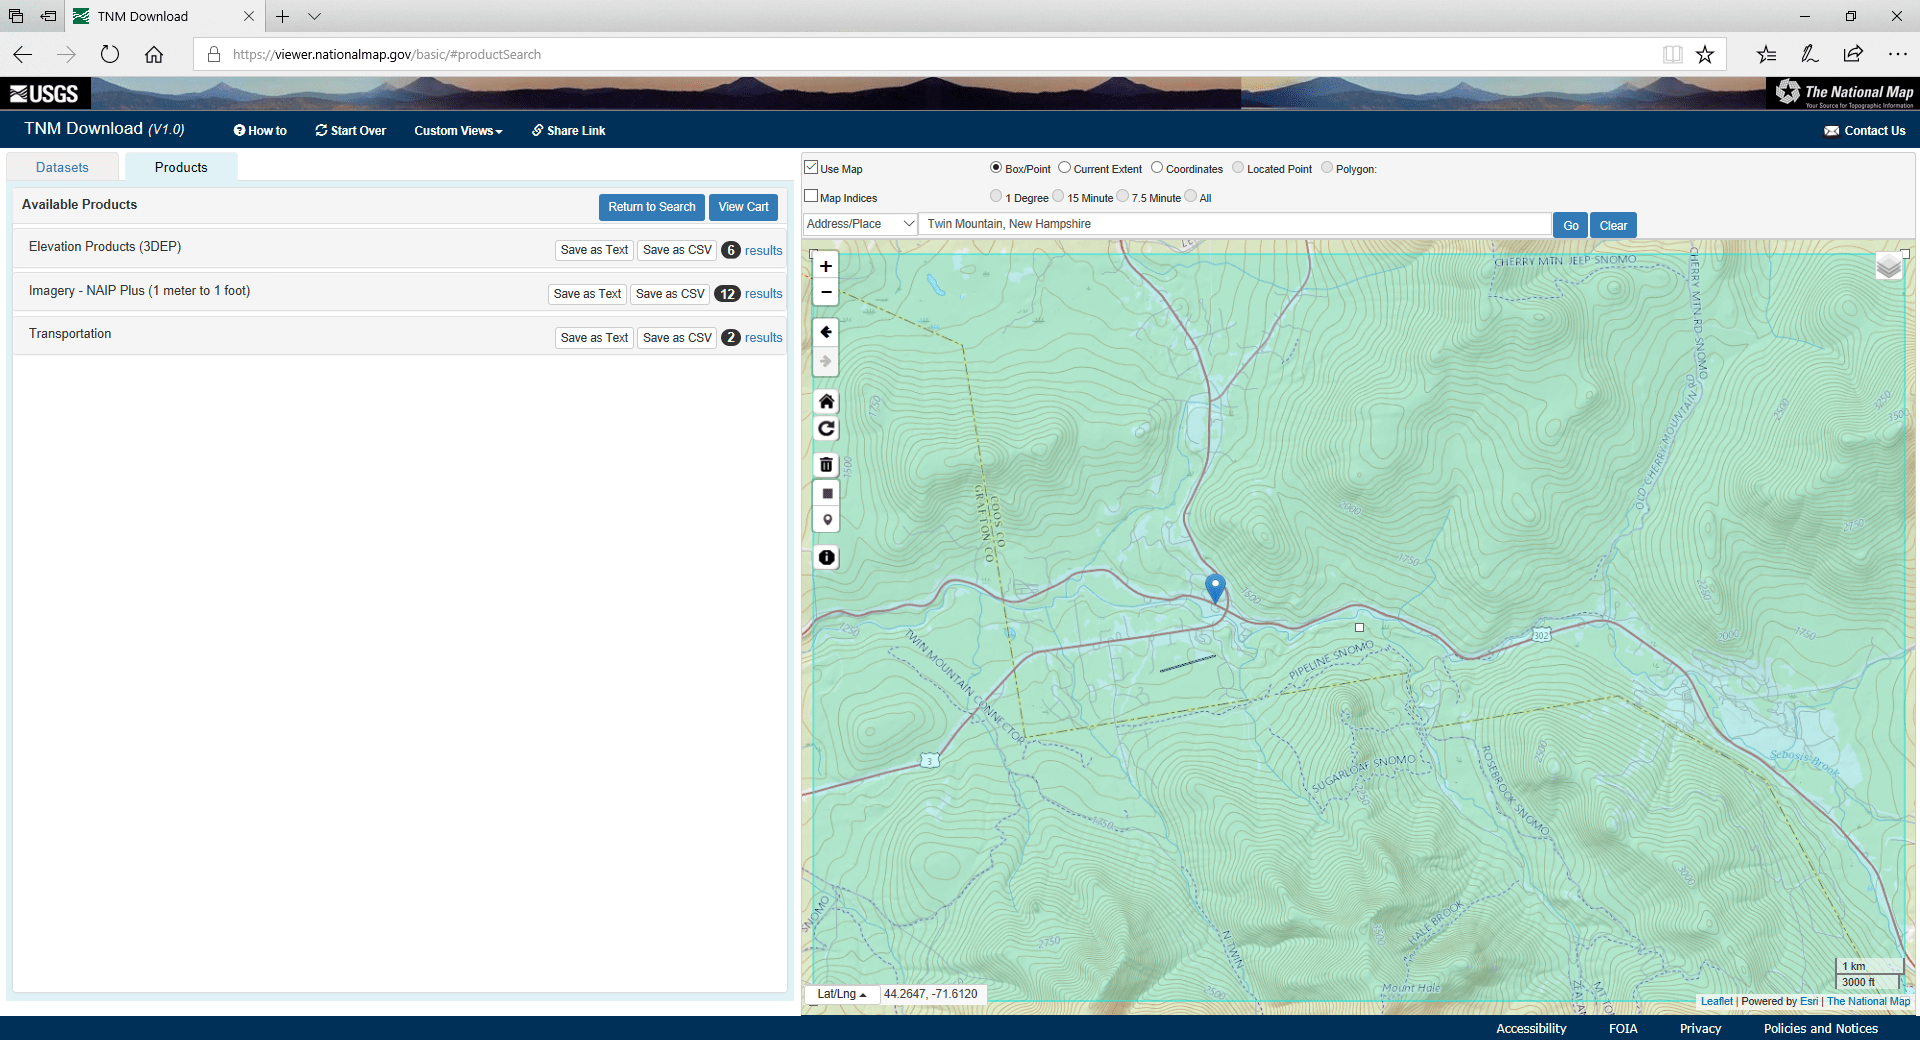
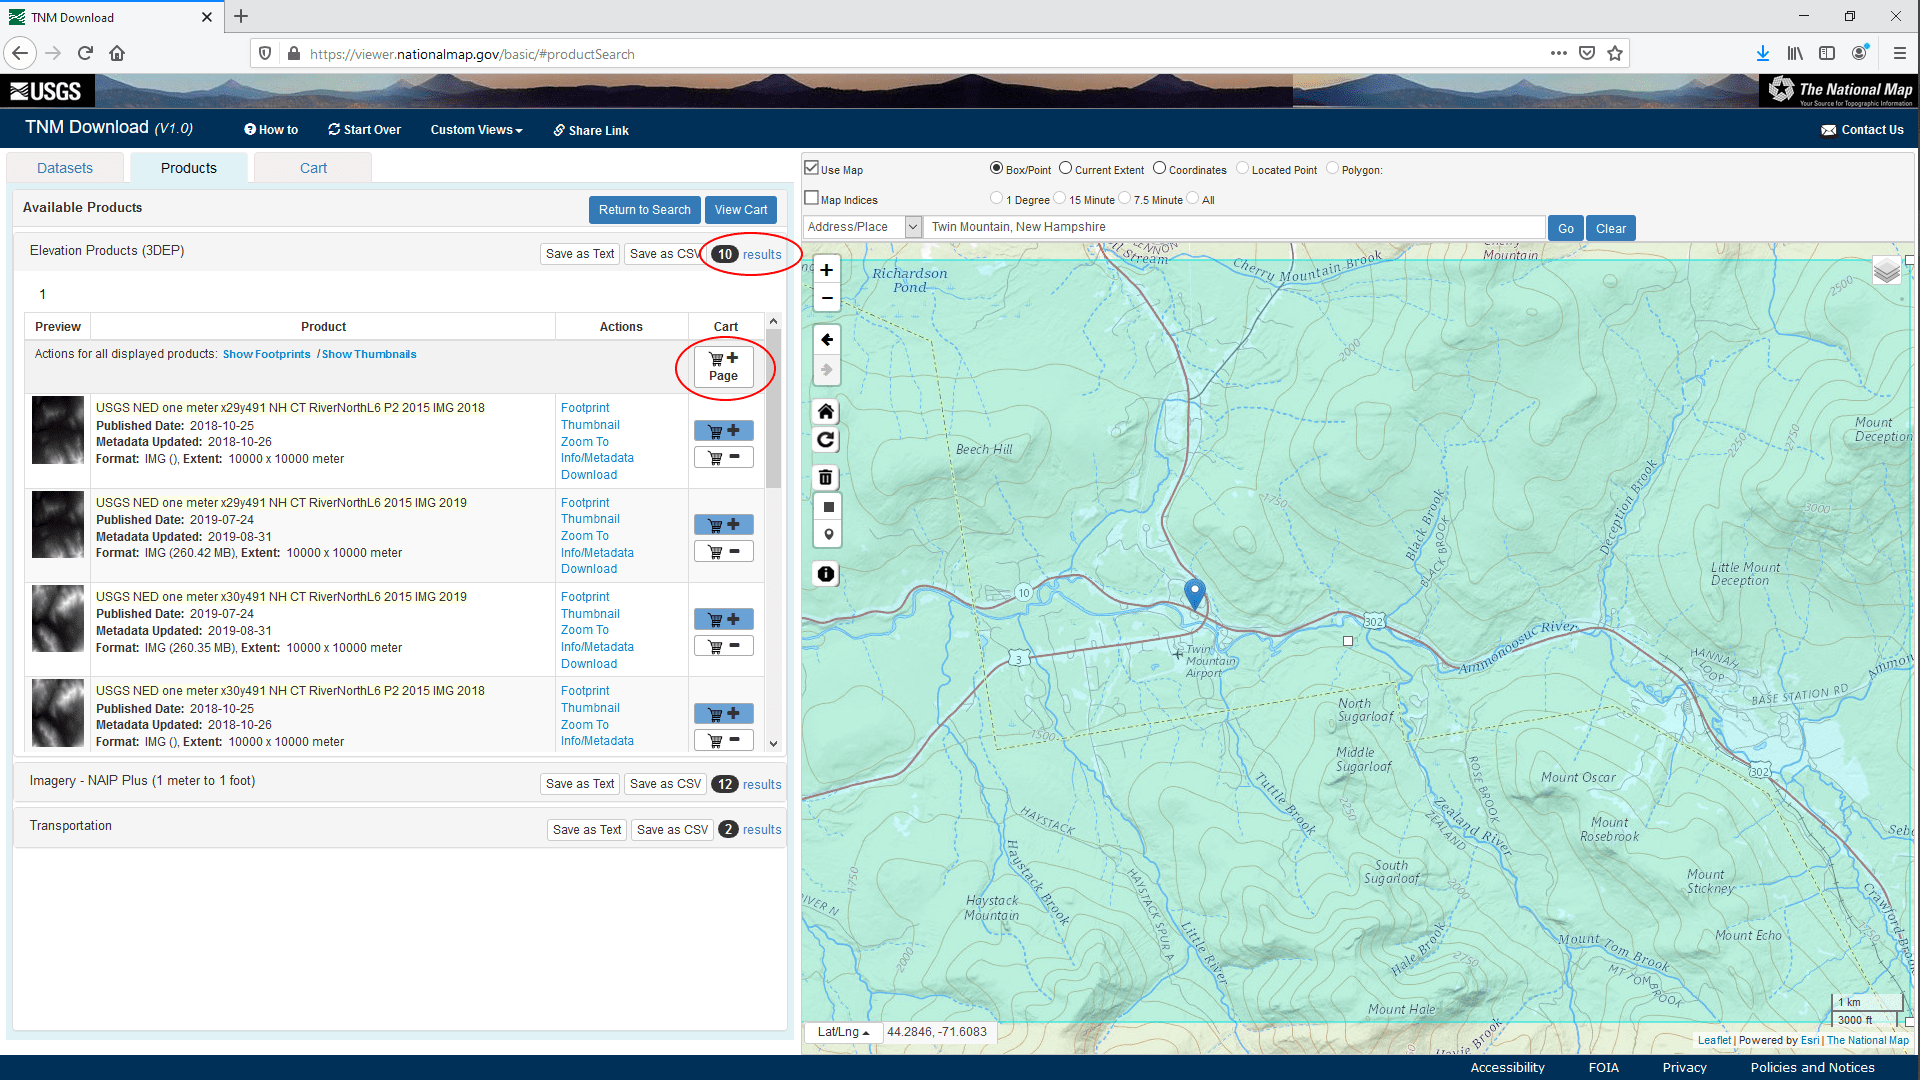
Step 9
Next you need to select what data you want to actually download:
- Click on the ‘results’ link next to each entry.
- You’ll need to click the ‘+’ button to add the items to your cart. Since we want all the data, the ‘+ Page’ button saves a bit of faff.
- You can use ‘Save as CSV’ to create a list and use it with The National Map Download Manager, but there’s not too much here so we’ll do it manually.
[NOTE: Depending on when you follow this tutorial, your results may be slightly different from ours because the USGS regularly update the data.]
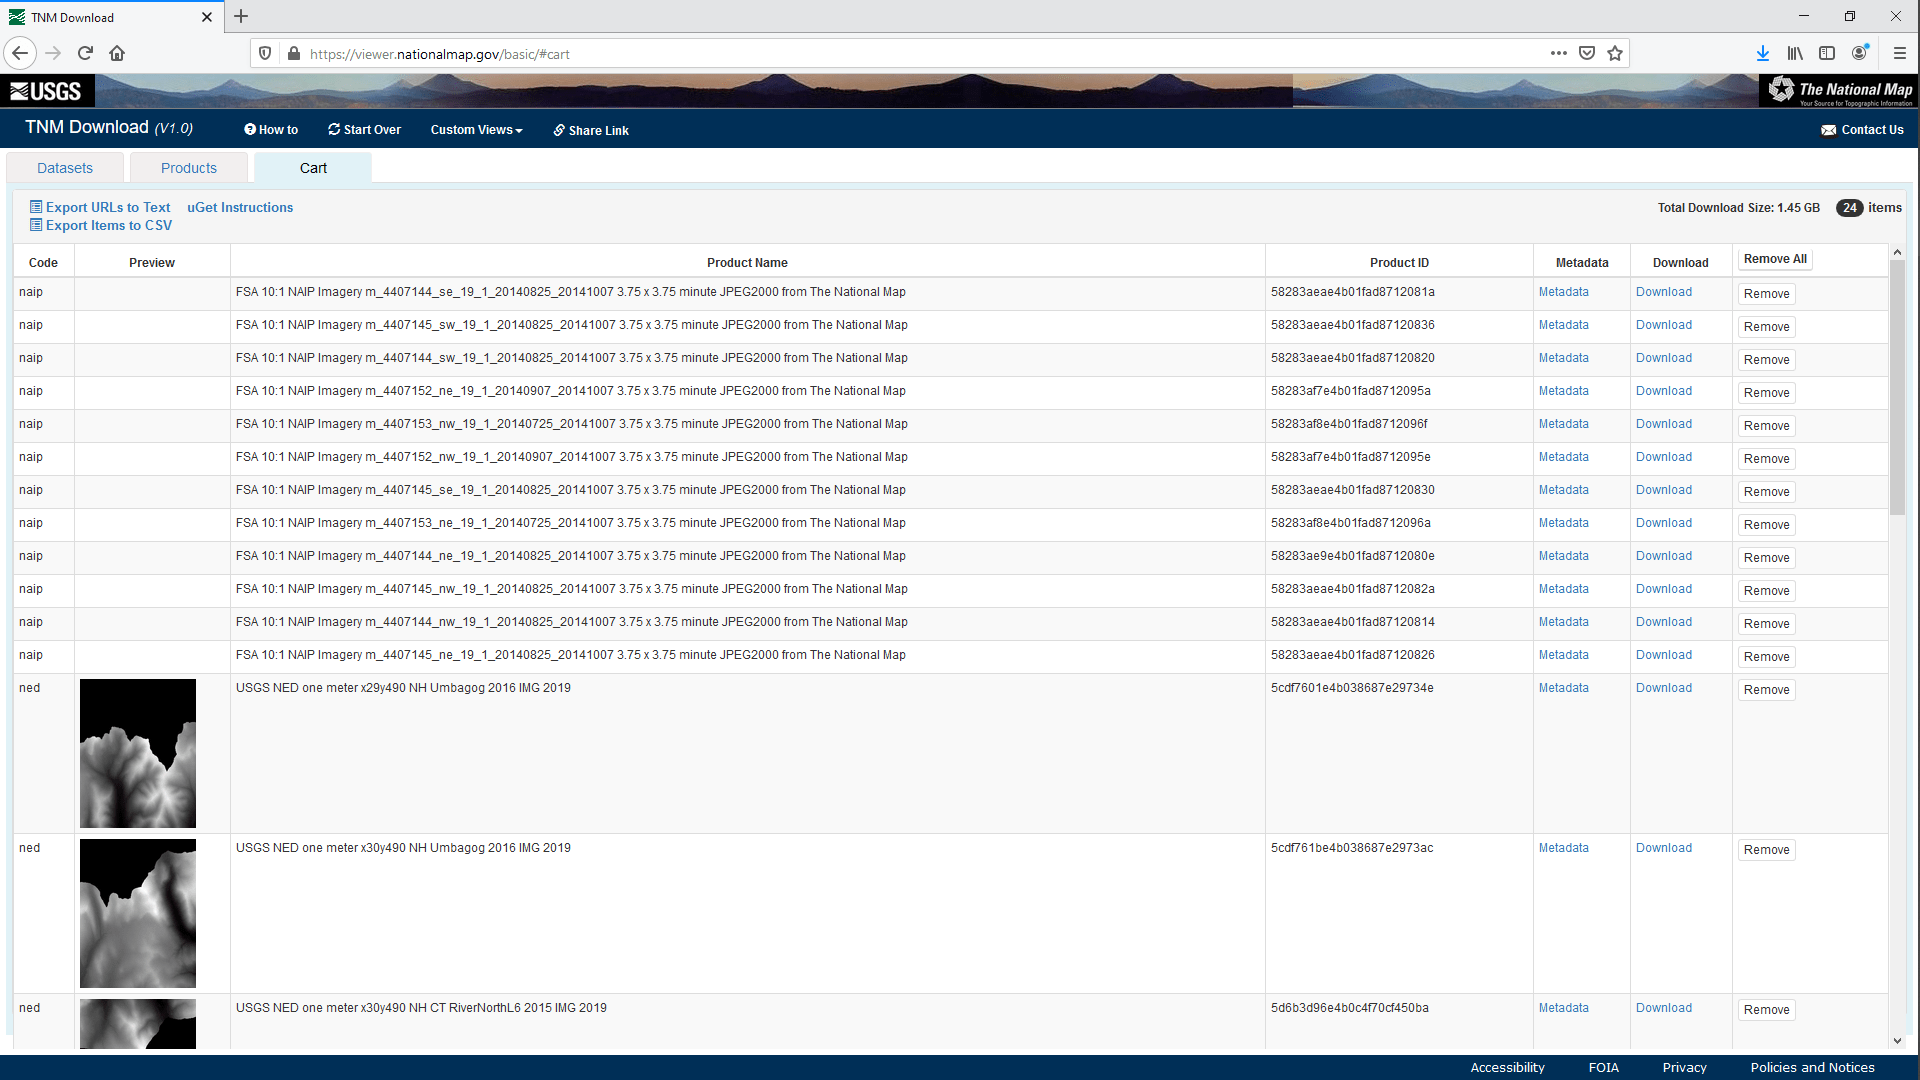
Step 10
Now we’ve done that we need to ‘View Cart’ to get the download links:
- Click the button in the top right of the ‘Products’ section. It should look something like this (below).
- Click on the ‘Download’ link for each file and save it somewhere sensible on your system.
- For the area we selected there were 24 files and 2.2GB of data downloaded.