How Can We Help?
6. Exporting DTM & Aerial Data
Now we’ve defined the extents for our UE4 landscape, we need to export the GIS data into formats that can be imported in to UE4. We’ll start with the height map first, then we’ll export the aerial data.
EXPORTING THE DTM DATA
Follow the steps below to export the DTM data you’ll need to create your landscape in UE4.
Step 1
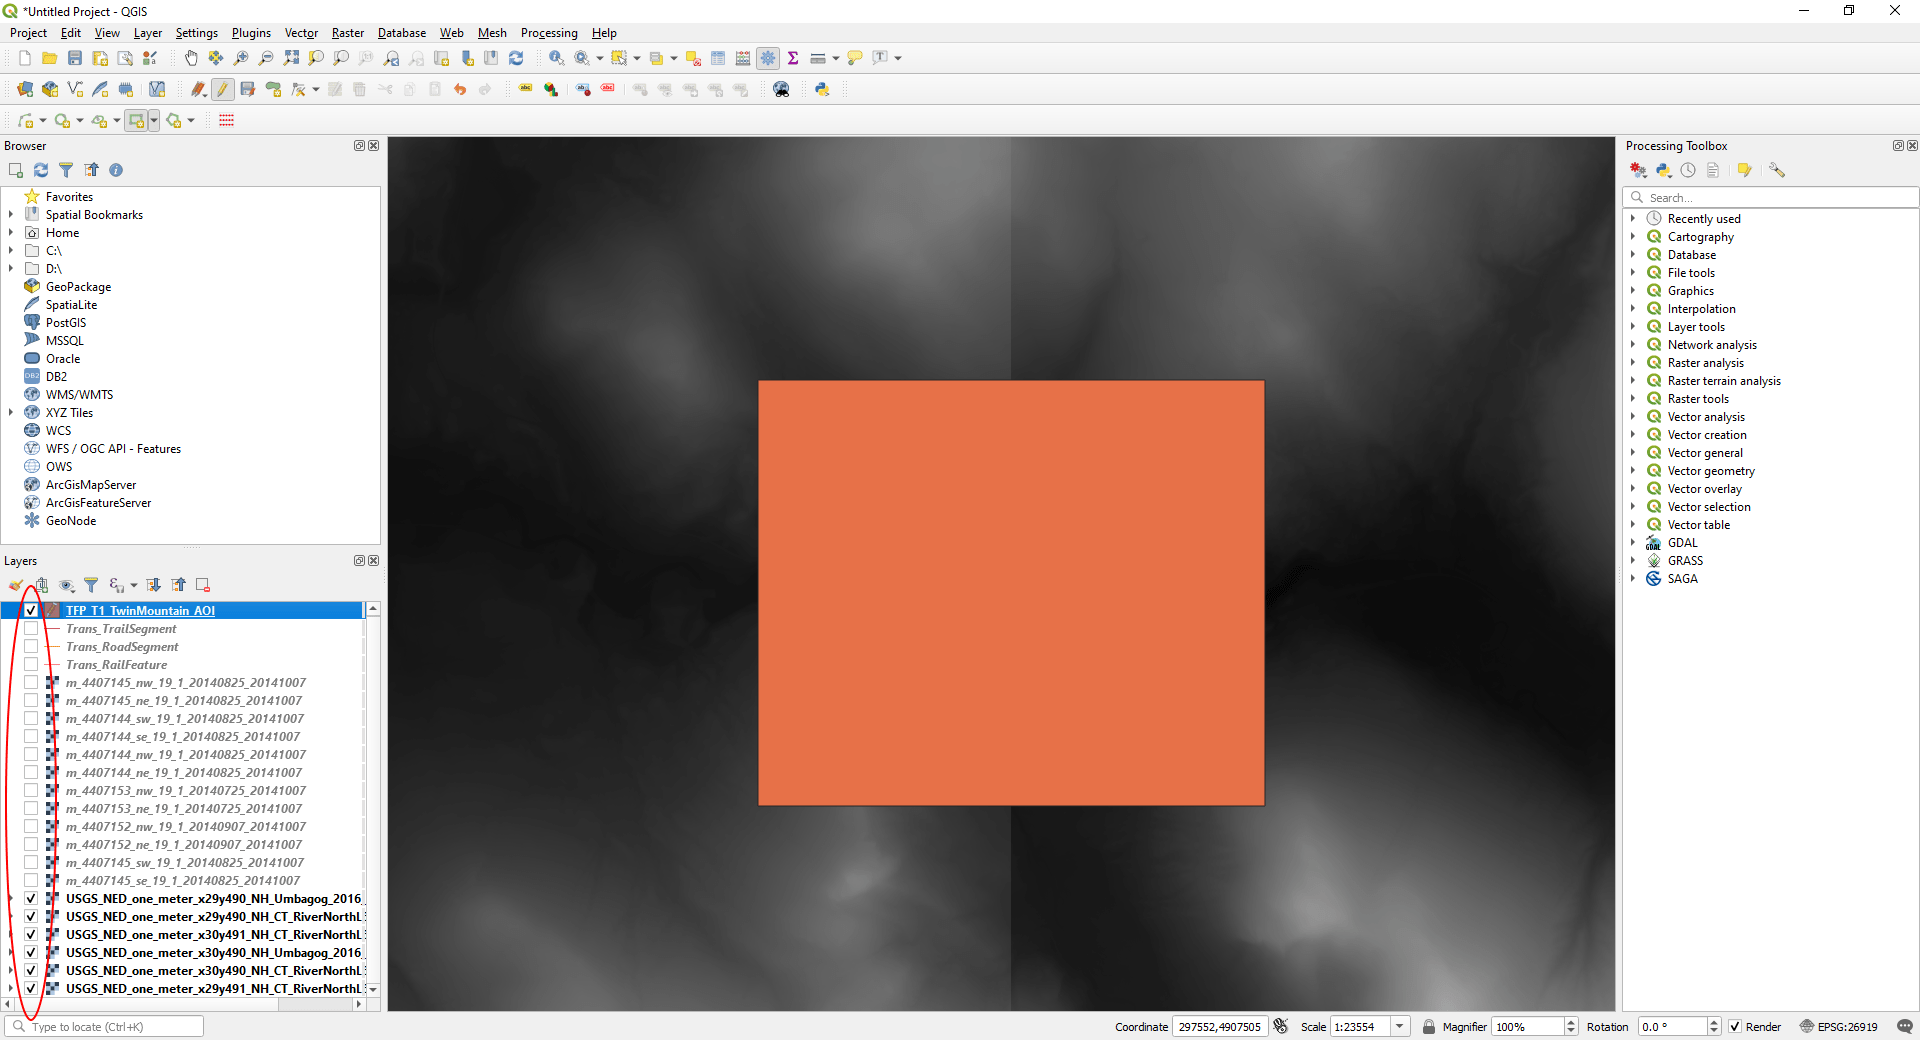
Turn off aerial & vector layers:
- In the ‘Layers’ panel, uncheck all aerial imagery layers and the road, rail and trail Shapefiles.
- Your AOI layer and the DTM layers should be the only layers showing.
Step 2
Create a ‘Virtual Raster’:
If you’re exporting multiple tiles of data (as we are) into a single file in QGIS, you first need to merge the files together. However if you’re working with a lot of data, this can overload memory limits. We can avoid this by creating a ‘Virtual Raster’ layer:
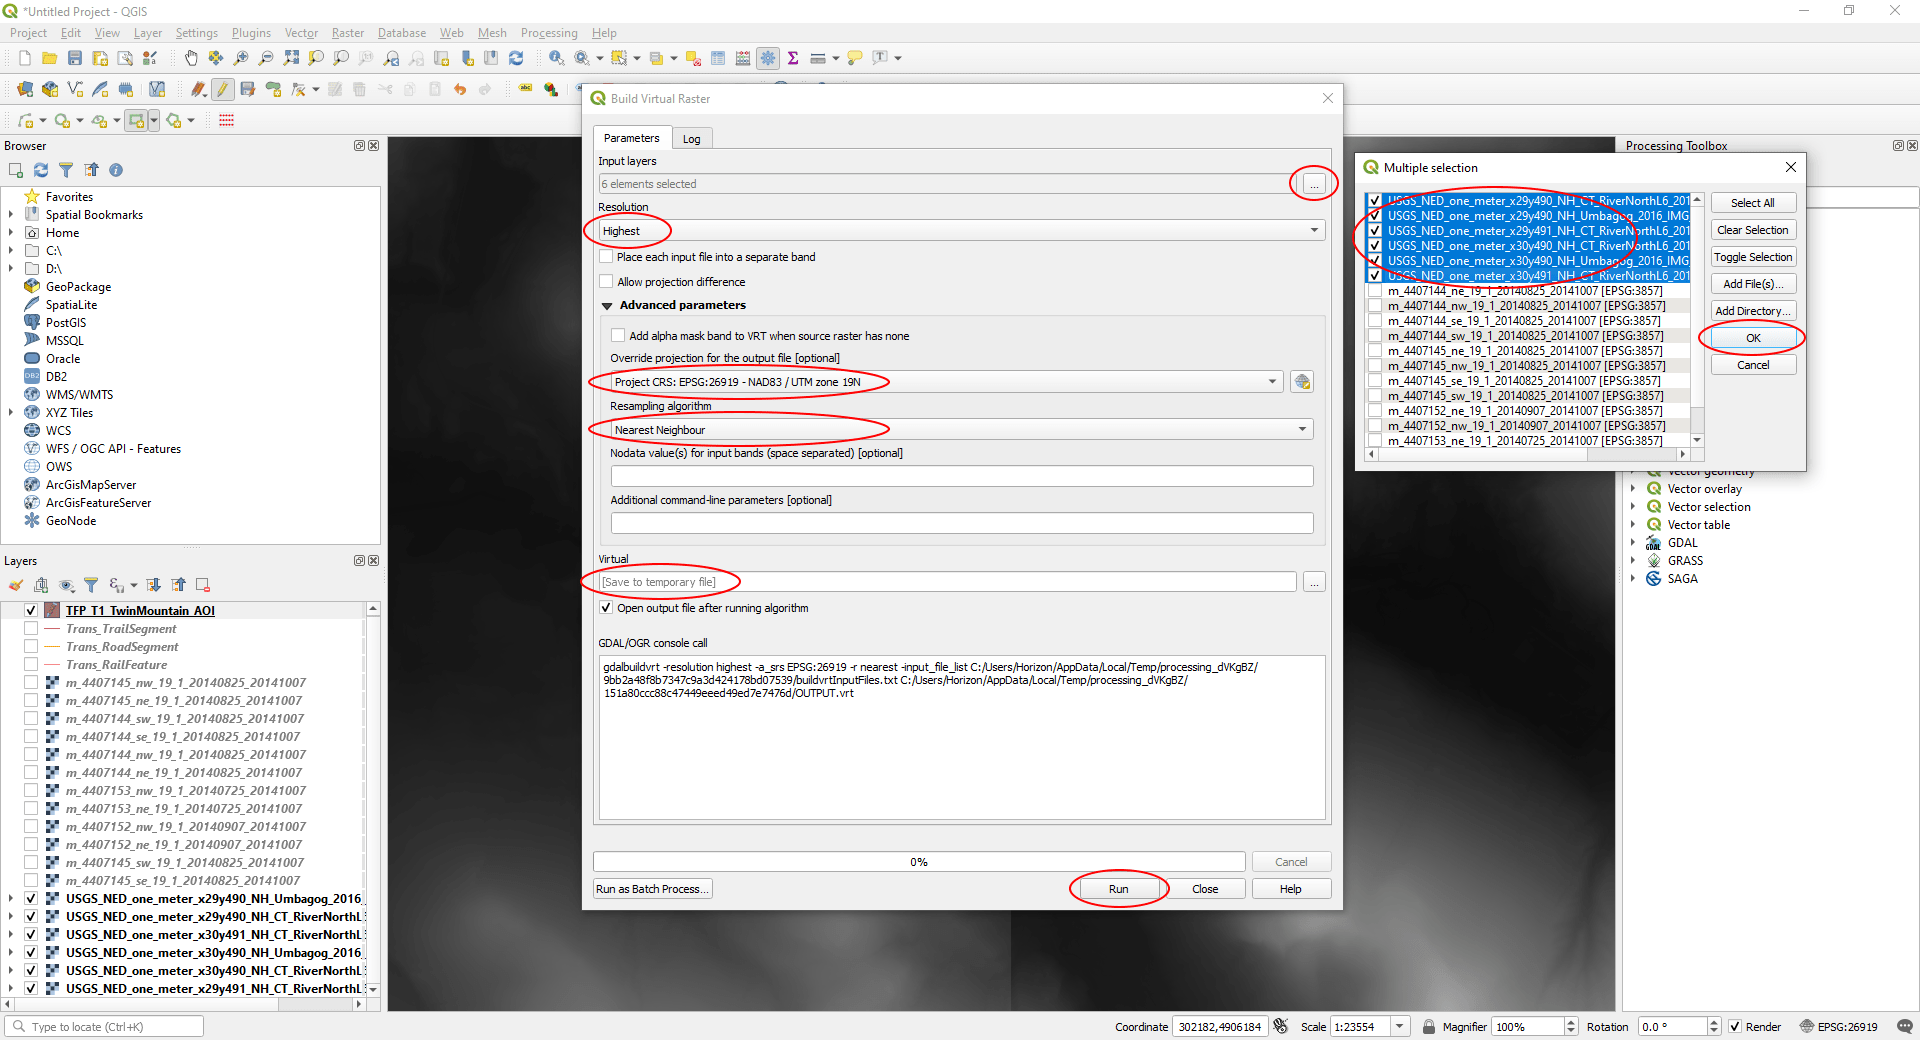
- On the main menu, click ‘Raster’ and select ‘Miscellaneous’ > ‘Build Virtual Raster…’.

In the ‘Build Virtual Raster’ window:
- Click the ‘…’ button to the right of ‘Input Source’ and select only the DTM source files (when done, hit ‘OK’).
- Set ‘Resolution’ to ‘Highest’.
- Make sure ‘Place each input file into a separate band’ is unchecked.
- Set the ‘Override projection for the output file [optional]’ to your ‘Project CRS’.
- Leave the ‘Resampling algorithm’ as ‘Nearest Neighbour’.
- Leave the ‘Virtual’ field as ‘[Save to temporary file]’.
- Click ‘Run’.
Step 3
Export your DTM data using the rectangle in your AOI layer as the extents:
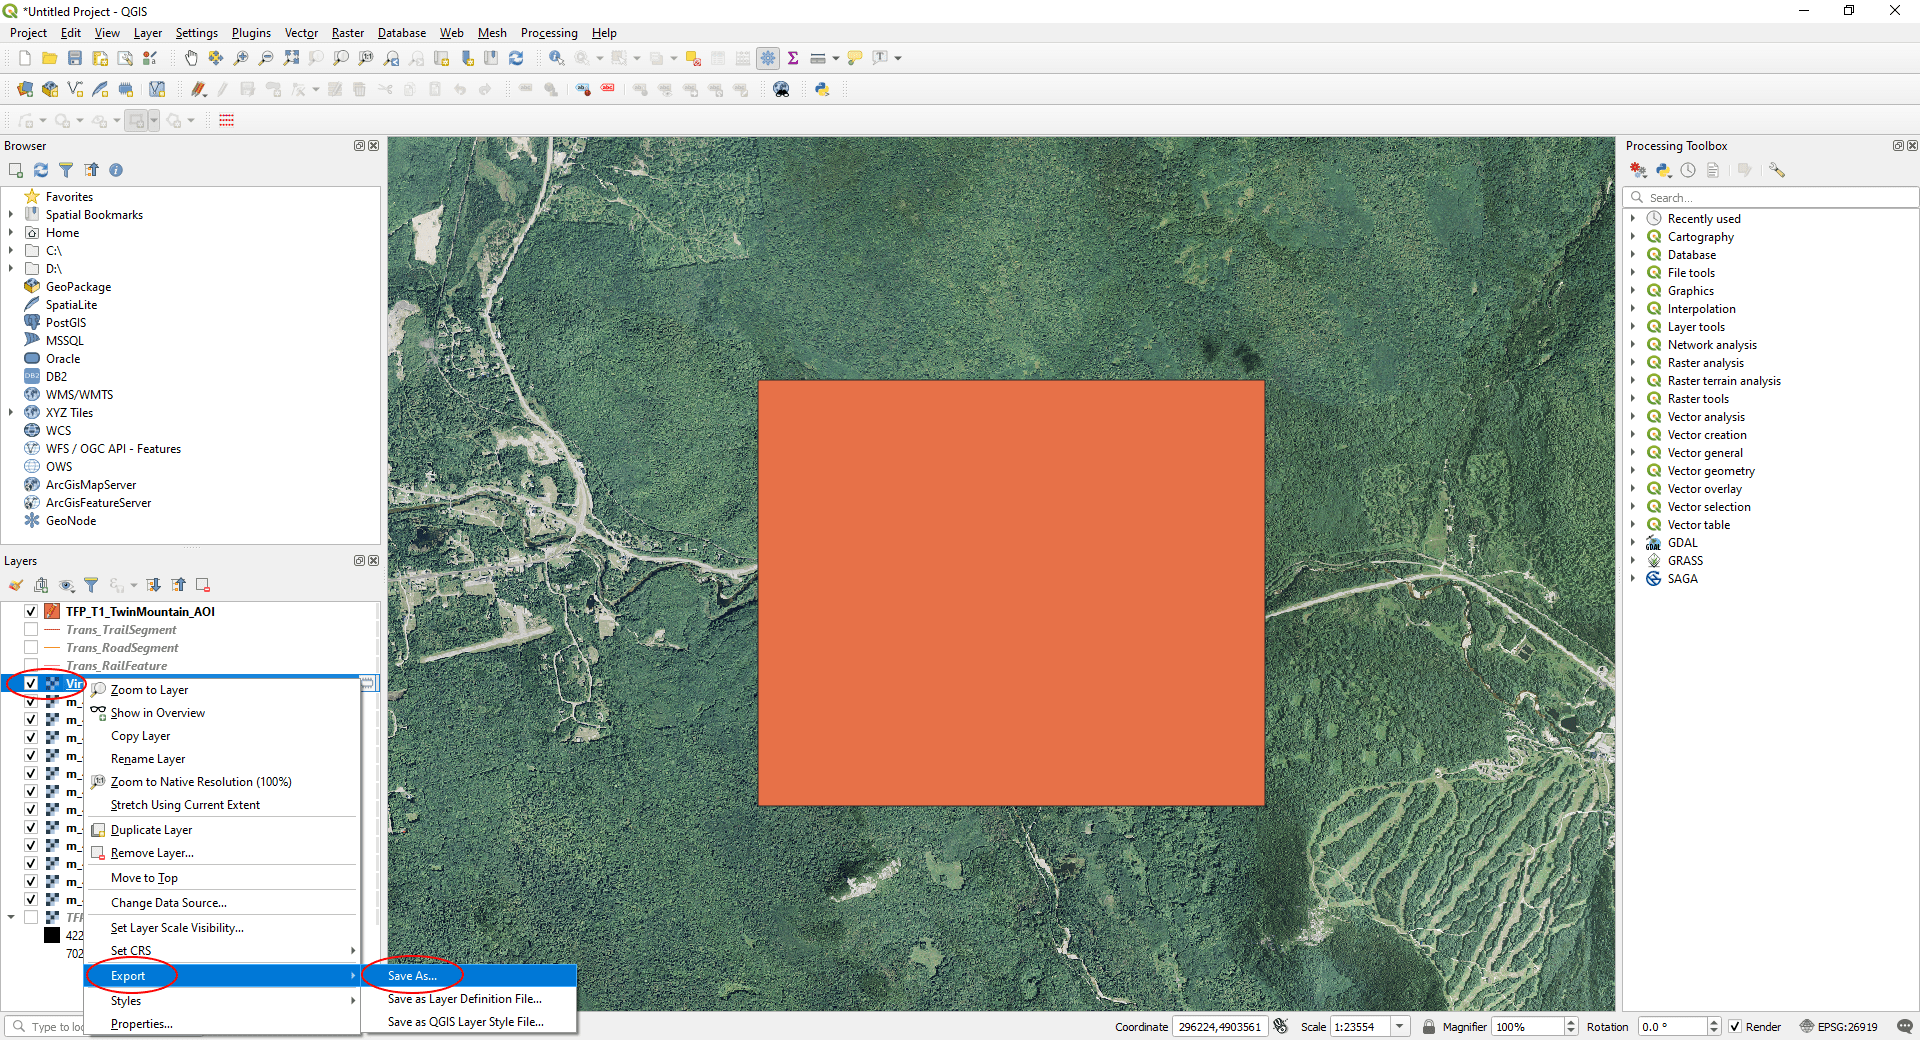
- <Right-click> on the new ‘Virtual’ layer in the ‘Layers’ panel.
- On the right-click menu, select ‘Export’ > ‘Save As…’.

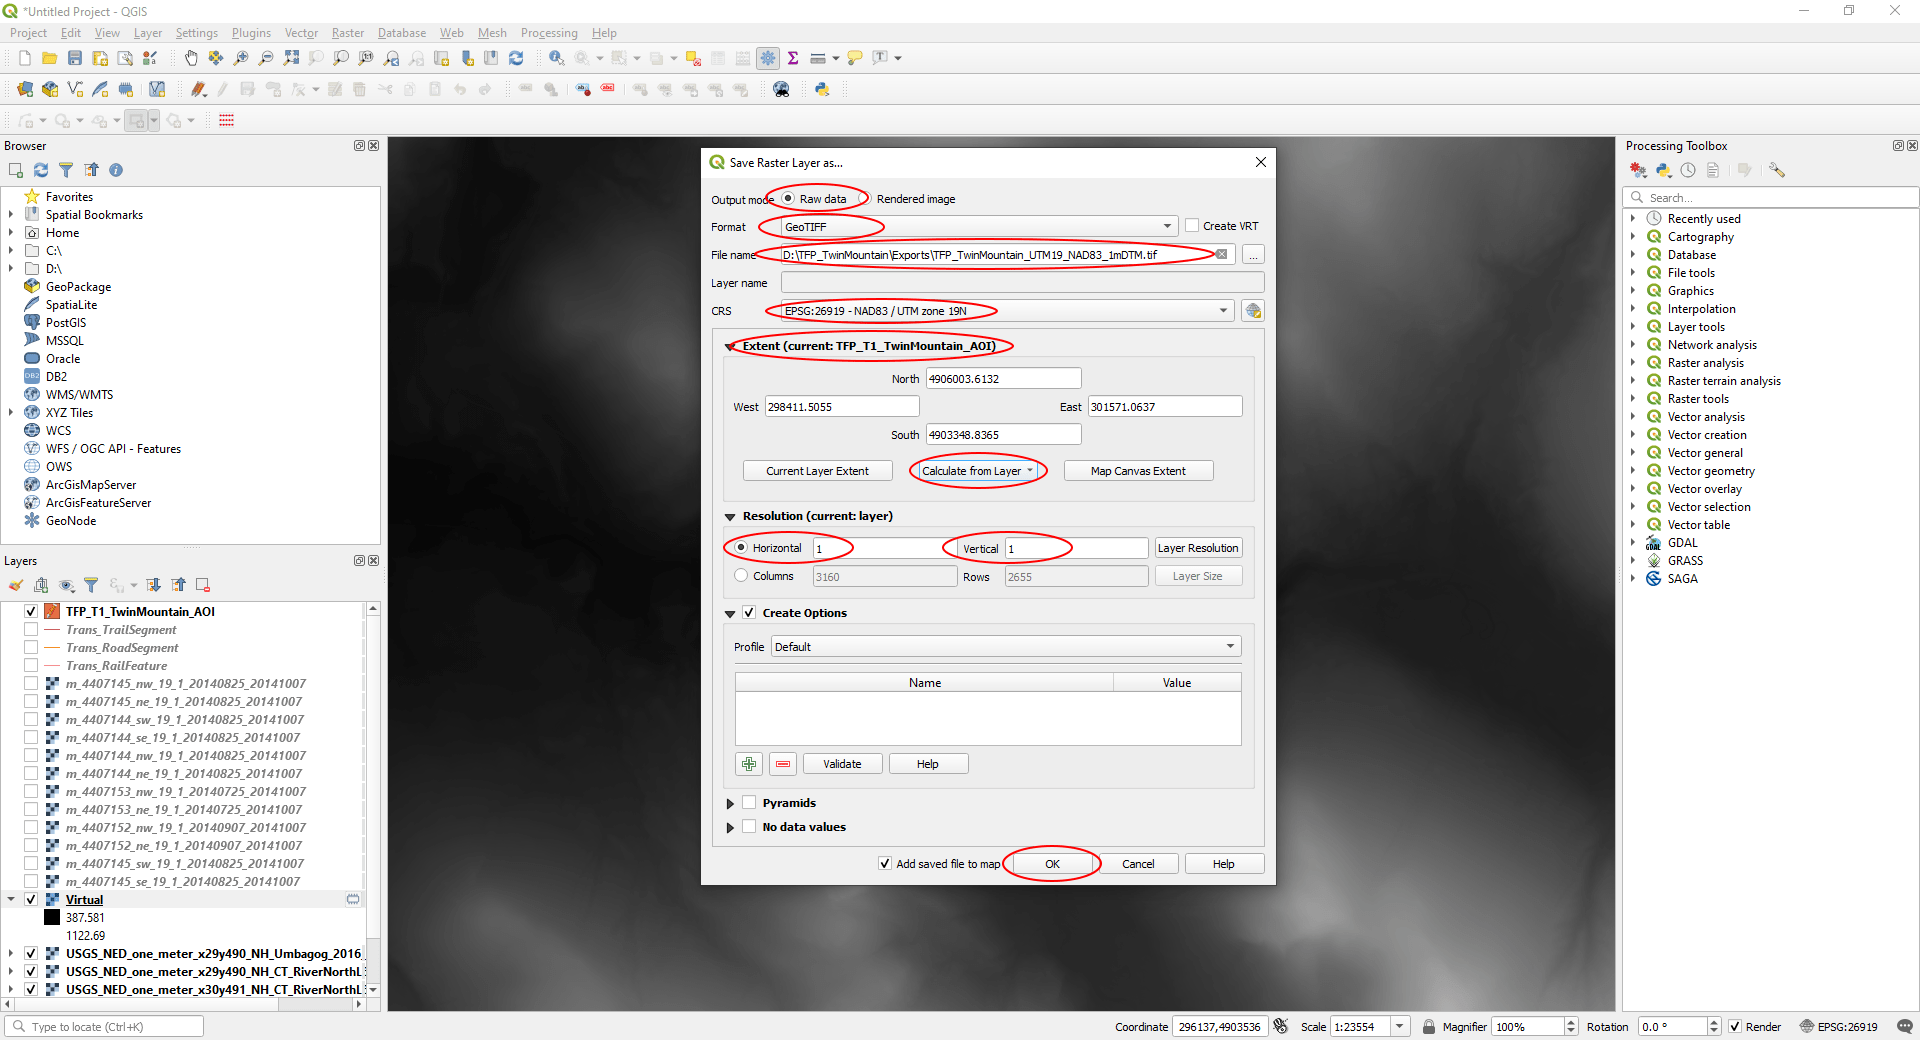
In the ‘Save Raster Layer As…’ window:
- Set the ‘Output mode’ to ‘Raw Data’.
- Make sure ‘Format’ is set to ‘GeoTiff’
- Use the ‘…’ button to the right of the ‘File name’ field, browse to a folder to save your DTM and give it a file name.
- Make sure the ‘CRS’ field states ‘EPSG:26919 – NAD83 / UTM Zone 19N’ (or whatever your project’s projection is).
- Under ‘Extent’, click ‘Calculate from Layer’ and select the layer with your AOI rectangle.
- Make sure the ‘Horizontal’ and ‘Vertical’ resolutions are set (we’re using 1m/pixel – the same as our source).
- Click ‘Run’.
Step 4
Close the DTM source files and the ‘Virtual’ raster layer you just created:
- Select all the DTM layers AND the ‘Virtual’ layer.
- and select ‘Remove Layer…’.
- On the ‘Remove layers and groups’ window, click ‘OK’.
EXPORTING THE IMAGERY
We’re using the aerial imagery to create masks for landscape surfaces and vegetation. UE4 requires the layer masks to be the same resolution as the landscape. We haven’t defined that yet, so we’ll just export the aerial imagery to the same resolution and extents as the DTM. We want a 24-bit GeoTiff – a format we’ll be able to use in Photoshop or GIMP.
Step 1
Show the aerial imagery and hide the DTM:
- In ‘Layers’ panel, uncheck the DTM layer and check all the aerial layers.

Step 2
Create a ‘Virtual Raster’:
- On the main menu, click ‘Raster’ and select ‘Miscellaneous’ > ‘Build Virtual Raster…’.

In the ‘Build Virtual Raster’ window:
- Click the ‘…’ button to the right of ‘Input Source’ and select only the aerial source files (when done, hit ‘OK’).
- Set ‘Resolution’ to ‘Highest’.
- Make sure ‘Place each input file into a separate band’ is unchecked.
- Leave the ‘Override Projection…’ setting blank here. (Our aerial images are actually in a different projection and setting this to ‘Project CRS’ will cause the virtual raster to fail).
- Set the ‘Resampling algorithm’ as ‘Bilinear’.
- Leave the ‘Virtual’ field as ‘[Save to temporary file]’.
- Click ‘Run’.

Step 3
Export your aerial data using the rectangle in your AOI layer as the extents:
- <Right-click> on the new ‘Virtual’ layer in the ‘Layers’ panel.
- On the right-click menu, select ‘Export’ > ‘Save As…’.
In the ‘Save Raster Layer as…’ window:
- ‘Output mode’ should be ‘Rendered Image’ (because we only want RGB channels).
- Set ‘Format’ to ‘GeoTiff’.
- In ‘File name’ field, browse to the same folder you exported the DTM to and give your aerial image file a name.
- Set the ‘CRS’ field to your ‘Project CRS’ (in our case ‘EPSG:26919 – NAD83 / UTM Zone 19N’.)
- In ‘Extents’, click ‘Calculate from Layer’ and select the layer you created with your AOI rectangle (the layer will be listed next to ‘Extents’ as ‘[current: (your layer name)]’ when set.)
- In ‘Resolution’ set the ‘Horizontal’ and ‘Vertical’ resolutions in metres. Set these values to the same resolution as the DTM you exported. (We’re using 1metre per pixel.)
- Click ‘OK’.
