How Can We Help?
8. Creating Landscape Masks
We’re going to use masks created from the aerial imagery to determine where our surface textures and vegetation should appear.
The Procedural Landscape Ecosystem (“PLE”) content provides Pine and Birch Forests as landscape material layers, so we’ll create masks for these. The underlying material layer for surfaces we’ll use will be grass, but since we’ll assume this is ubiquitous where there aren’t forests, we don’t need to create a mask for grass – PLE will take care of that.
Step 1
Launch Photoshop and open the aerial GeoTiff file you exported.
Image dimensions aren’t important at this stage because we’ll resize the masks to fit the landscape we create when we import the DTM.
Step 2
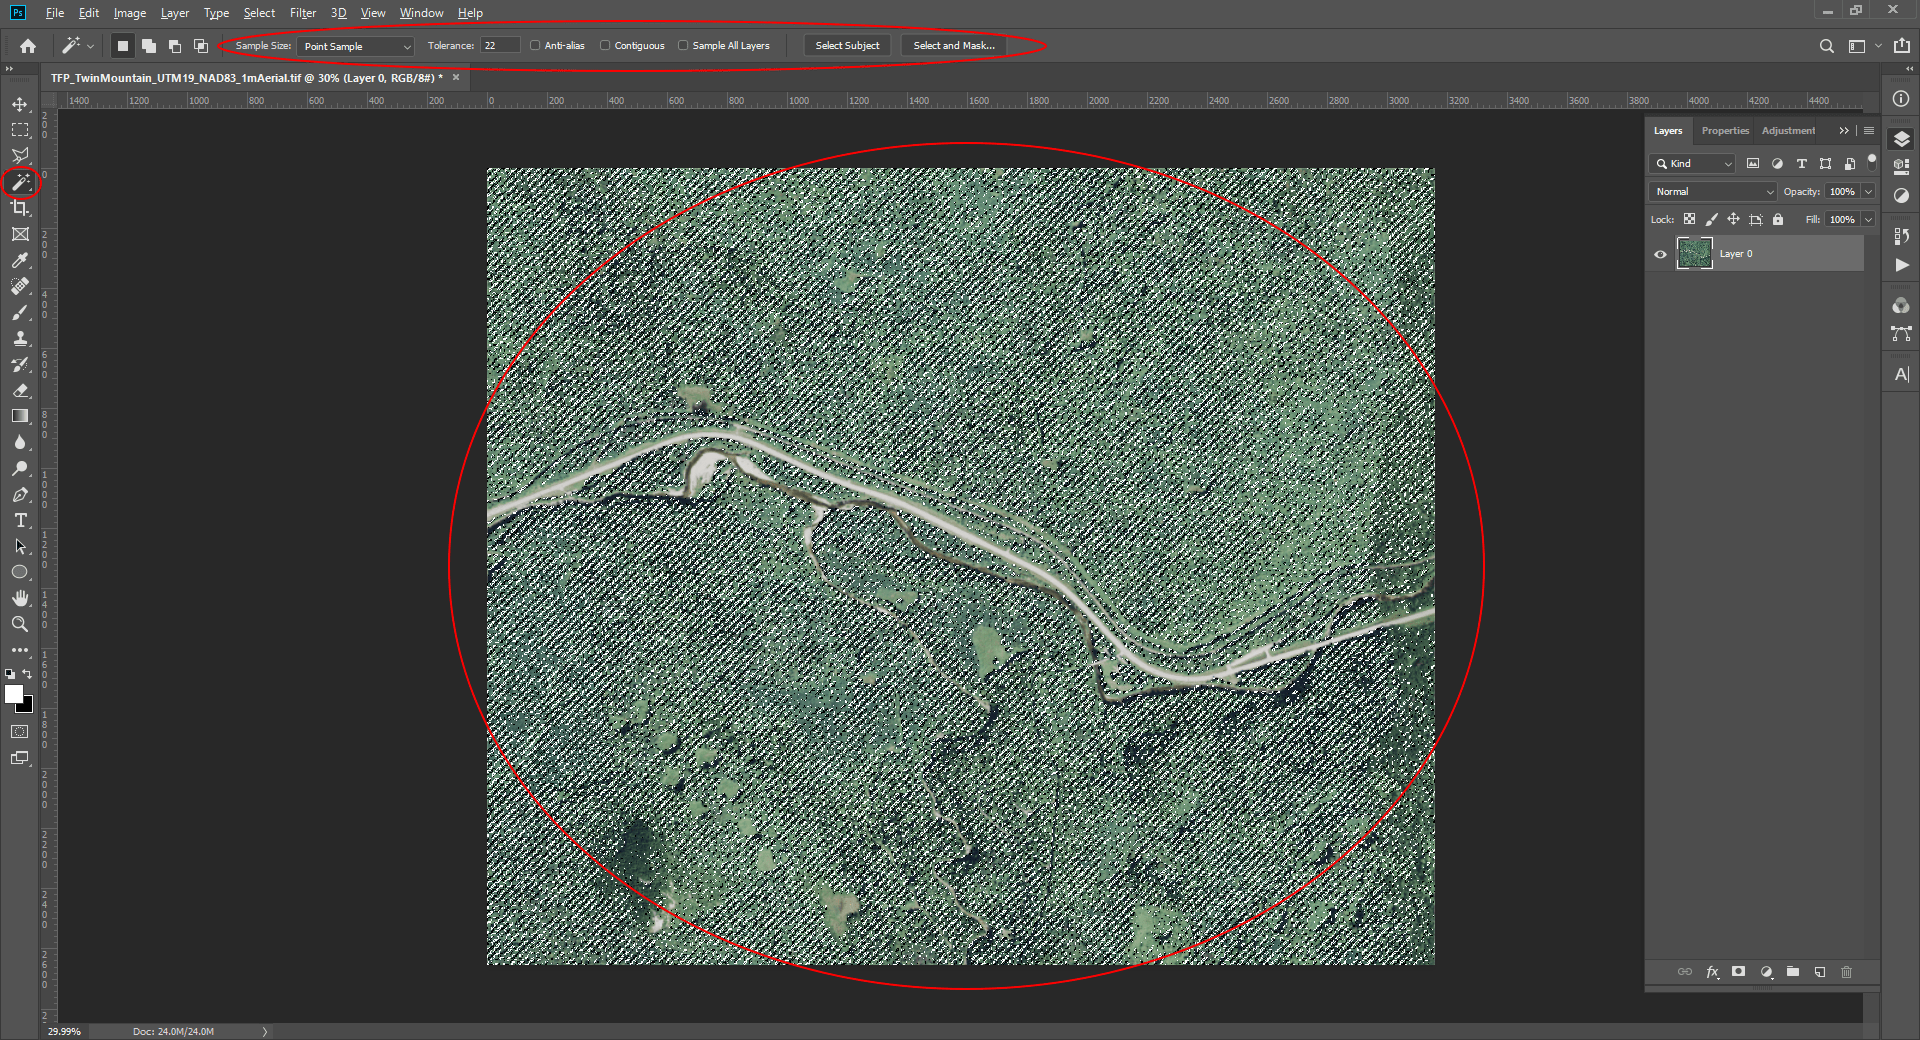
Select pine trees in the aerial image:
(This step is a bit of an approximation since we’re assuming pine trees are all broadly the same colour in the aerial image, but the results are actually quite effective.)
- Select Photoshop’s ‘Magic Wand’ tool.
- Edit the tool’s settings at the top of the window (shown below).
- Zoom into the aerial image and click on a pine tree.
Depending on your aerial image, you may need to fiddle a little with the ‘Tolerance’ to make sure you’re selecting the features you want and not those you don’t.
You should see something like this:
Step 3
Create a mask from the selection:
- Create 2 new layers for the image.
- Change the foreground colour to white.
- Change the background colour to black.
- Select the top-most layer and fill the ‘Magic Wand’ selection with white (<alt> + <delete>)
- Deselect everything (<alt> + <D>)
- Choose the lower of the two new layers and fill it with black (<ctrl> + <delete>).
The results should looks something like this:

Step 4
Merge the black and white layers into a single layer.
- Select the new layers (<ctrl> + <left-click> to select both)
- <Right-click> on the two selected layers in the ‘Layers’ panel and select ‘Merge Layers’.
- Rename the new layer ‘PineForest’.
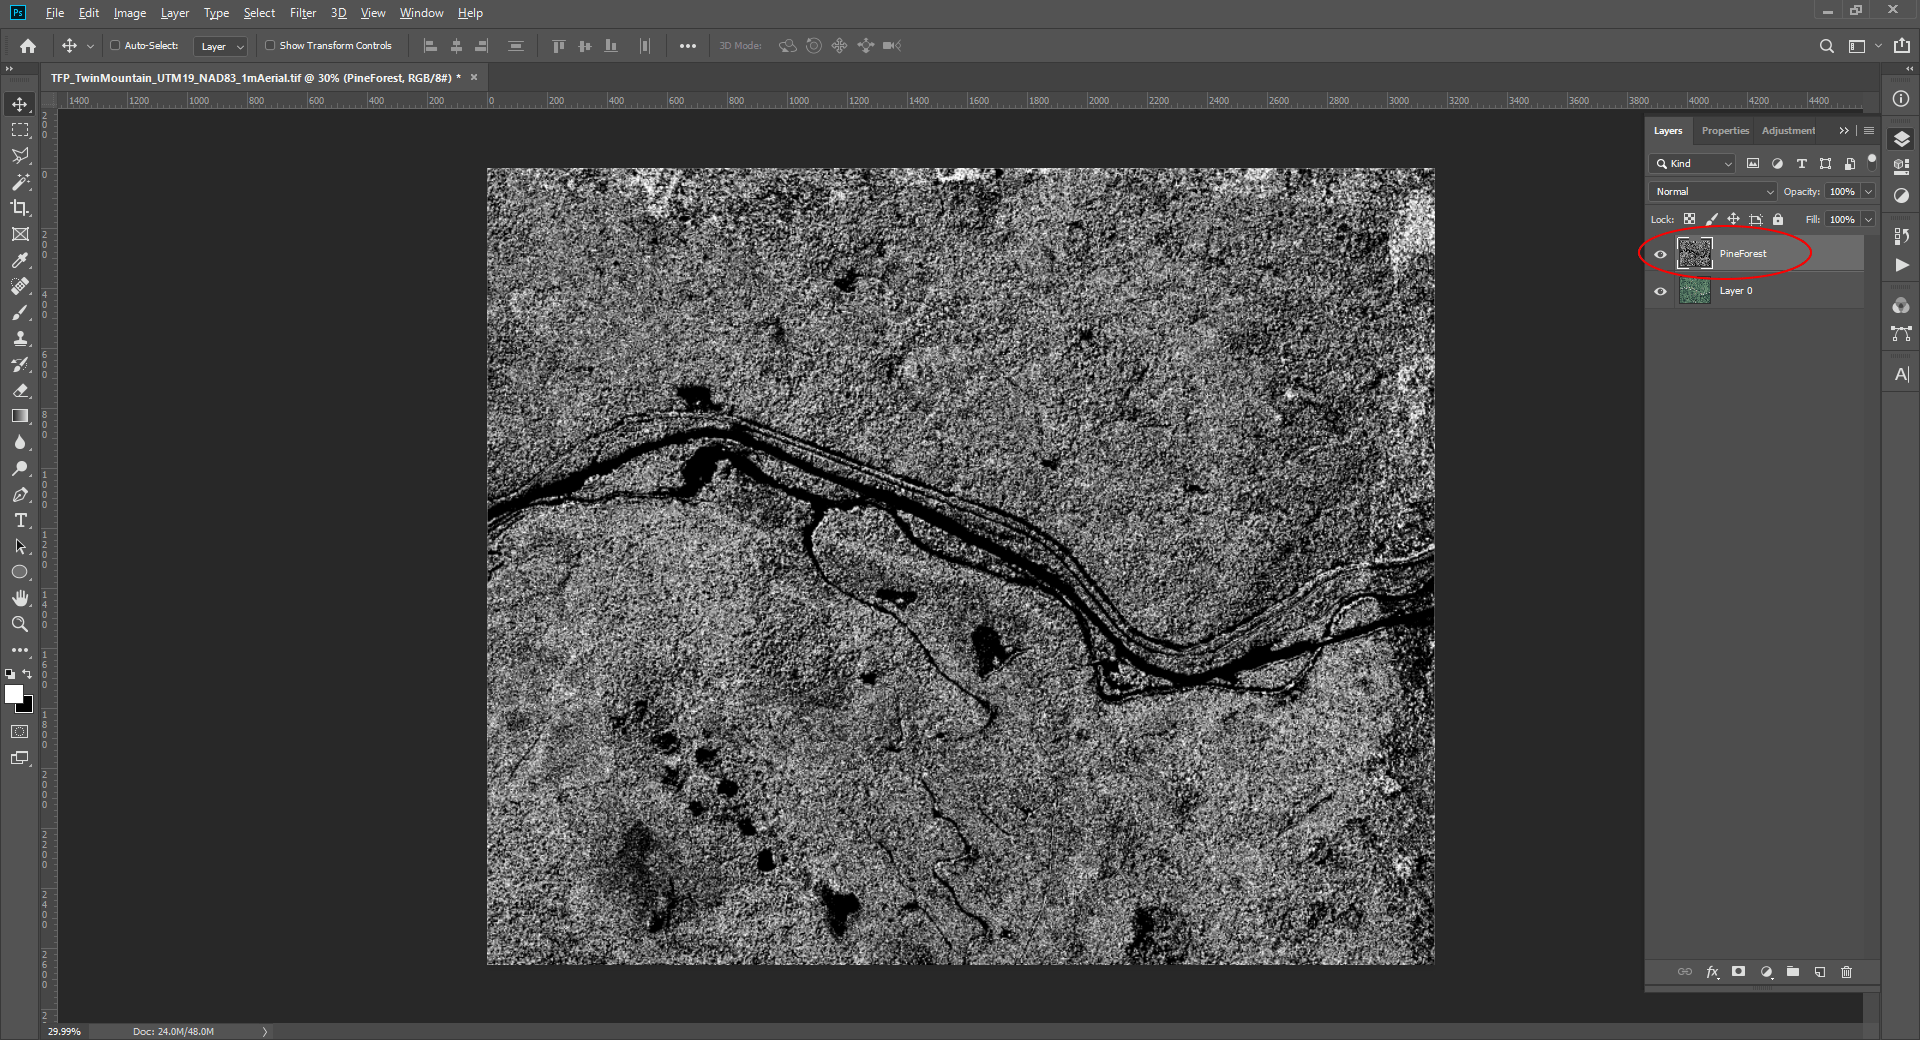
Step 5
Repeat this process for the Birch forest:
- Hide the ‘PineForest’ layer and select the aerial layer (‘Background’).
- Zoom in to the aerial.
- Using the ‘Magic Wand’ tool, click on a birch tree. (Fiddle with tool settings as appropriate.)

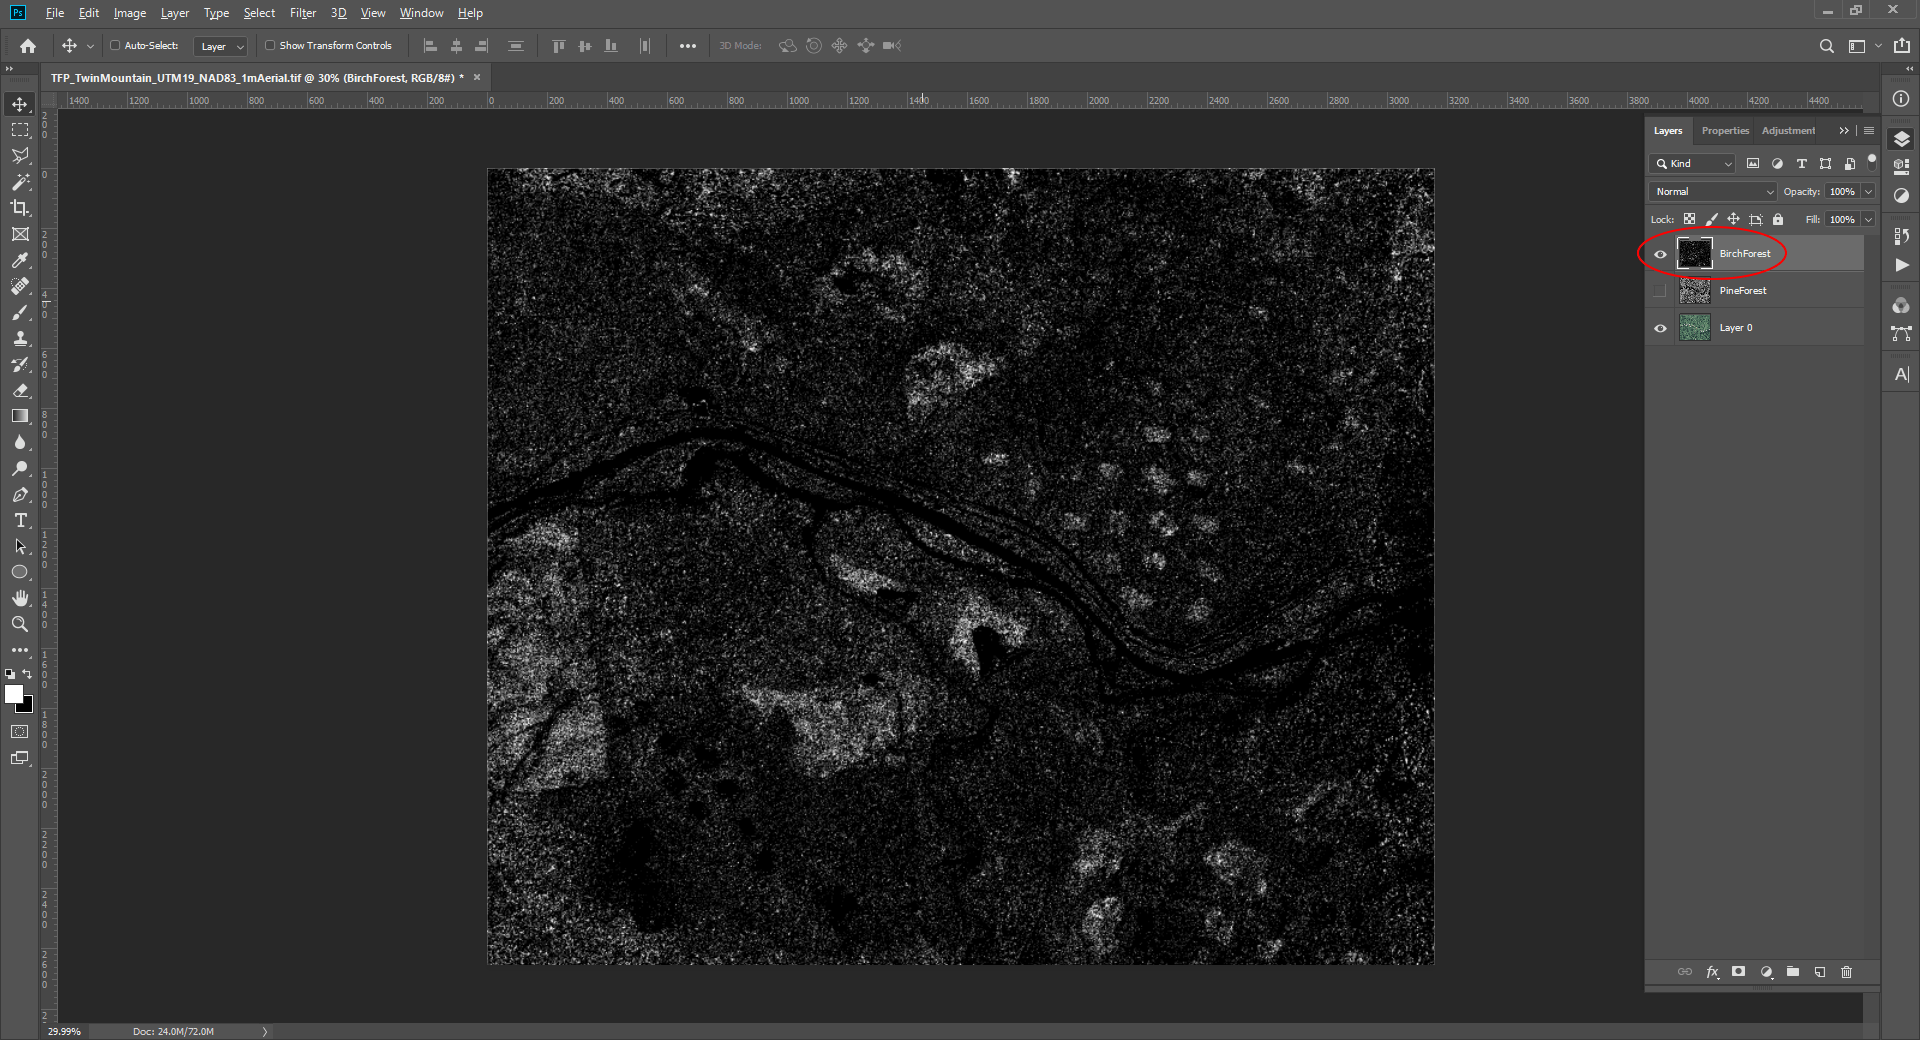
Step 6
Create a mask from the selection:
- Create 2 new layers.
- Set foreground colour to white, background colour to black.
- Fill the selection white ( + ) for the top-most layer.
- Deselect ( + )
- Select the lower layer and fill it black.
- Select both layers and merge.
- Rename the new layer ‘BirchForest’.
Step 7
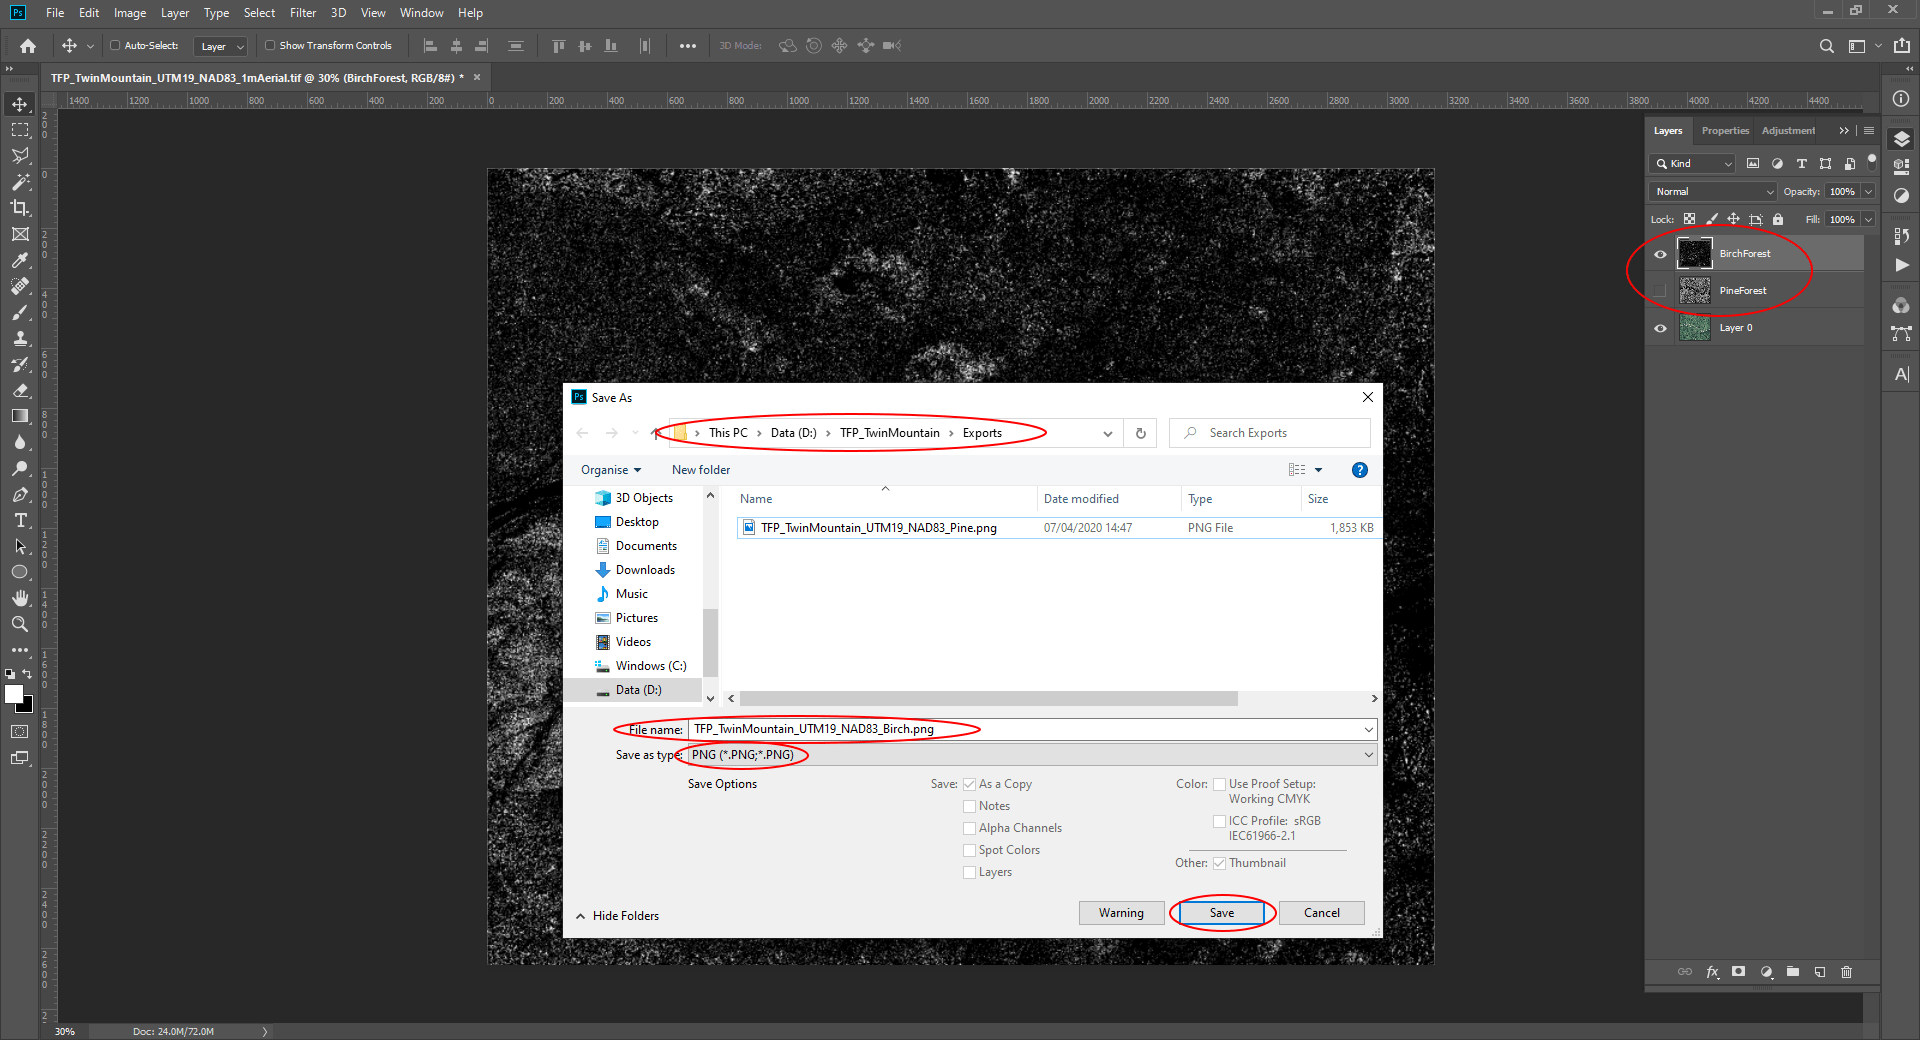
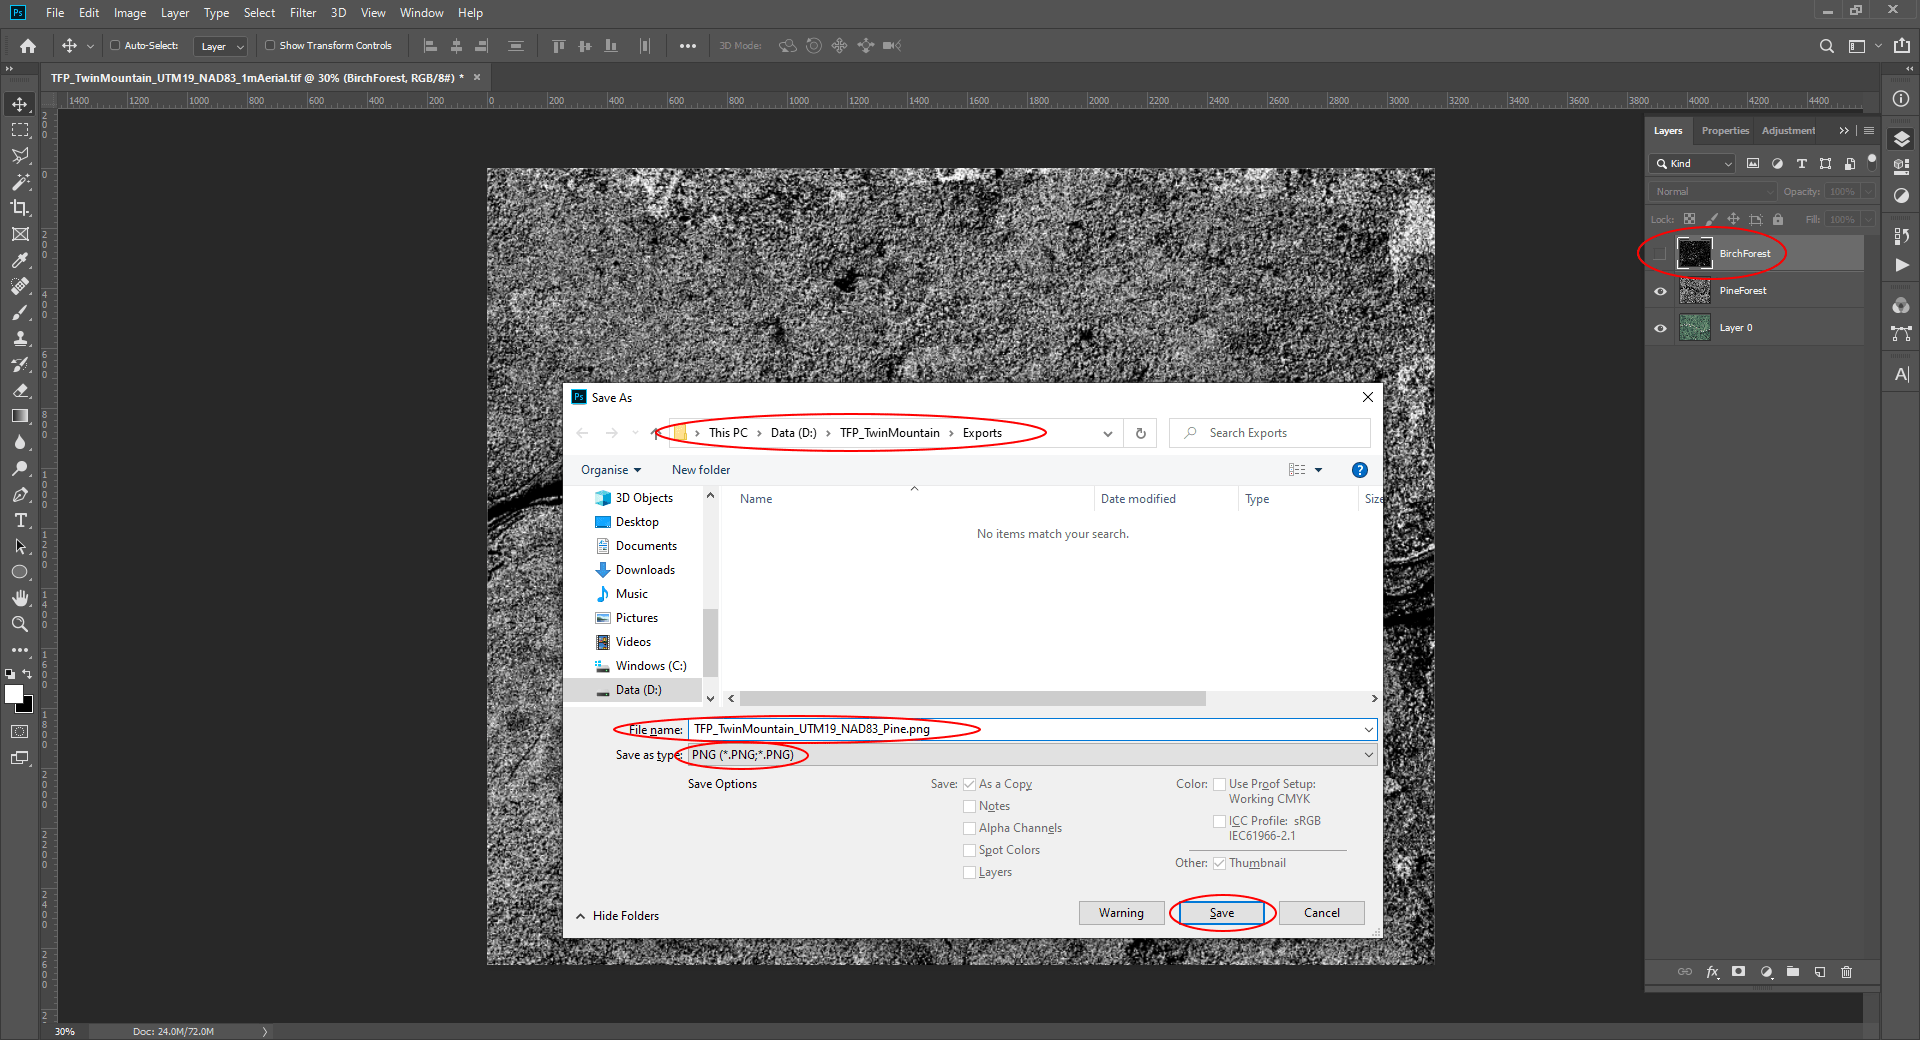
Finally we need to save the masks as separate .png files.
To save the pine forest mask:
- Hide the ‘BirchForest’ layer.
- ‘File’ > ‘Save As…’
- Change ‘Save as type’ to ‘PNG’
- Give it a useful filename and save to your exports folder.
Step 8
To save the birch forest mask:
- Hide the ‘PineForest’ layer.
- ‘File’ > ‘Save As…’
- Change ‘Save as type’ to ‘PNG’
- Give it a useful filename and save to your exports folder.