How Can We Help?
3. Editing Vector Data
We need to make sure the vector files are correctly set up for use as splines in UE4. A common problem is splines being broken into segments. We need to connect them together to prevent breaks in our UE4 spline meshes at a later stage, which is what we cover in this section of the tutorial.
Step 1
Load the rail Shape File you exported into a new Global Mapper window:
- Open a new instance of Global Mapper (you can have multiple open at one time, but we don’t need the previous one, so we’ll close that).
- Drag the rail vector .shp file into the main window.
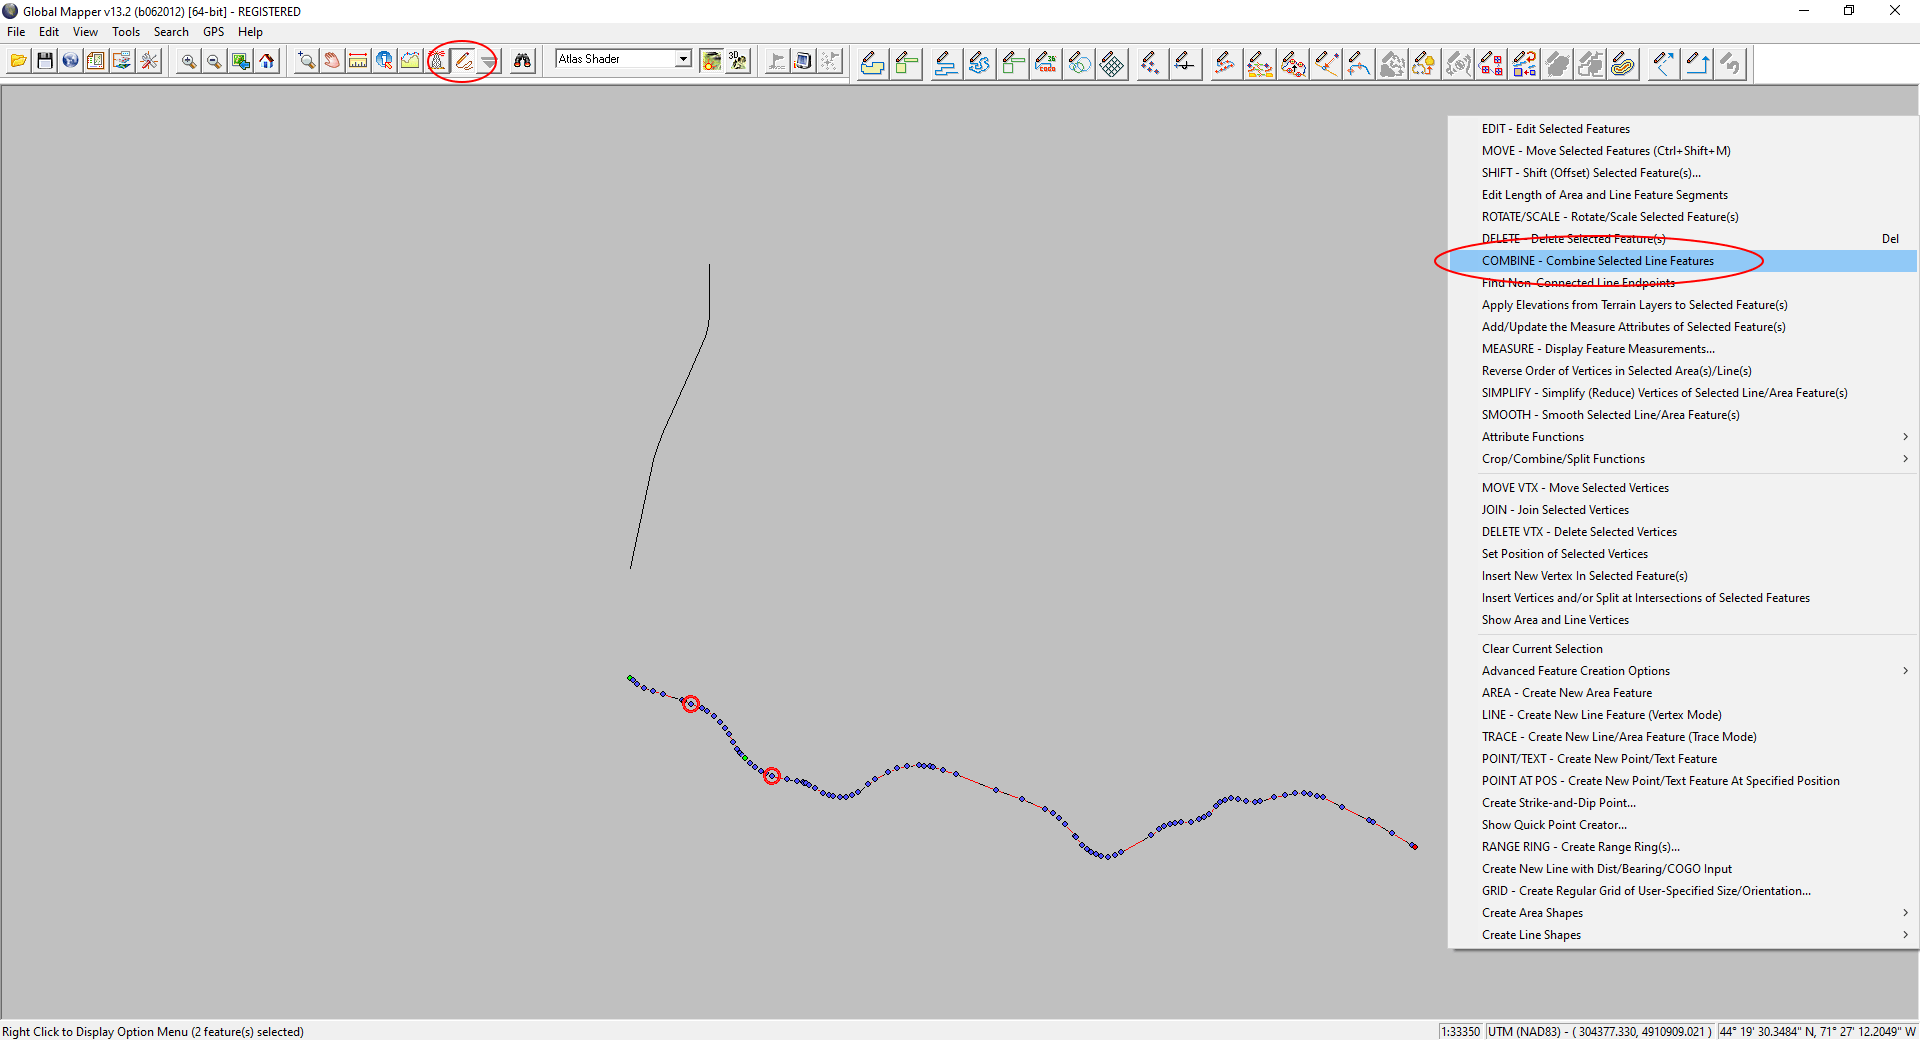
- Using the ‘Digitizer Tool’ to select part of the rail vector, you can see it’s separated into discreet segments:
[NOTE: The area we selected means the rail vector comes in and goes out of the AOI so it’s naturally split in two pieces. That’s ok. It’s discreet segments that should otherwise be connected that we’re treating here.]

Step 2
Connect segments that should be connected:
- Using the ‘Digitizer Tool’ select all line segments that should be connected (since this is a single rail line, that’s all of them). You can hold the <ctrl> down to select multiple segments.
- When you’ve selected all the segments you need, <right-click>, then select ‘COMBINE – Combine Selected Line Features’.
Step 3
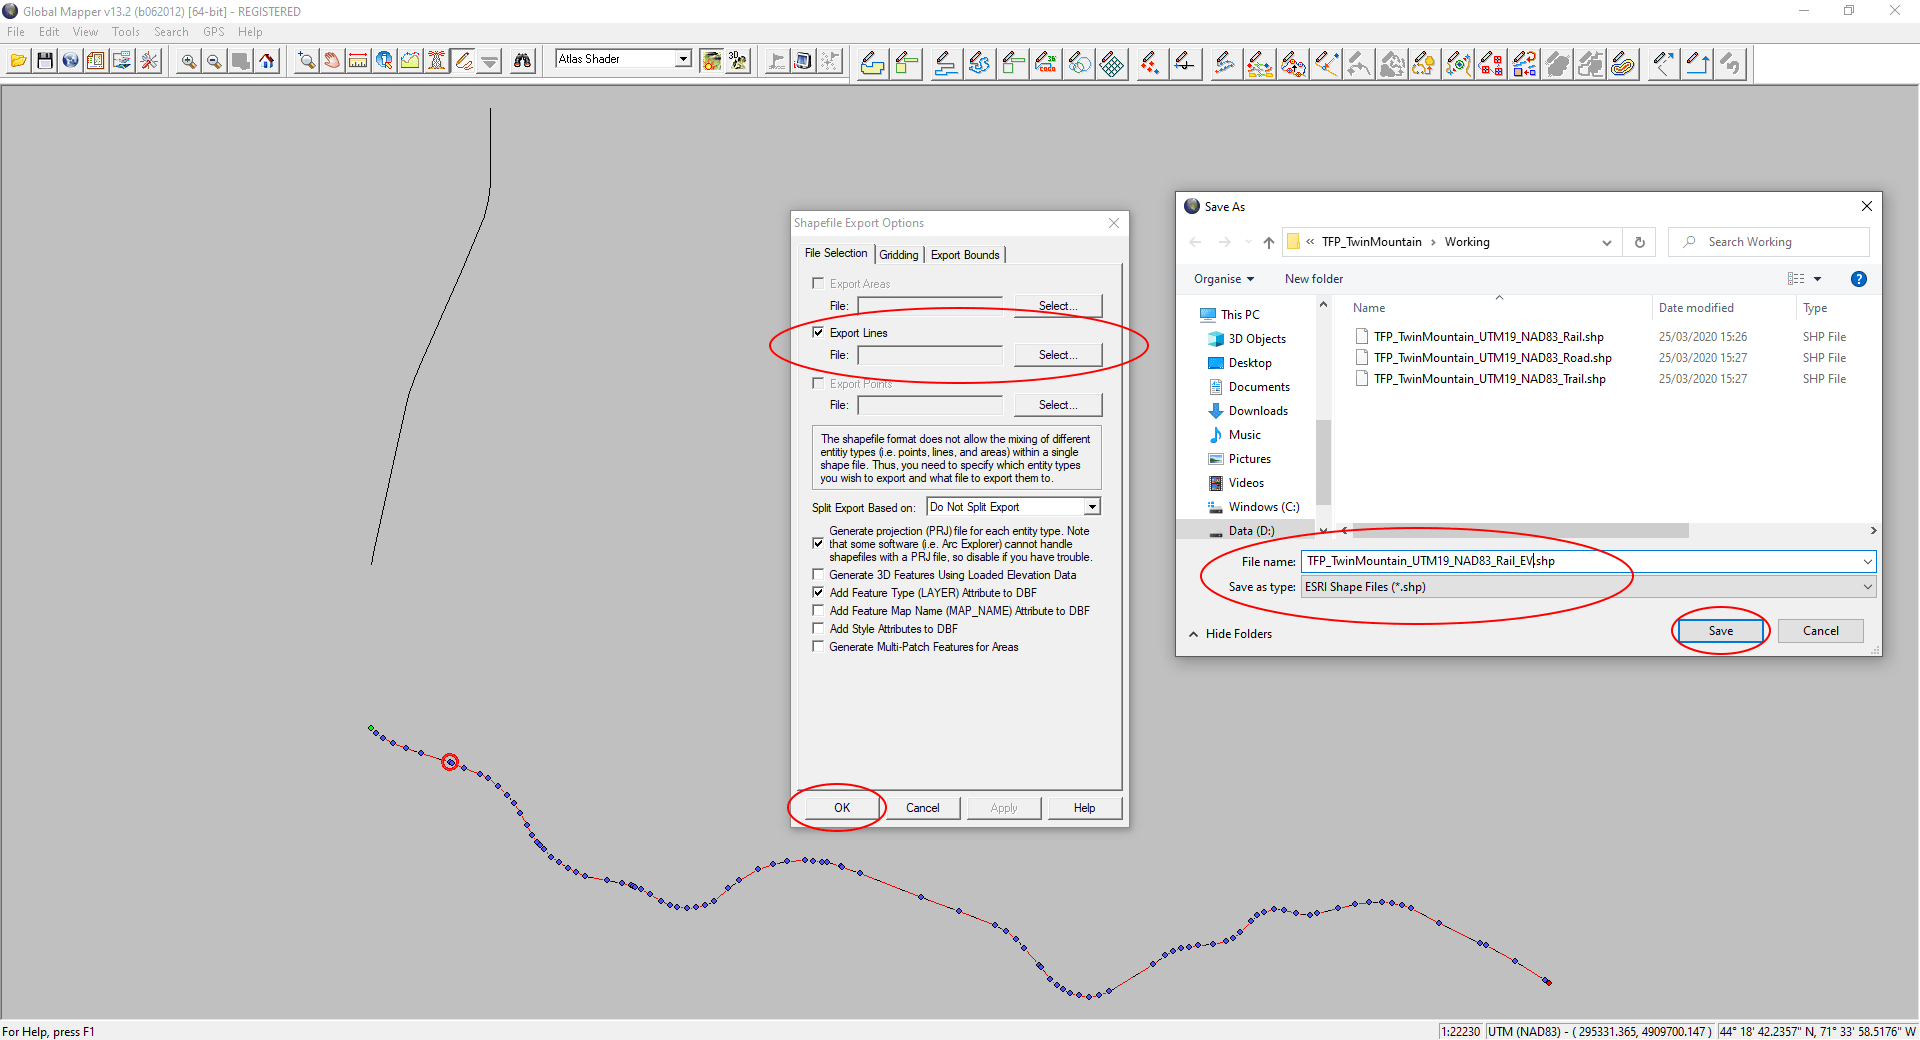
Export the combined vectors to a new .shp file:
- ‘Select Export Format’ > ‘Shapefile’
- On the ‘File Selection’ tab of ‘Shapefile Export Options’ check ‘Export Lines’.
- Navigate to your exports folder and give the file a useful name.
- We’ve already exported data to the correct bounds so we don’t need to do that again.
- Click ‘OK’ to save the new .shp file.
Step 4
Repeat Steps 1 to 3 for the road and trails vector files.
[NOTE: The road and trail vector files are likely to be more complex than rail. You should connect only those vectors that form part of the same road or trail.]