How Can We Help?
DTM Import Options
IMPORTANT
To import DTM data with TerraForm, you need to make sure it’s in a format TerraForm understands. Just because it’s a GeoTiff, doesn’t mean it will work correctly – there are a number of settings in the GeoTiff format that you need to specify to create a landscape from your DTM.
We’ve written a number of articles about how to prepare your DTM source data for import into Unreal Editor, using TerraForm. You can find them here: Preparing DTM (Terrain) Data
IMPORT DTM AS LANDSCAPE
Once you’ve hit the Import DTM as Landscape button and selected the GeoTIFF DTM file you want to import, TerraForm will show you the Terrain Model Import Options window. Here you can set options for the UE4 Landscape Actor you’ll create. It looks like this:
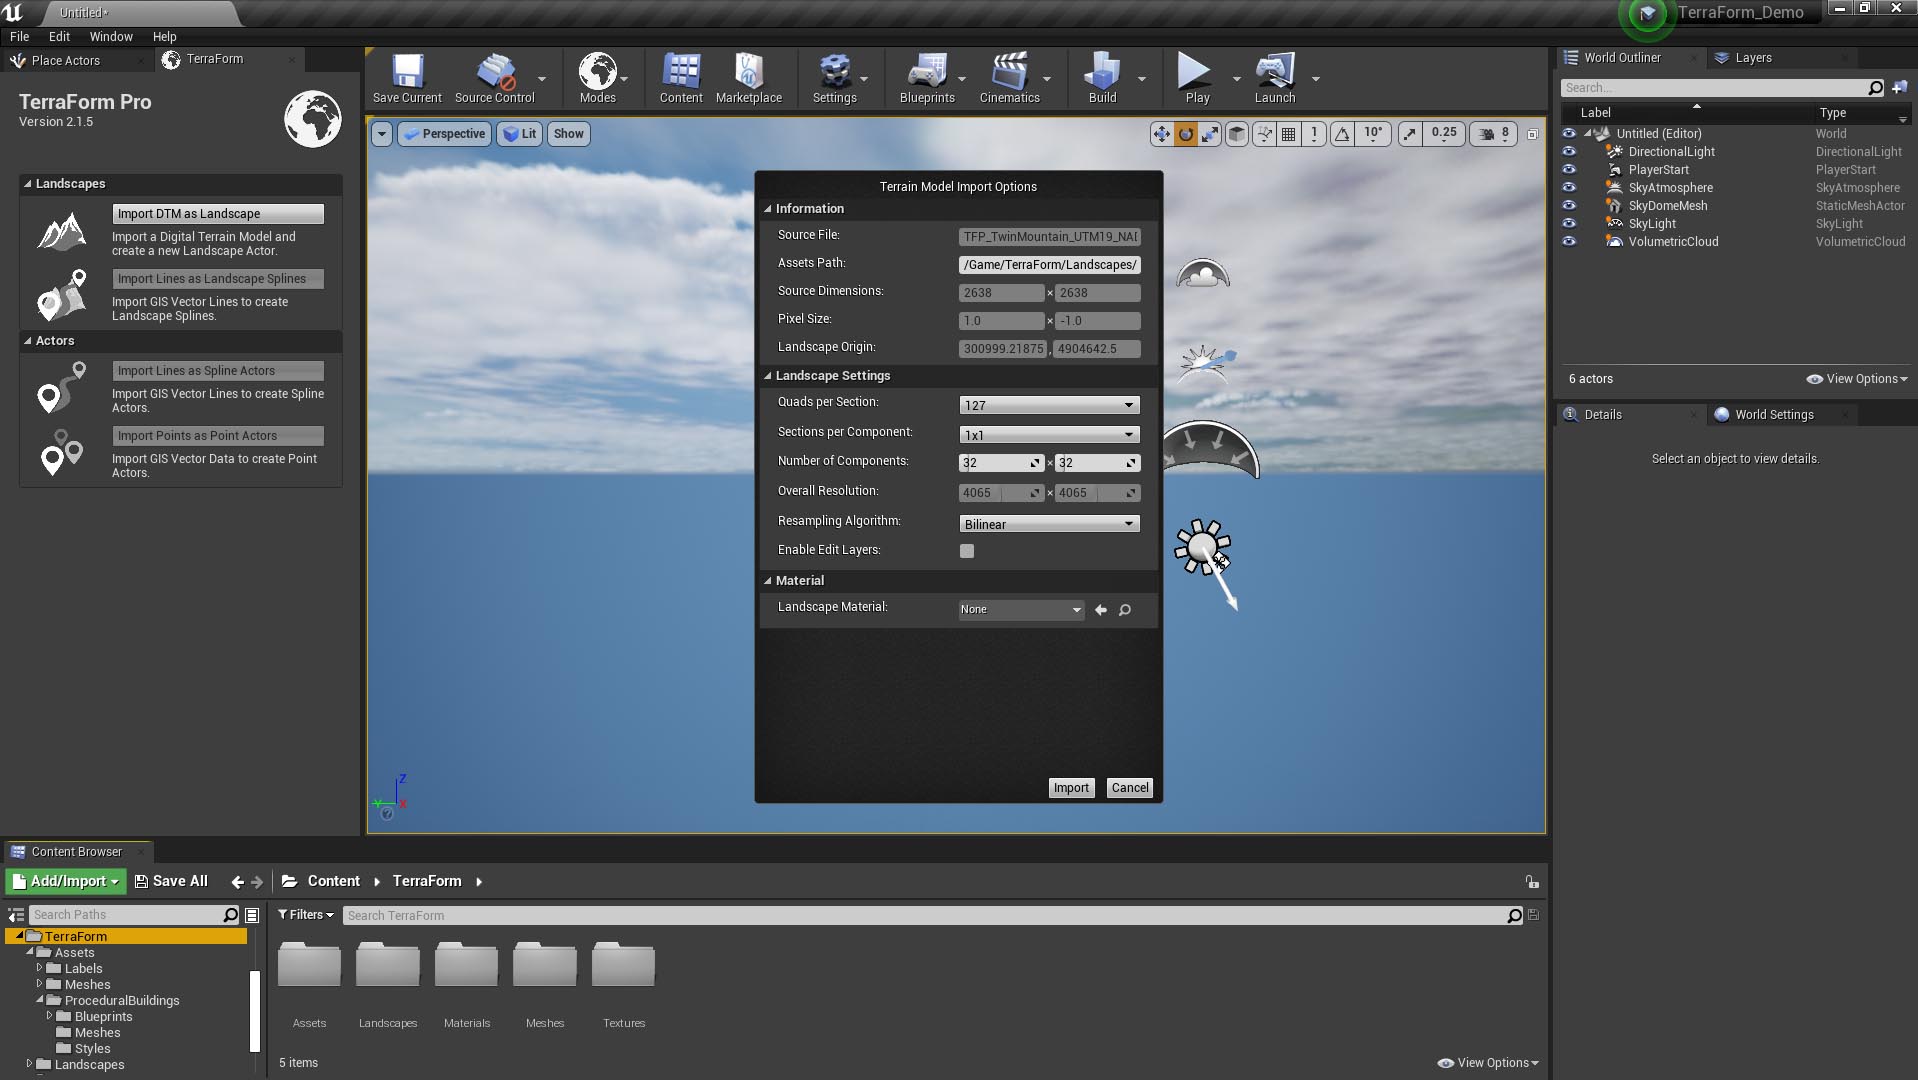
Information:
The top section of this window shows you some information about the DTM source file you’re importing:
Source File: This is the name of the source file you’ve selected to import. Fairly self-explanatory.
Asset Path: This is where the TerraForm Landscape Anchor projection data will be stored.
Source Dimensions: The dimensions of the source file in pixels.
Pixel Size: The size of each pixel in metres.
Landscape Origin: The location of the top-left corner of your DTM in the source coordinate system.
Landscape Settings:
These settings give you the control to create a Landscape Actor that meets your requirements. There are trade-offs you should consider with respect to performance/quality, depending on the platform you’re creating your game for. Further information can be found in Epic’s UE4 Landscape Technical Guide, which you can find here:
https://docs.unrealengine.com/en-US/Engine/Landscape/TechnicalGuide/index.html
These settings will affect the performance of your landscape, as well as the size/detail.
Quads per Section: A quad is the smallest unit of a landscape.
Sections per Component: Sections are the base unit of landscape LOD calculations.
Number of Components: Components are Unreal’s base unit of rendering, visibility calculation and collision. Epic recommends keeping landscapes below a total of 1024 (32 x 32 components).
Overall Resolution: Adjusting the settings above within the limitations and guidance provided by Epic’s technical guide allows you to optimise the size/detail/performance of your landscape for your application.
Resampling Algorithm: This is the method of resampling that TerraForm will use to create the landscape from your DTM data. Each has benefits, depending on what you’re seeking to achieve with your landscape. If you’re not sure, Bilinear and Cubic B-Spline give really nice smooth results without stepping, whilst maintaining high levels of data accuracy.
Enable Edit Layers: Setting your landscape to accommodate layer editing means that you can use splines to modify your landscape non-destructively (using the new experimental lake/river water systems in UE4.26 for example). It does use additional system resources which can affect performance, so if you’re not going to use such features leave it switched off.
Material:
Landscape Material: You can set the material you’d like to apply to your landscape here.