How Can We Help?
Changing Bit-Depth to Float32
BIT-DEPTH
The Bit-Depth of DTM data is essentially the precision – it’s the number of bits of data used to describe the x, y, and z values of your terrain. Without getting too complicated, TerraForm wants the Bit-Depth to be 32-bit – meaning that the x, y and z values of each height point in your DTM data have 32-bits of data to store the location. Whilst this sounds like a lot, it’s actually not. The ‘Float’ bit, means that within those 32-bits, the decimal point can be moved about to make the most of the storage space available.
THIS ARTICLE
This guide shows you a couple of different methods for converting data to a bit-depth of 32-bit floating point (“float32”).
If we’re just looking to change the bit-depth of the image, we can use the ‘Translate (Convert Format)’ function (that’s Method 1). If we’re clipping data too, we can change the bit-depth in the same process to save a little time (Method 2).
Both methods begin with loading your data into QGIS, so it’s assumed you have installed QGIS and have some data. If you haven’t yet got any source data yet and you’re just looking to follow the process, you can download the samples used in this guide.
Step 1
Load the data into QGIS:
- Select the DTM data file in File Explorer and drag it into QGIS.

A new QGIS project will have a default coordinate reference system already assigned. This is the CRS that the data you load will be displayed in. When you load data that’s stored in a different CRS, QGIS may try to transform it to the project’s CRS.
We don’t want it to do this – instead we want QGIS to display our DTM data in the CRS it’s already stored in:
- In the ‘Select Transformation…’ window that appears, click ‘Cancel’.
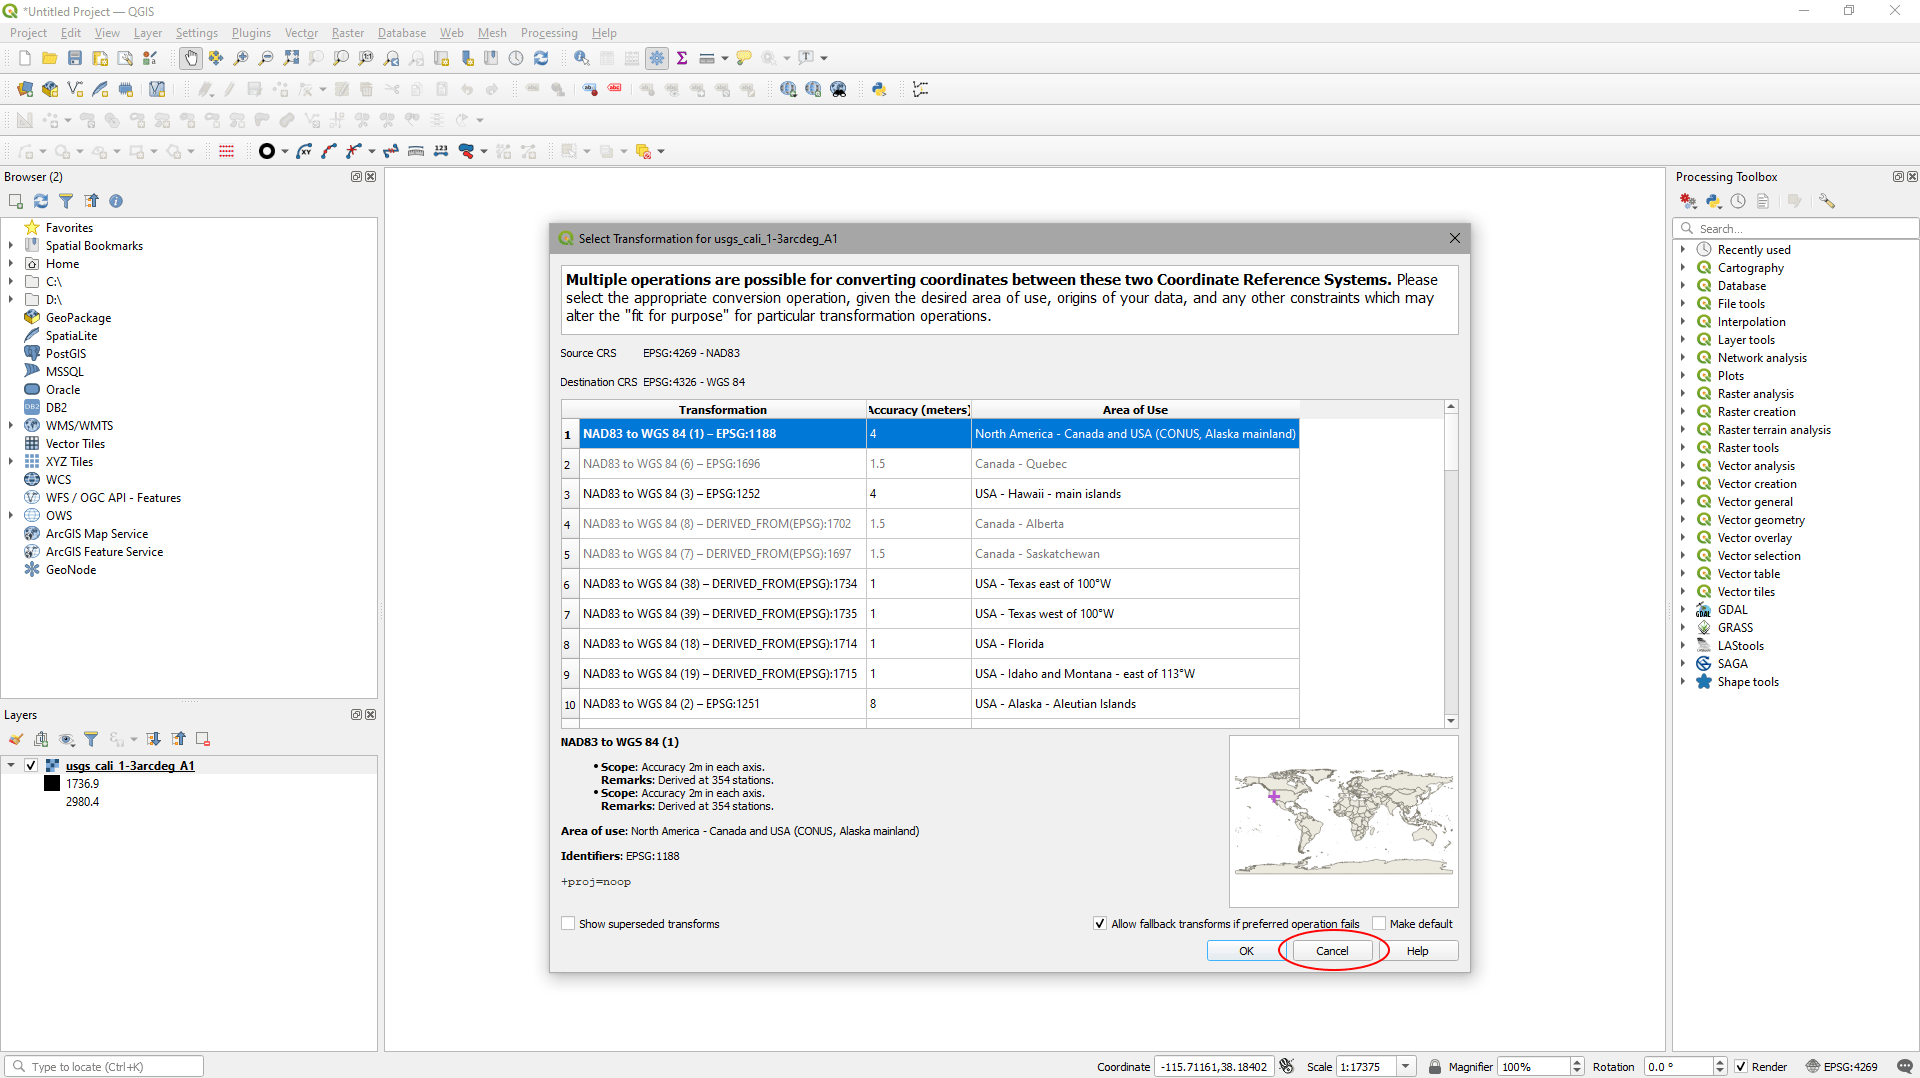
QGIS now will adopt the CRS of the file you’ve loaded.
Step 2
Check the bit-depth of the DTM data:
TerraForm currently requires DTM data in 32-bit floating point format. This is the most common format for DTM data, but data does come in other formats.
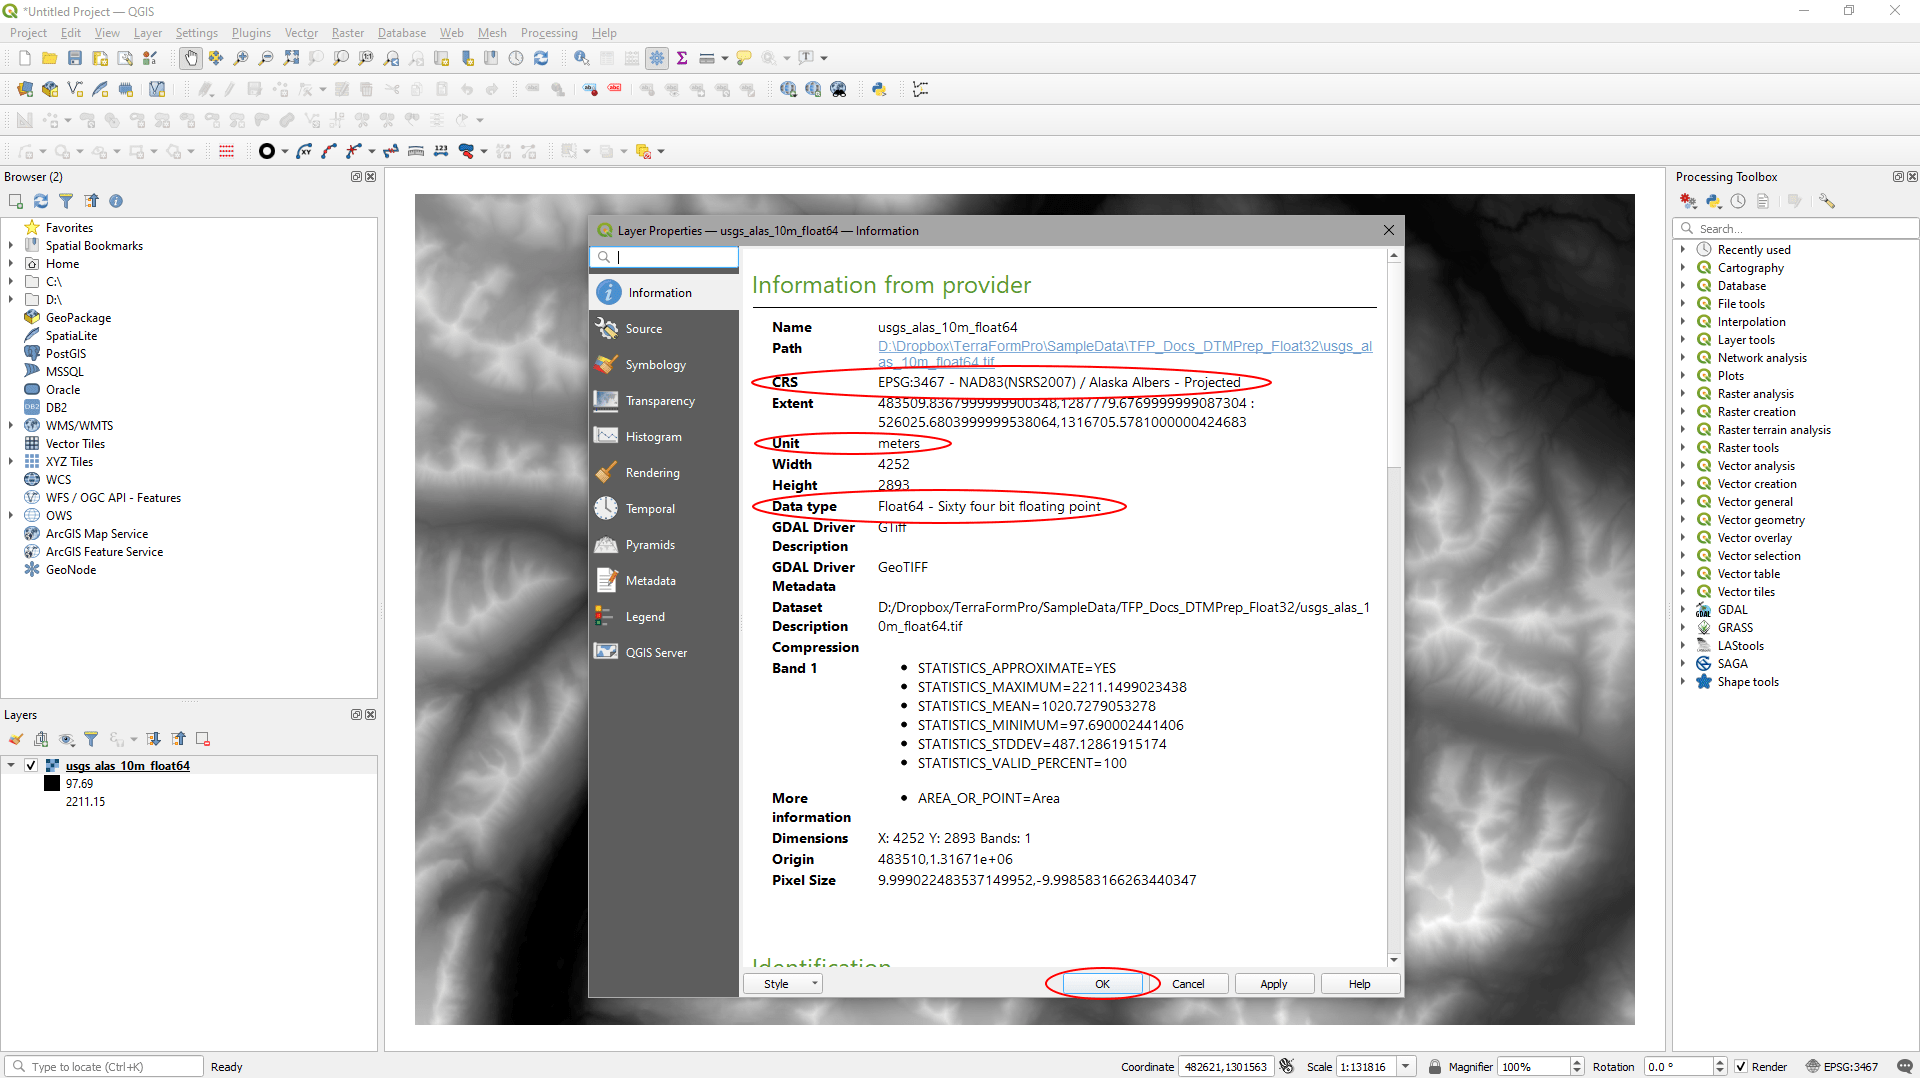
- Double click the DTM file in the ‘Layers’ panel to pull up the ‘Layer Properties’.
- In this example, the coordinate reference system “CRS” isn’t UTM, but the Units are meters, so we can use the data in this projection.
- On the ‘Information’ tab, it says the data type is ‘Float64’, so we need to change it.
- Click ‘OK’ to close the window.
Method 1: Translate
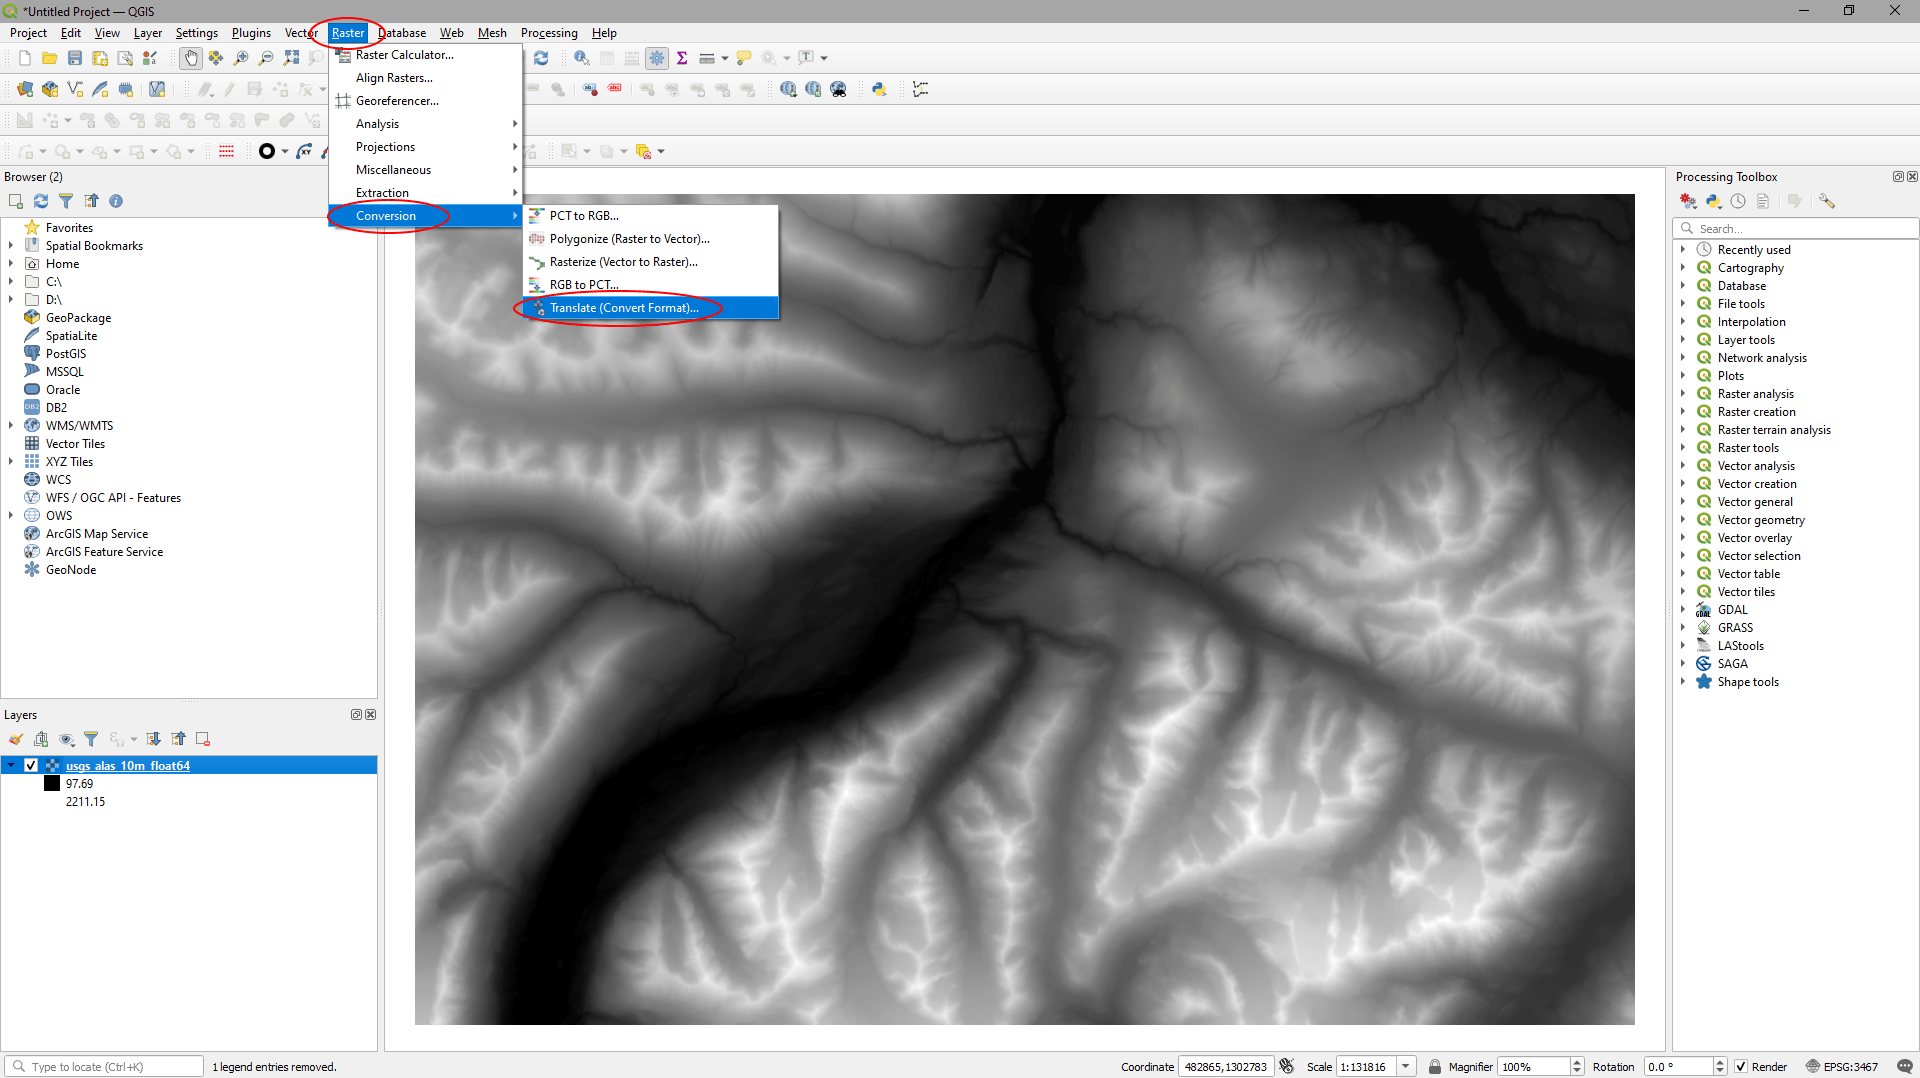
Translate the format to Float32:
- Select ‘Raster’ > ‘Conversion’ > ‘Translate (Convert Format)’.
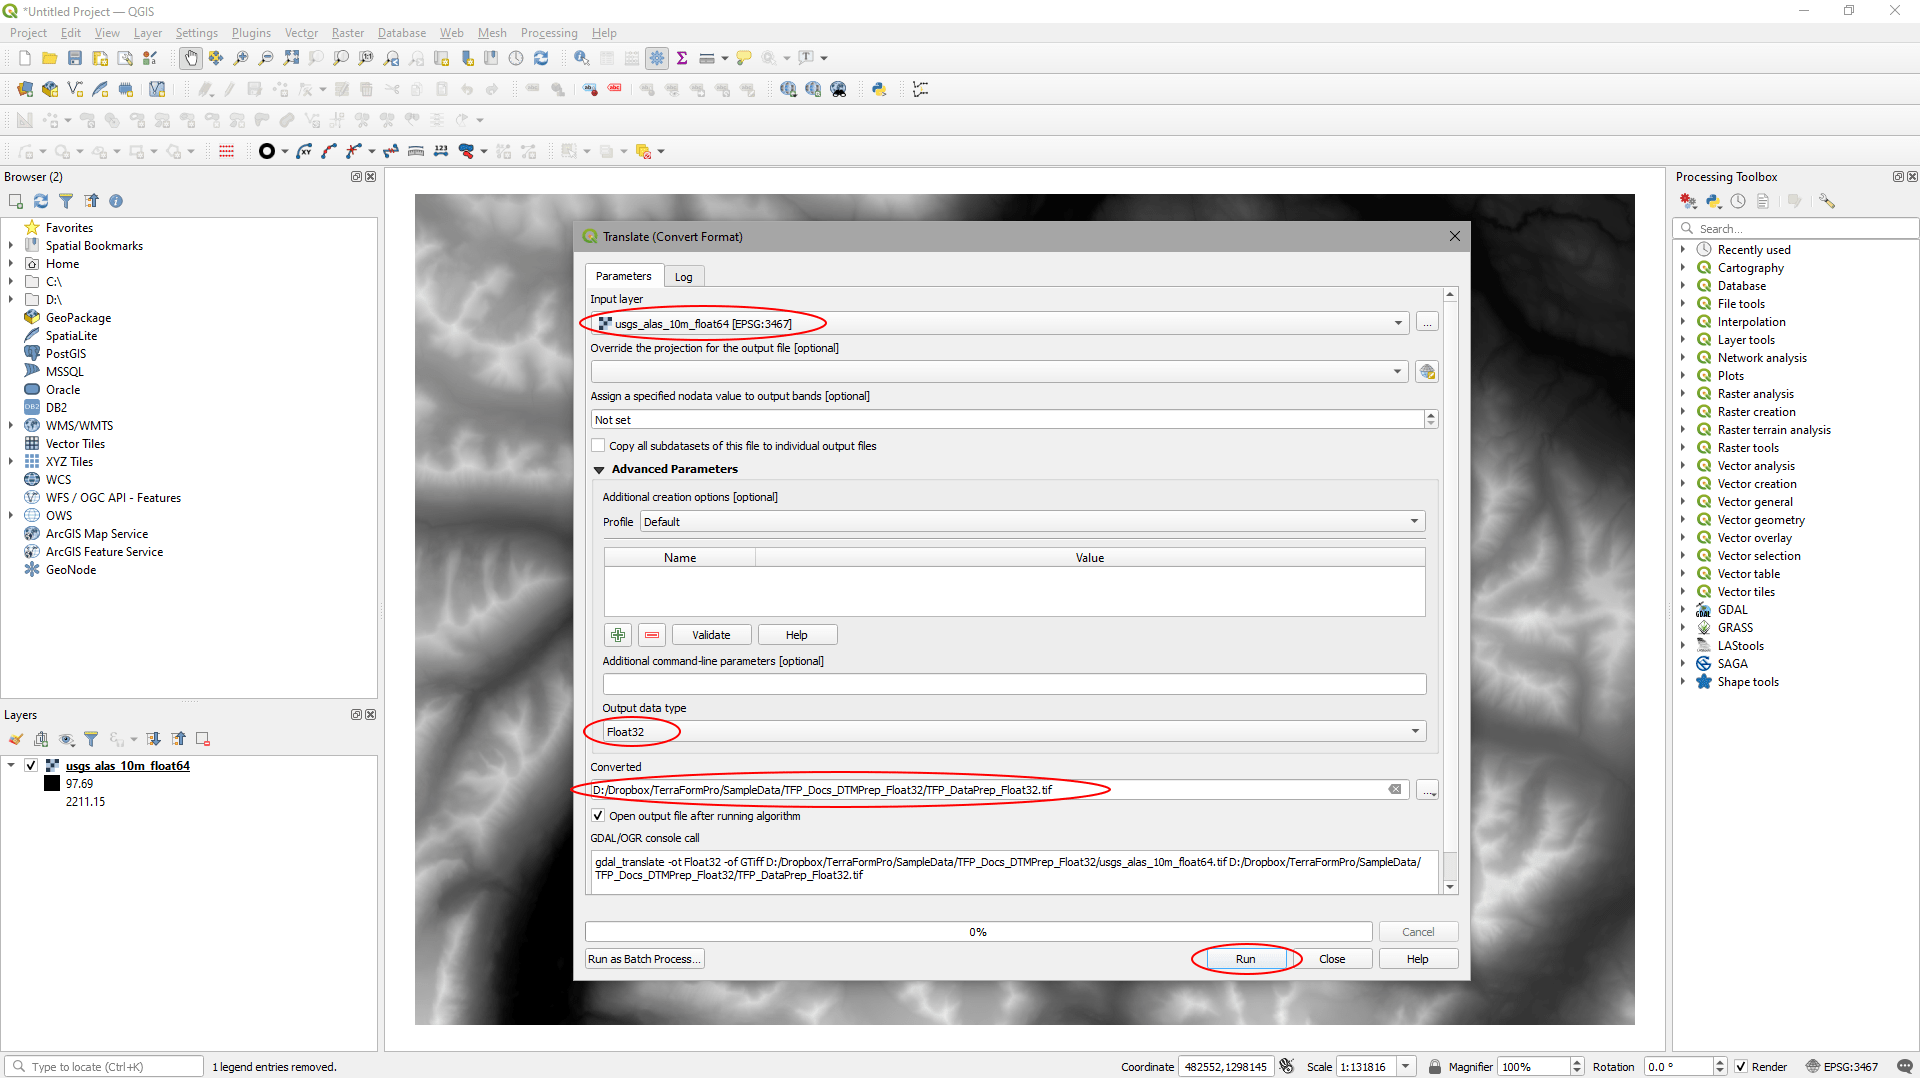
In the ‘Translate (Convert Format)’ window that appears:
- Set the ‘Input layer’ to your DTM file (it’ll be selected already if it’s the only data loaded).
- Set the ‘Output data type’ to ‘Float 32’.
- Click the button to the right of ‘Converted’, select ‘Save to File…’, then navigate to a location to export your data and give it a filename.
- Hit ‘run’.
Method 2: Clip
Clip the DTM data and change the data type:
We can change the bit-depth of the data at the same time as clipping the image.
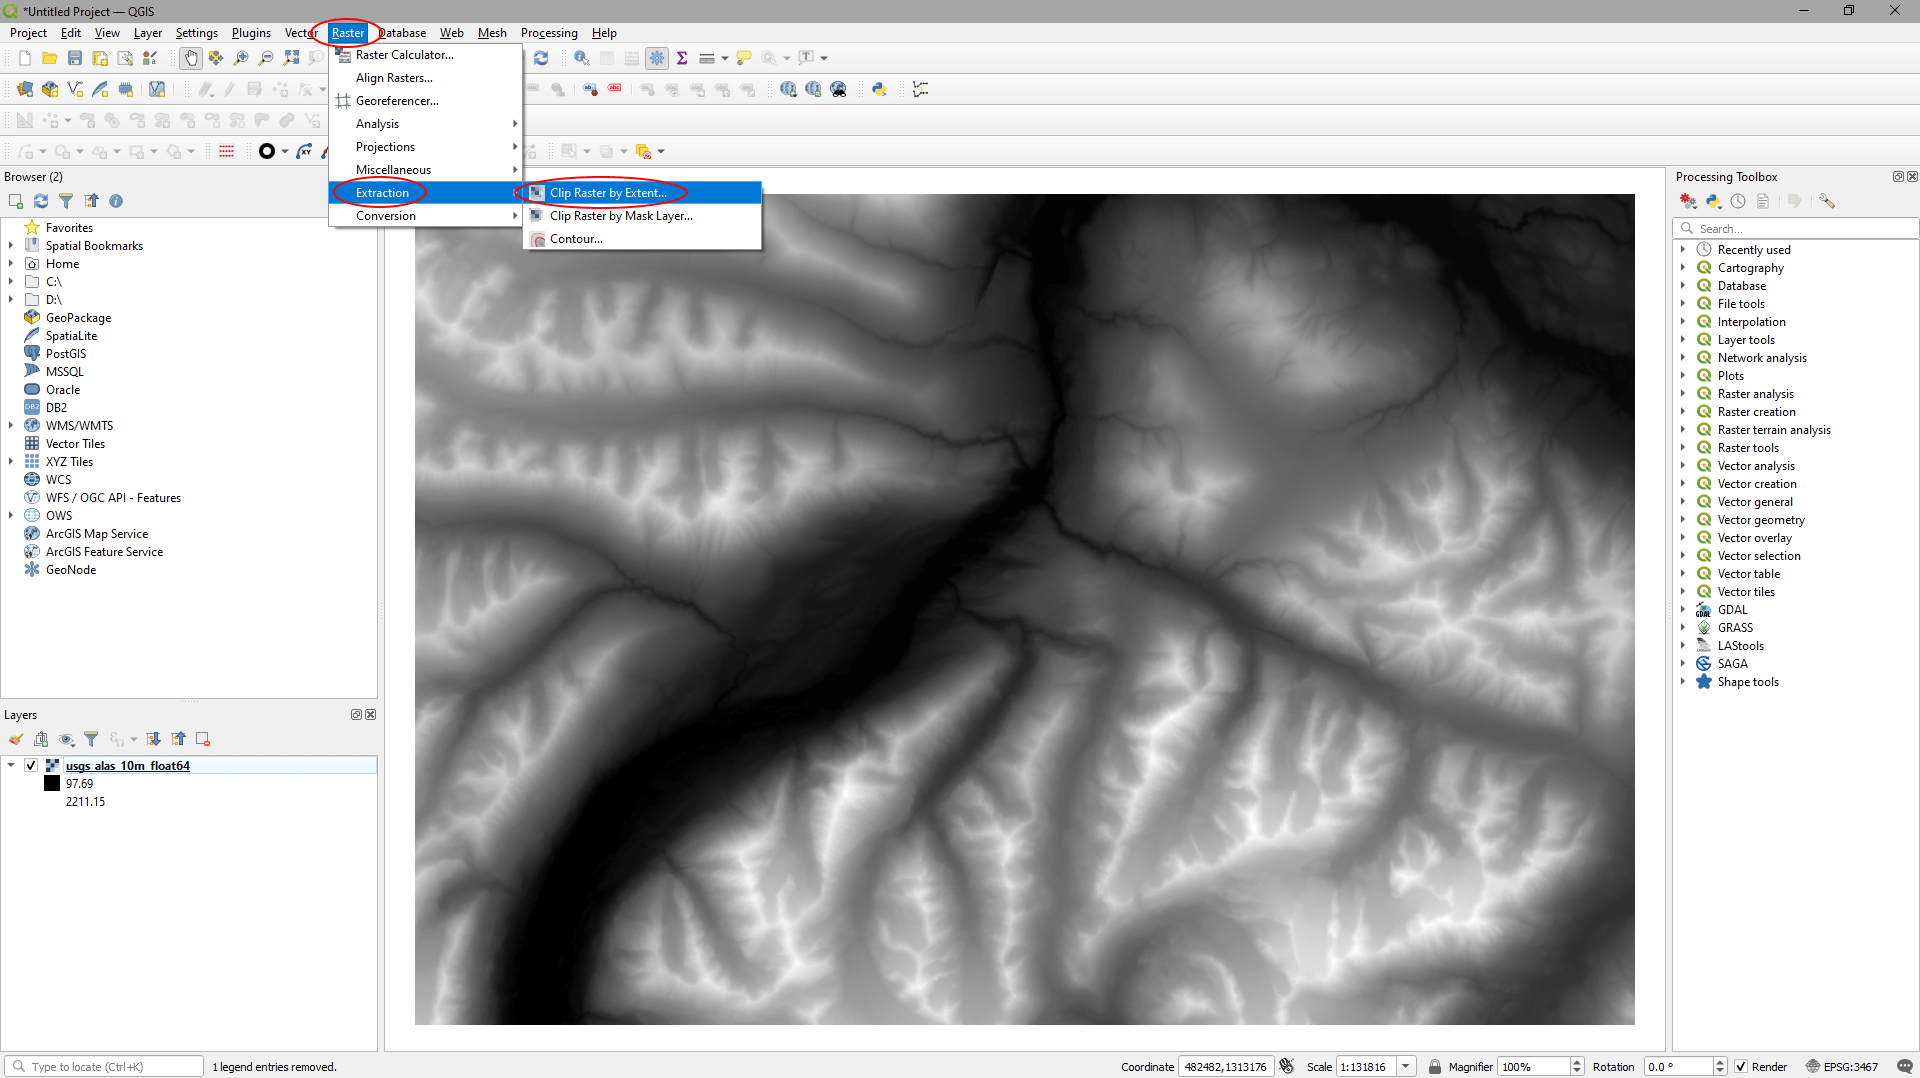
- Select ‘Raster’ > ‘Extraction’ > ‘Clip Raster by Extent…’.
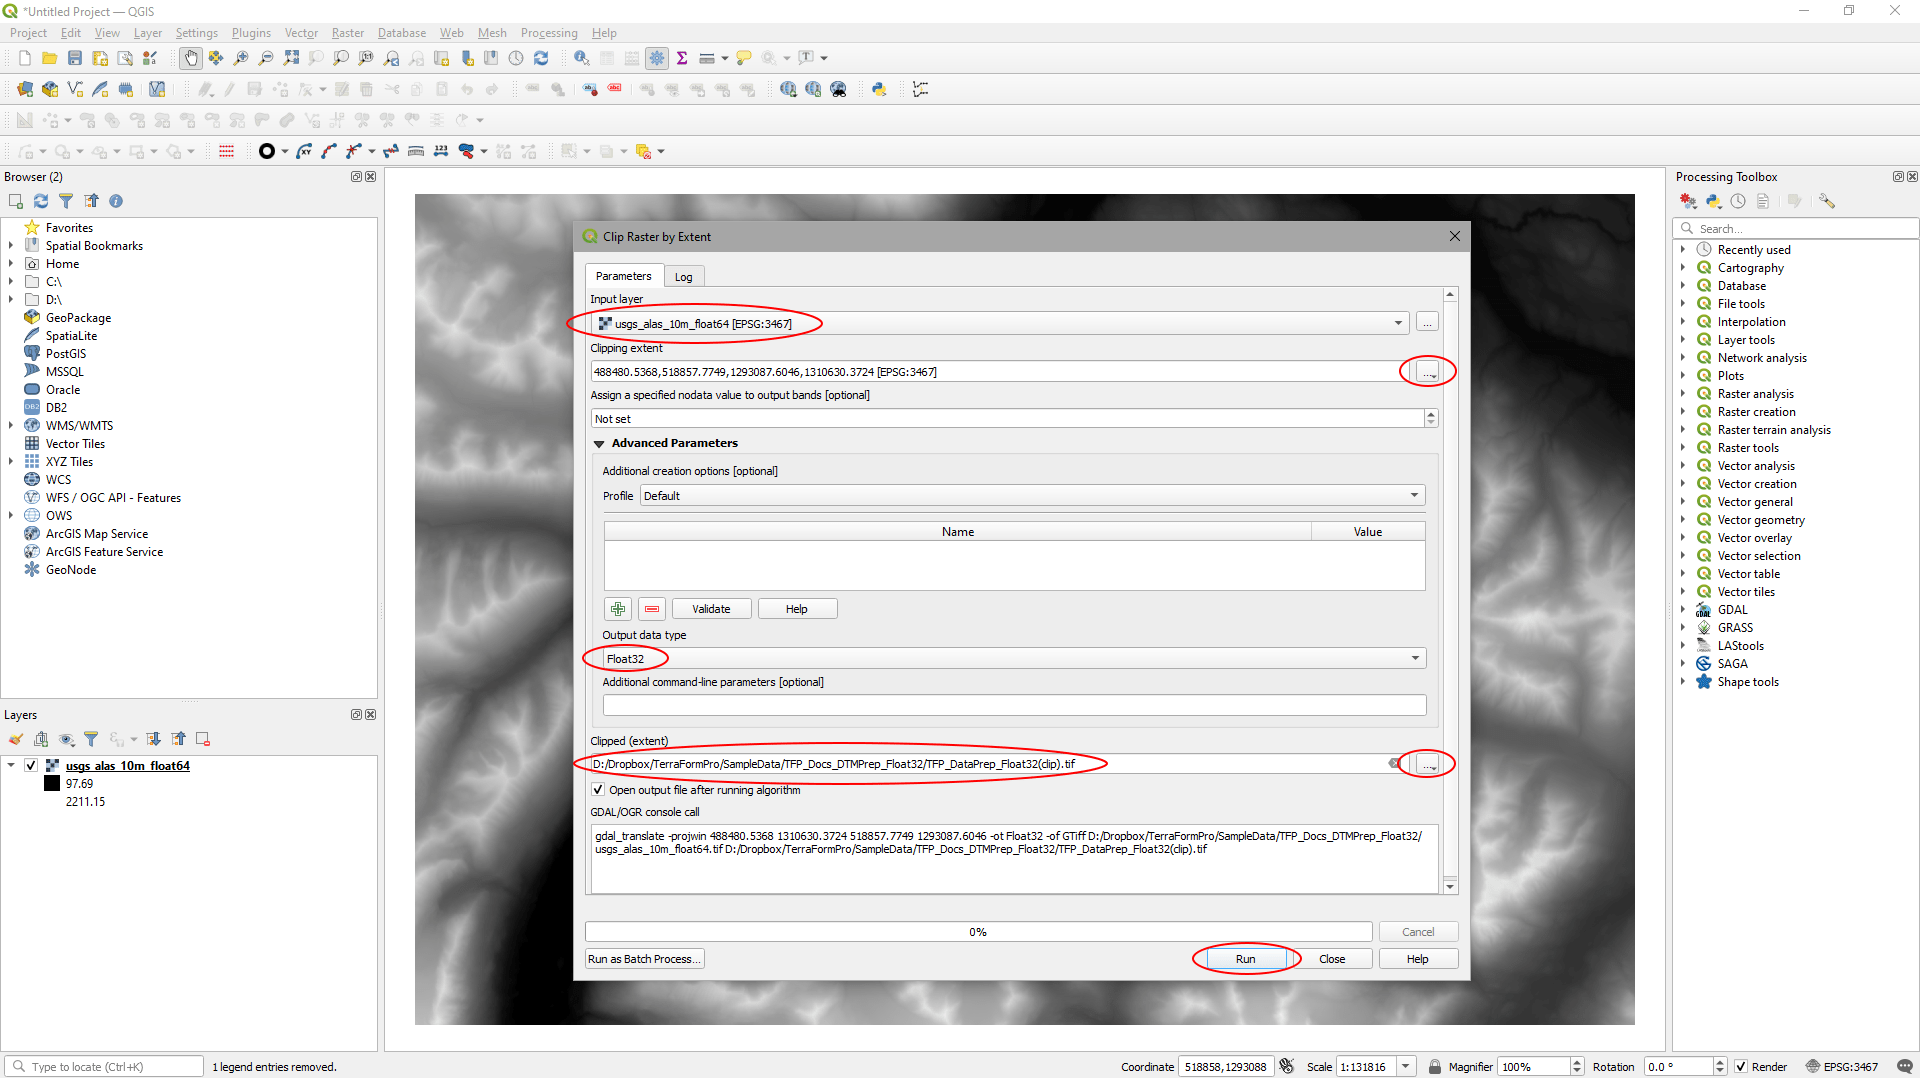
In the ‘Clip Raster by Extent’ window that appears:
- Set the ‘Input layer’ to your DTM file.
- Under ‘Clipping extent’, click the button to the right and select one of the options that fits best with how you’d like to clip the data. We used ‘Draw on Canvas’.
- Set the ‘Output data type’ to ‘Float 32’.
- Click the button to the right of ‘Clipped (extent)’, select ‘Save to File…’, then navigate to a location to export your data and give it a filename.
- Hit ‘run’.
Result
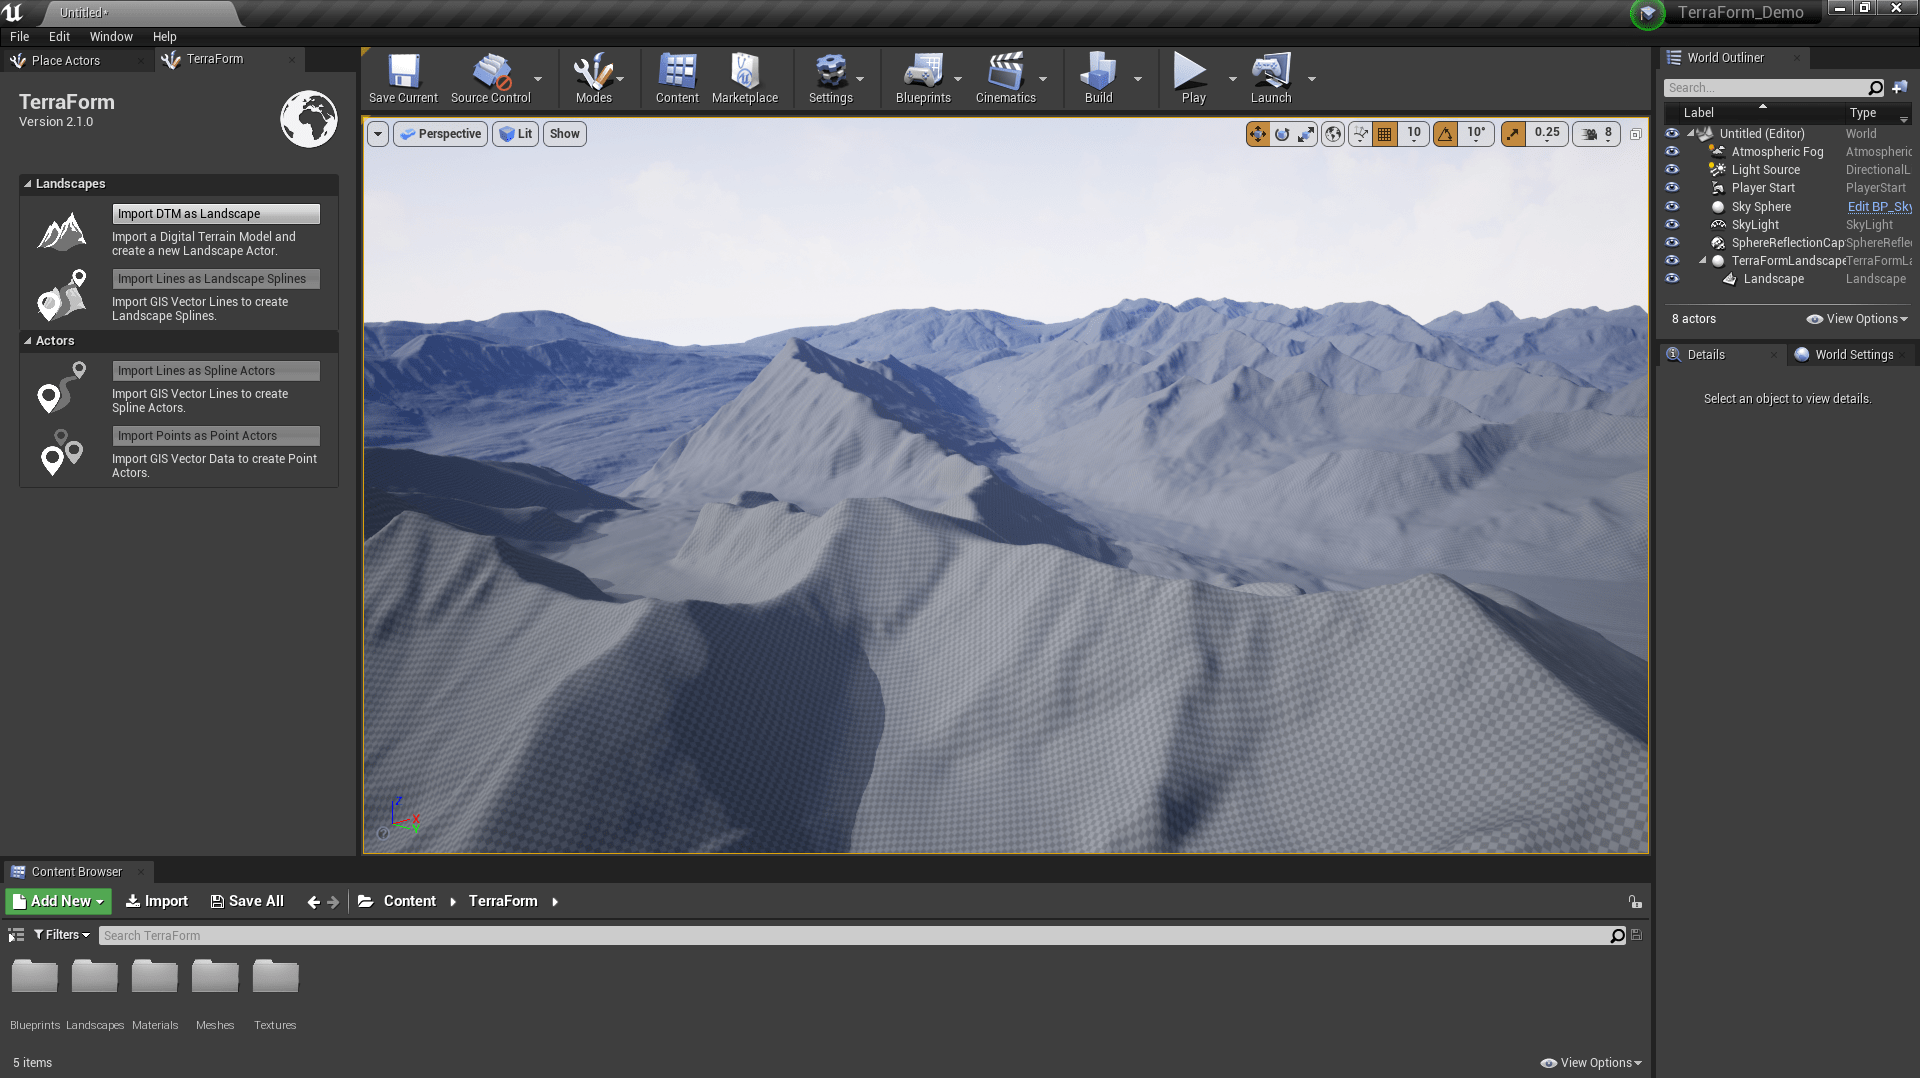
Here’s what the Alaskan data looks like in UE4: