How Can We Help?
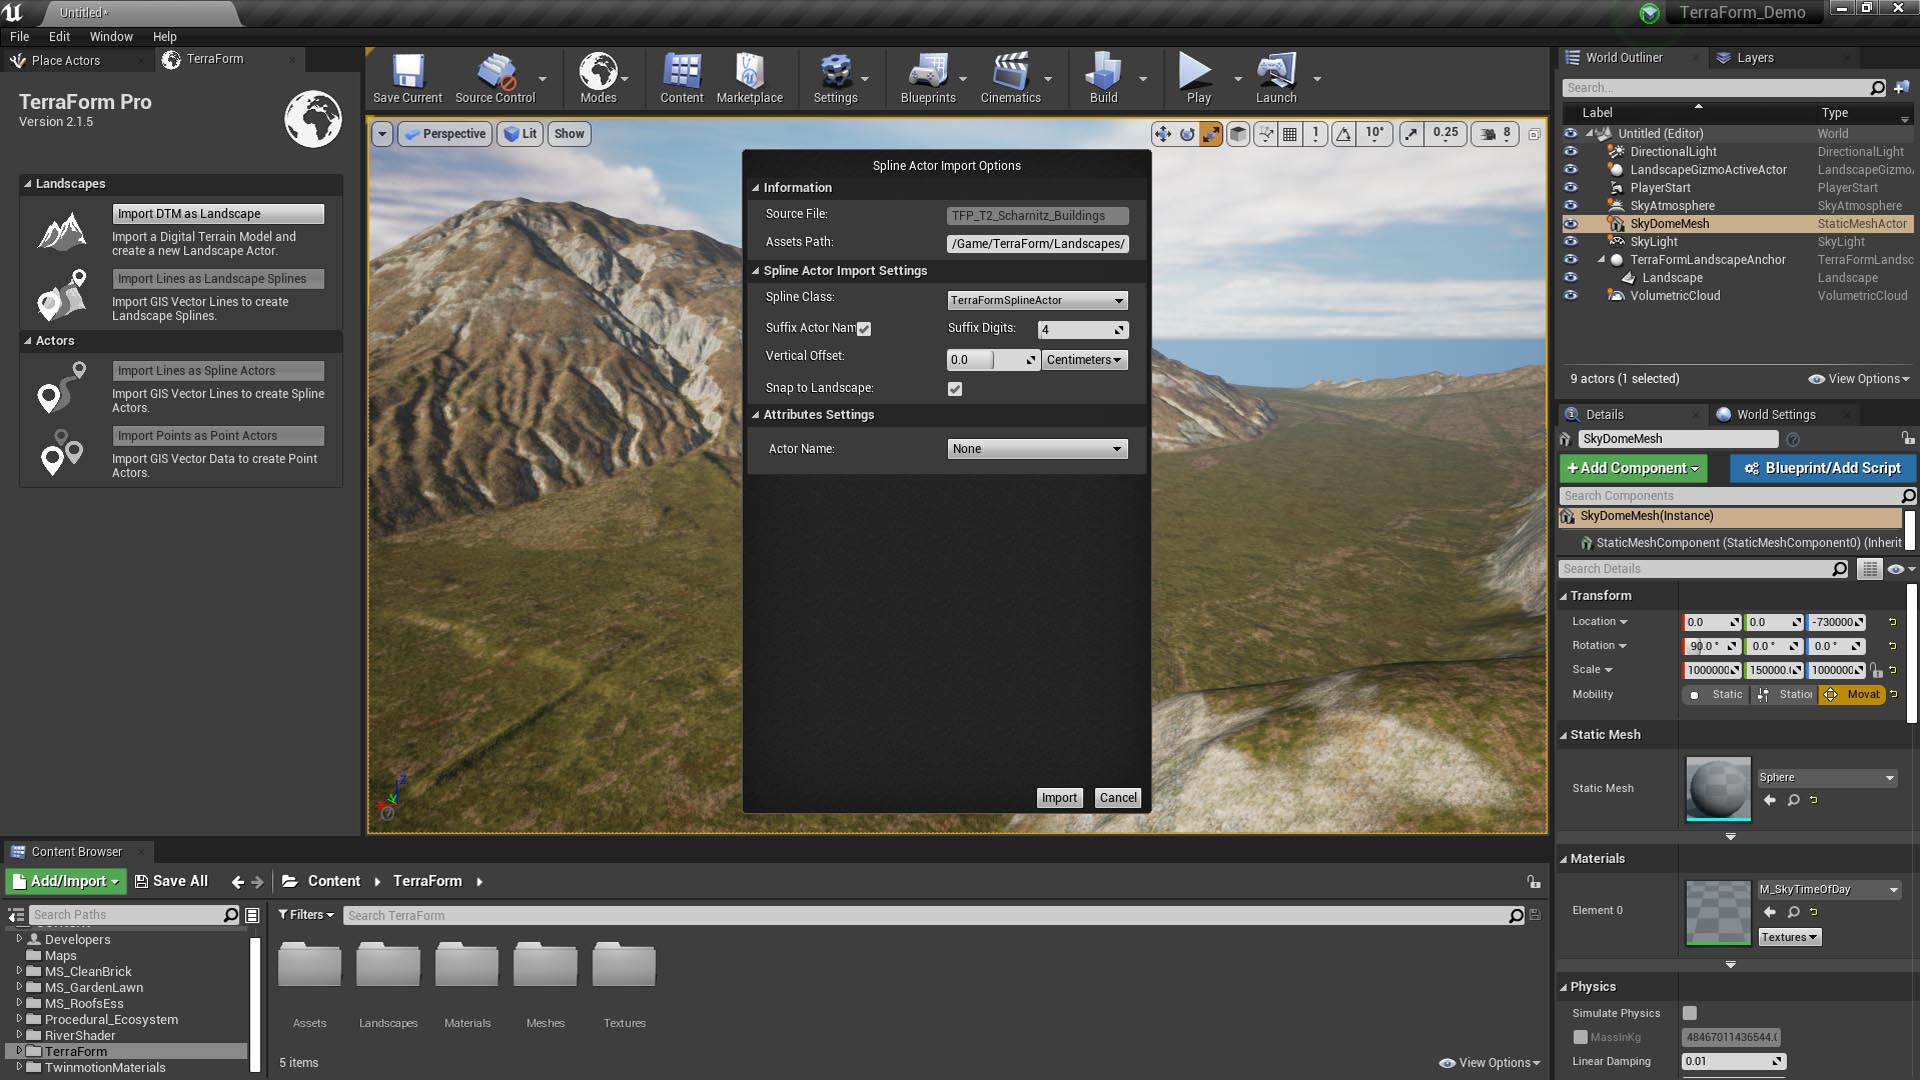
Spline Actor Import Options
The Spline Actor Import Options window is used to select the blueprint you want to import your GIS line or point vector data to, and provides a limited number of import options for your imported spline data:
Information:
Source File: The name of the GIS vector line (.shp) file you’re importing.
Assets Path: The path to the folder to use to save any assets created during the import process.
Blueprint Spline Import Settings:
Spline Class: This is where to select the blueprint you’d like to import your GIS vector data to. Only blueprints that use the TerraForm Spline Actor class will be available.
Suffix Actor Name: You can now use attributes in your GIS vector data to rename the spline actors that you create. This option determines whether or not a suffix should be added to the end of the actor name to ensure names are unique.
Suffix Digits: The number of digits to use in the suffix.
Vertical Offset: Here you can set a vertical offset for your blueprint spline. Vertical Offsets are applied whether to Snap to Landscape checked or not. If checked, your blueprint will be vertically offset from the landscape by this value. If not checked, Vertical Offset becomes the height value for all control points.
Snap to Landscape: If checked, the control points of your blueprint splines will be set to the landscape’s terrain altitude. If unchecked, spline control points will be set to the z-value of the GIS vector line data, where available. If no z-value is available, spline points will be set to an altitude of 0.00.
Attribute Settings:
Actor Name: If your vector data has an attribute for the name of the actor you want to create, you can select the attribute here.
Other Attributes: If the blueprint you’re importing your vector data to supports attributes to set the values for different parameters, they will appear here.

