How Can We Help?
9. Creating UE4 Landscape
This section’s all about how to use the data we’ve just prepared to create a Landscape in UE4.
WE NEED
Since UE4 doesn’t natively support GIS vector data, we’ve developed an editor plugin to provide this functionality.
- We’re using TerraForm in this tutorial.
We’re also using some content from the UE4 Market Place to texture and populate the landscape with vegetation, rail and roads:
- We’re using Procedural Landscape Ecosystem in this tutorial.
Step 1
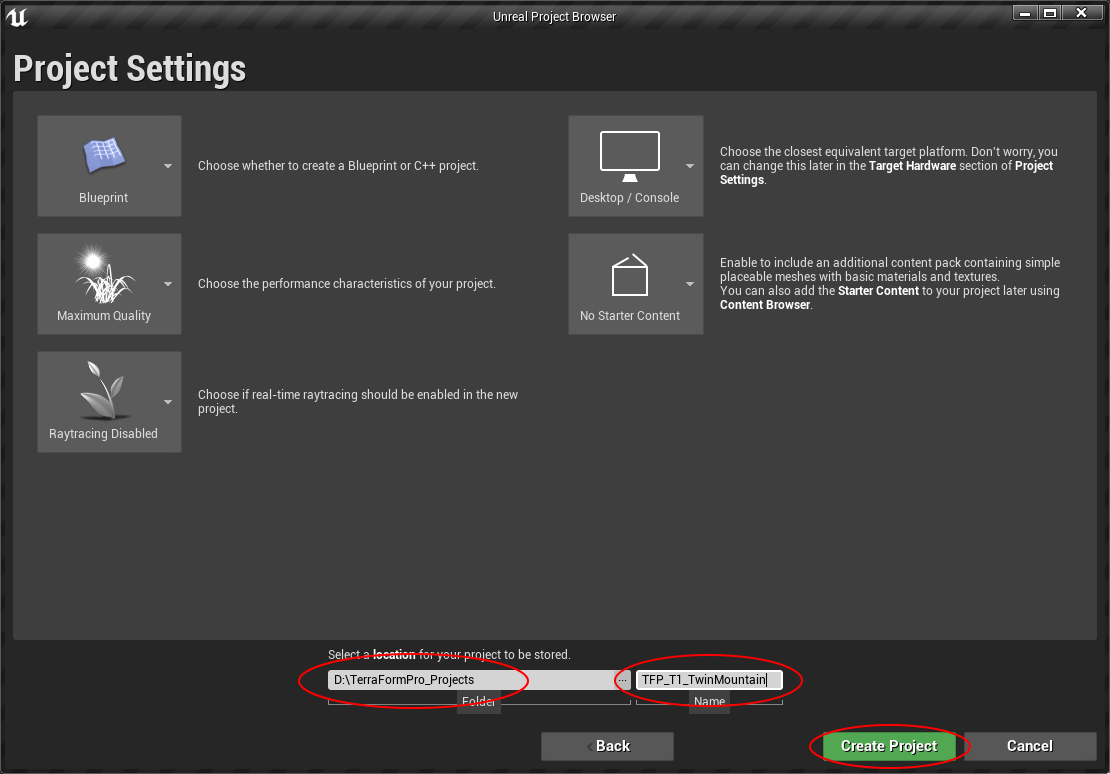
The first thing we need to do is create a new project:
- Launch the Unreal Engine (Version 4.24.3) from within the Unreal Browser.
- In the ‘Select or Create New Project’ section, select ‘Games’ from the ‘New Project Categories’ and click ‘Next’.
- In the ‘Select Template’ window, select the ‘Blank’ template and click ‘Next’.
- The ‘Project Settings’ window confirms your choices and gives you the opportunity to select the folder you want to create your project in and give the project a filename.
Step 2
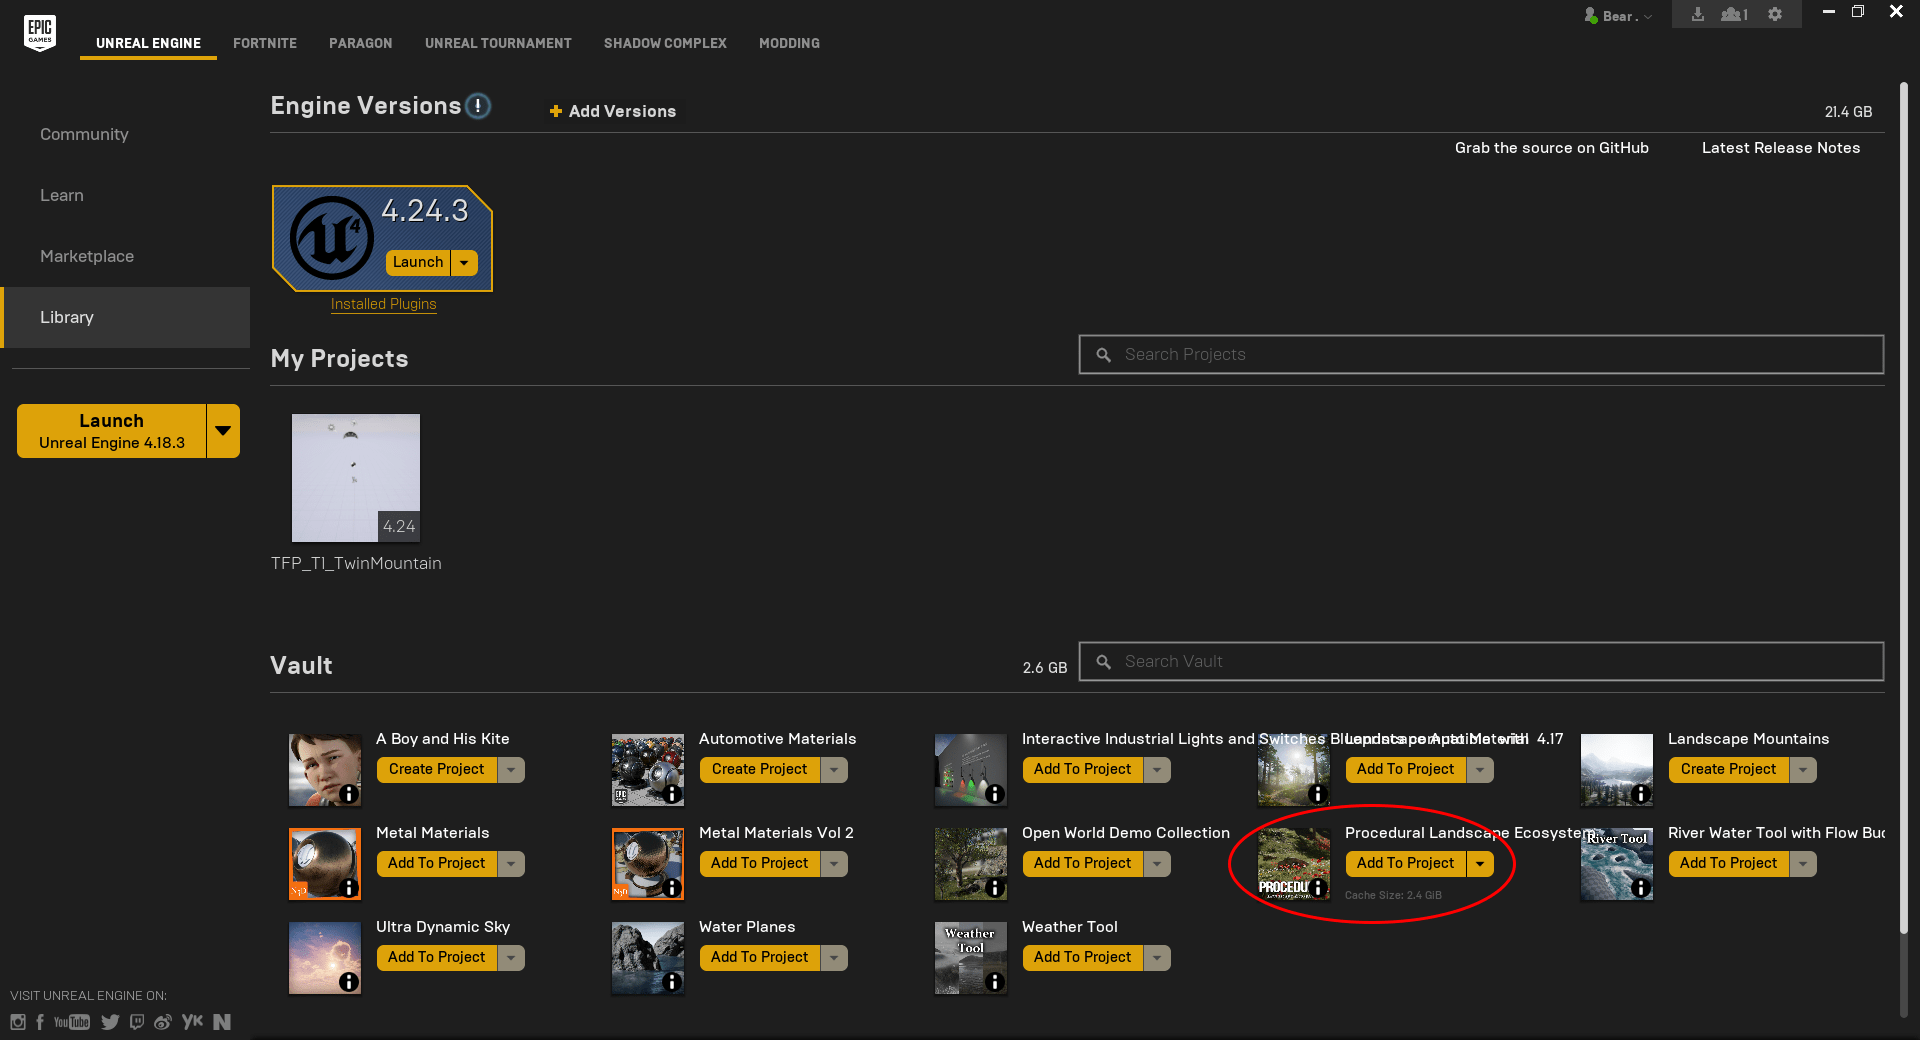
Add the Procedural Landscape Ecosystem plugin to the project.
- To do this you need to close the project you’ve just created and return to the Unreal Browser.
- Click ‘Add to Project’ on the Procedural Landscape Ecosystem.
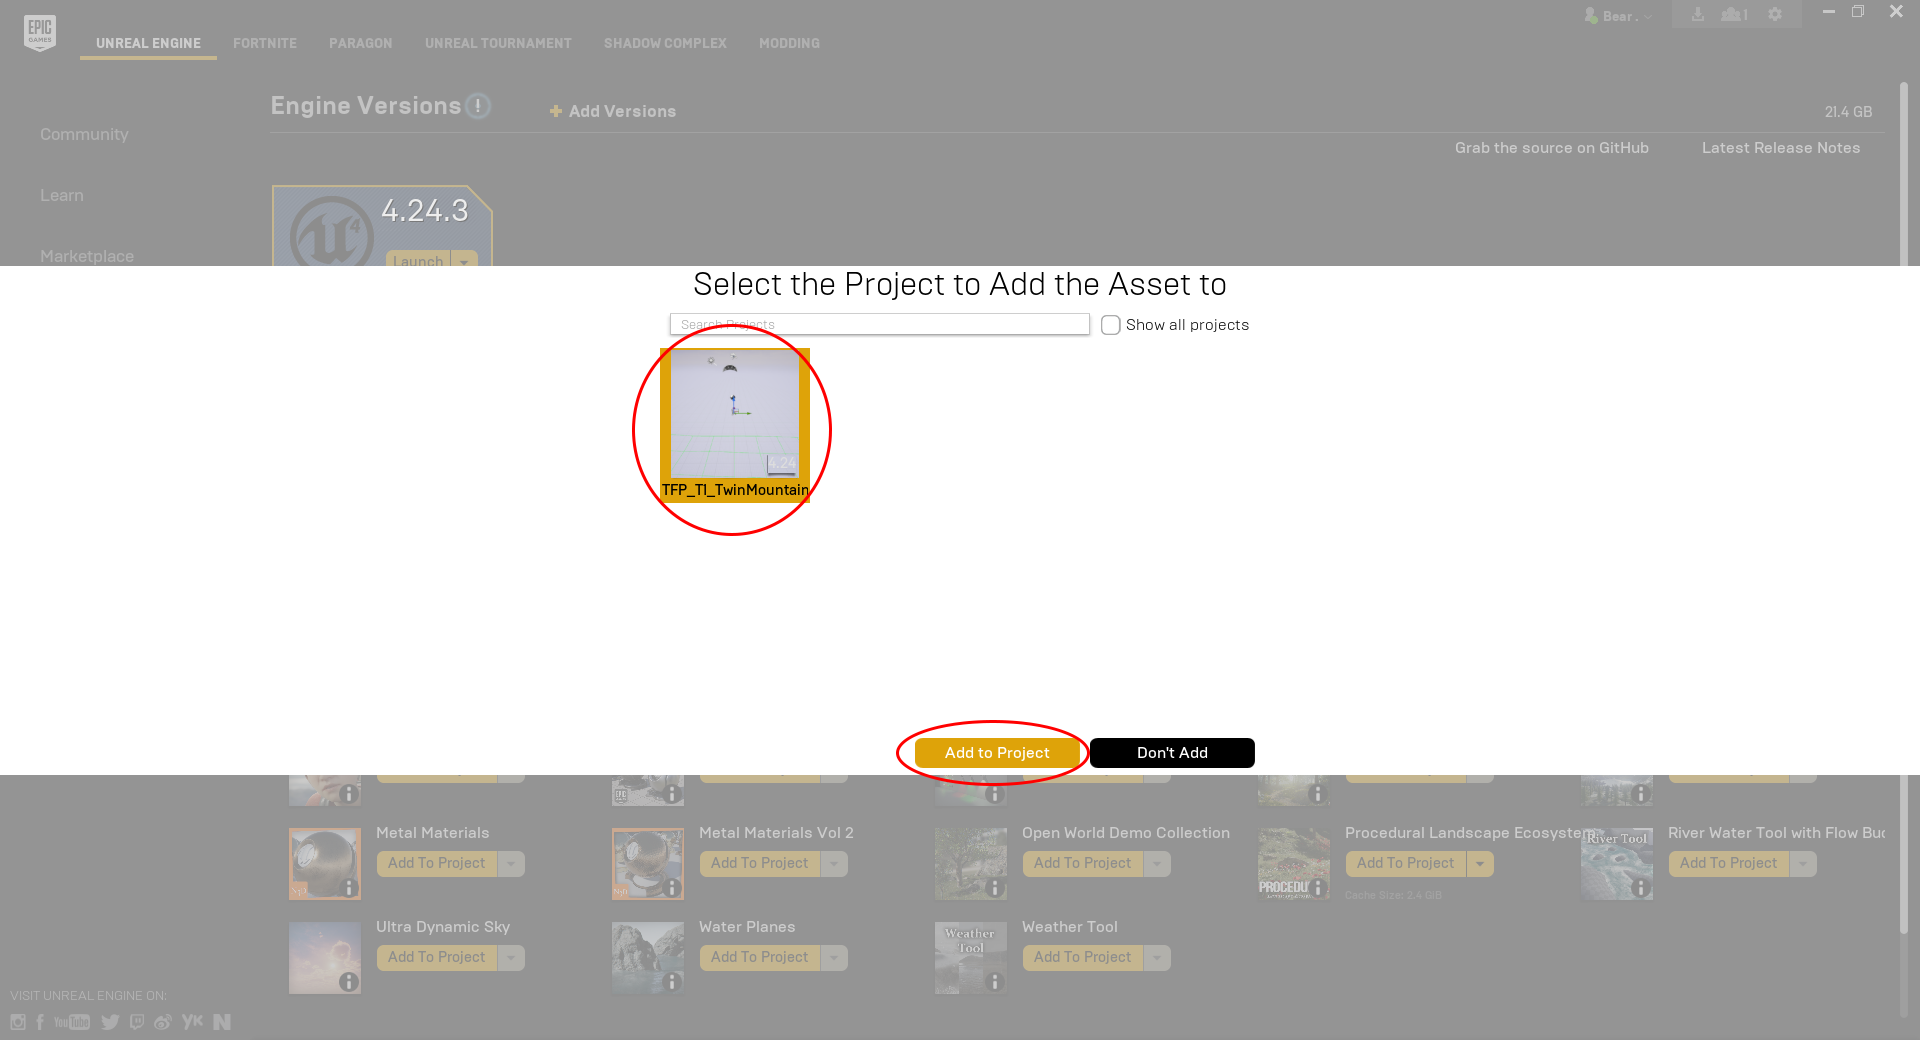
- Select the Project to add the content to.
- Click ‘Add To Project’.
Step 3
Add the TerraForm plugin to Unreal Engine.
With the Unreal Editor closed:
- Navigate to the folder on your hard drive you installed Unreal Engine to.
- Open the folder for the Unreal Engine version (in this case it’s 4.24.3, so the ‘UE_4.24’ folder is the one we want) and then ‘Engine’ > ‘Plugins’.
- Unzip the contents of the ‘TerraFormLite_V203_UE4.24.3.zip’ you downloaded from TerraFormPro.com into the ‘Plugins’ folder.
- I installed Unreal Engine to D:/Epic/ so on my system it looks like this:

Step 4
Enable the TerraForm plugin.
- The first time you launch your project after adding the TerraForm plugin, the Editor will show the message: ‘New Plugins are available’.
- Click ‘Manage Plugins…’

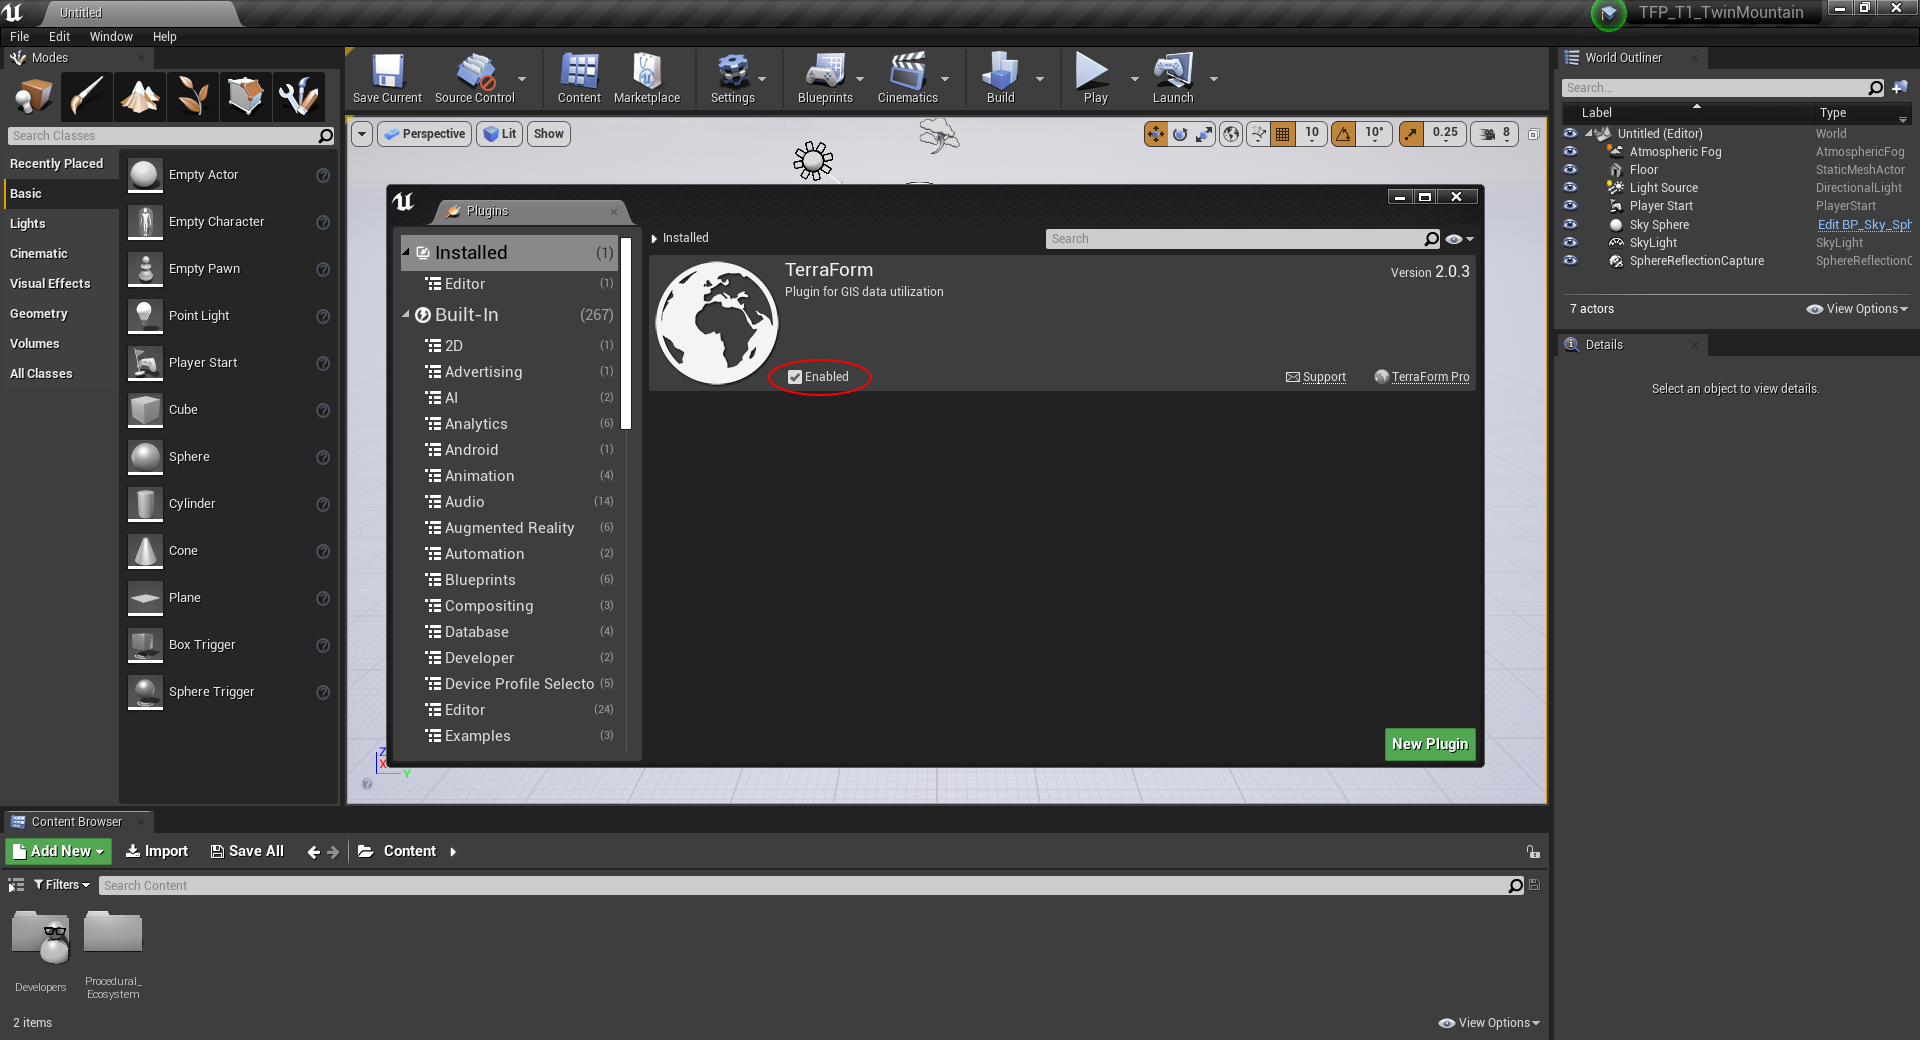
Step 5
Enable the TerraForm plugin.
- Make sure that the ‘Enabled’ box is checked. Then close the ‘Plugins’ window.
Step 6
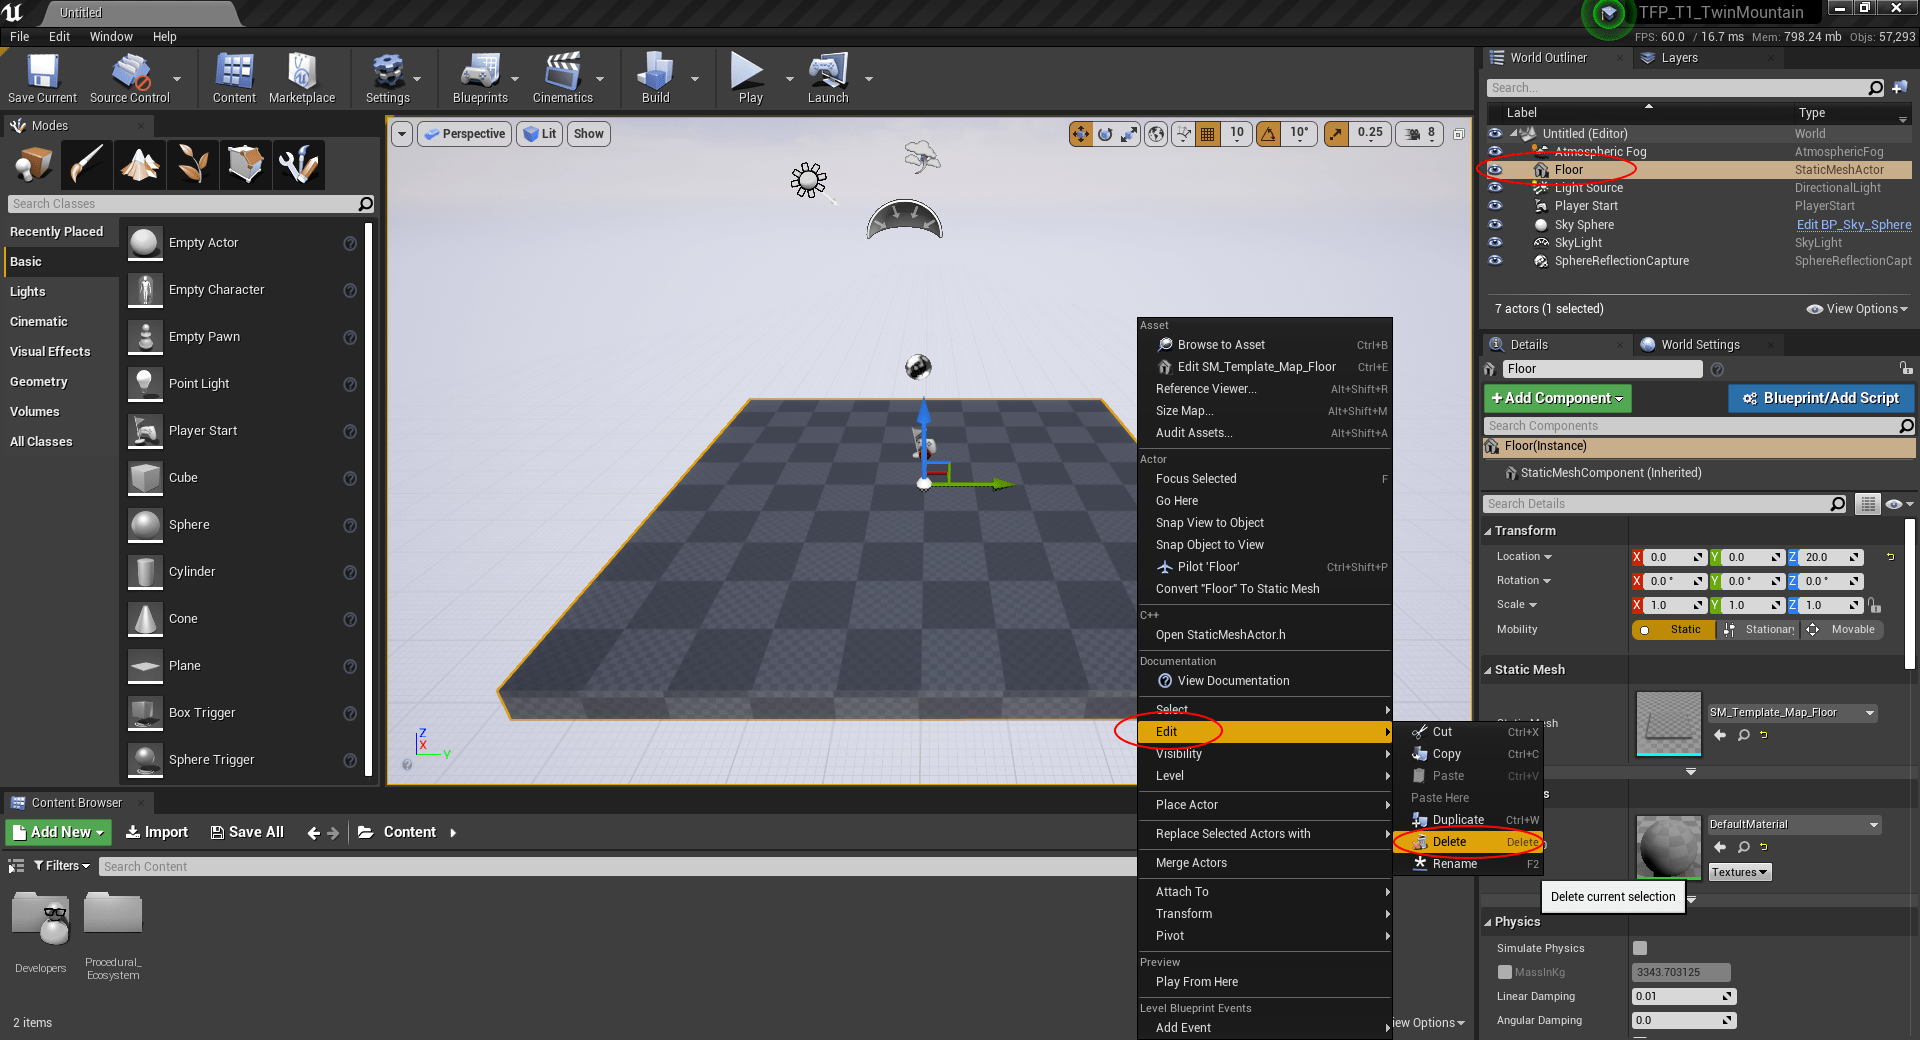
Delete the default ‘Floor’ object:
- Select the ‘Floor’ object in the ‘World Outliner’.
- <Right-click>, select ‘Edit’ > ‘Delete’.
Step 7
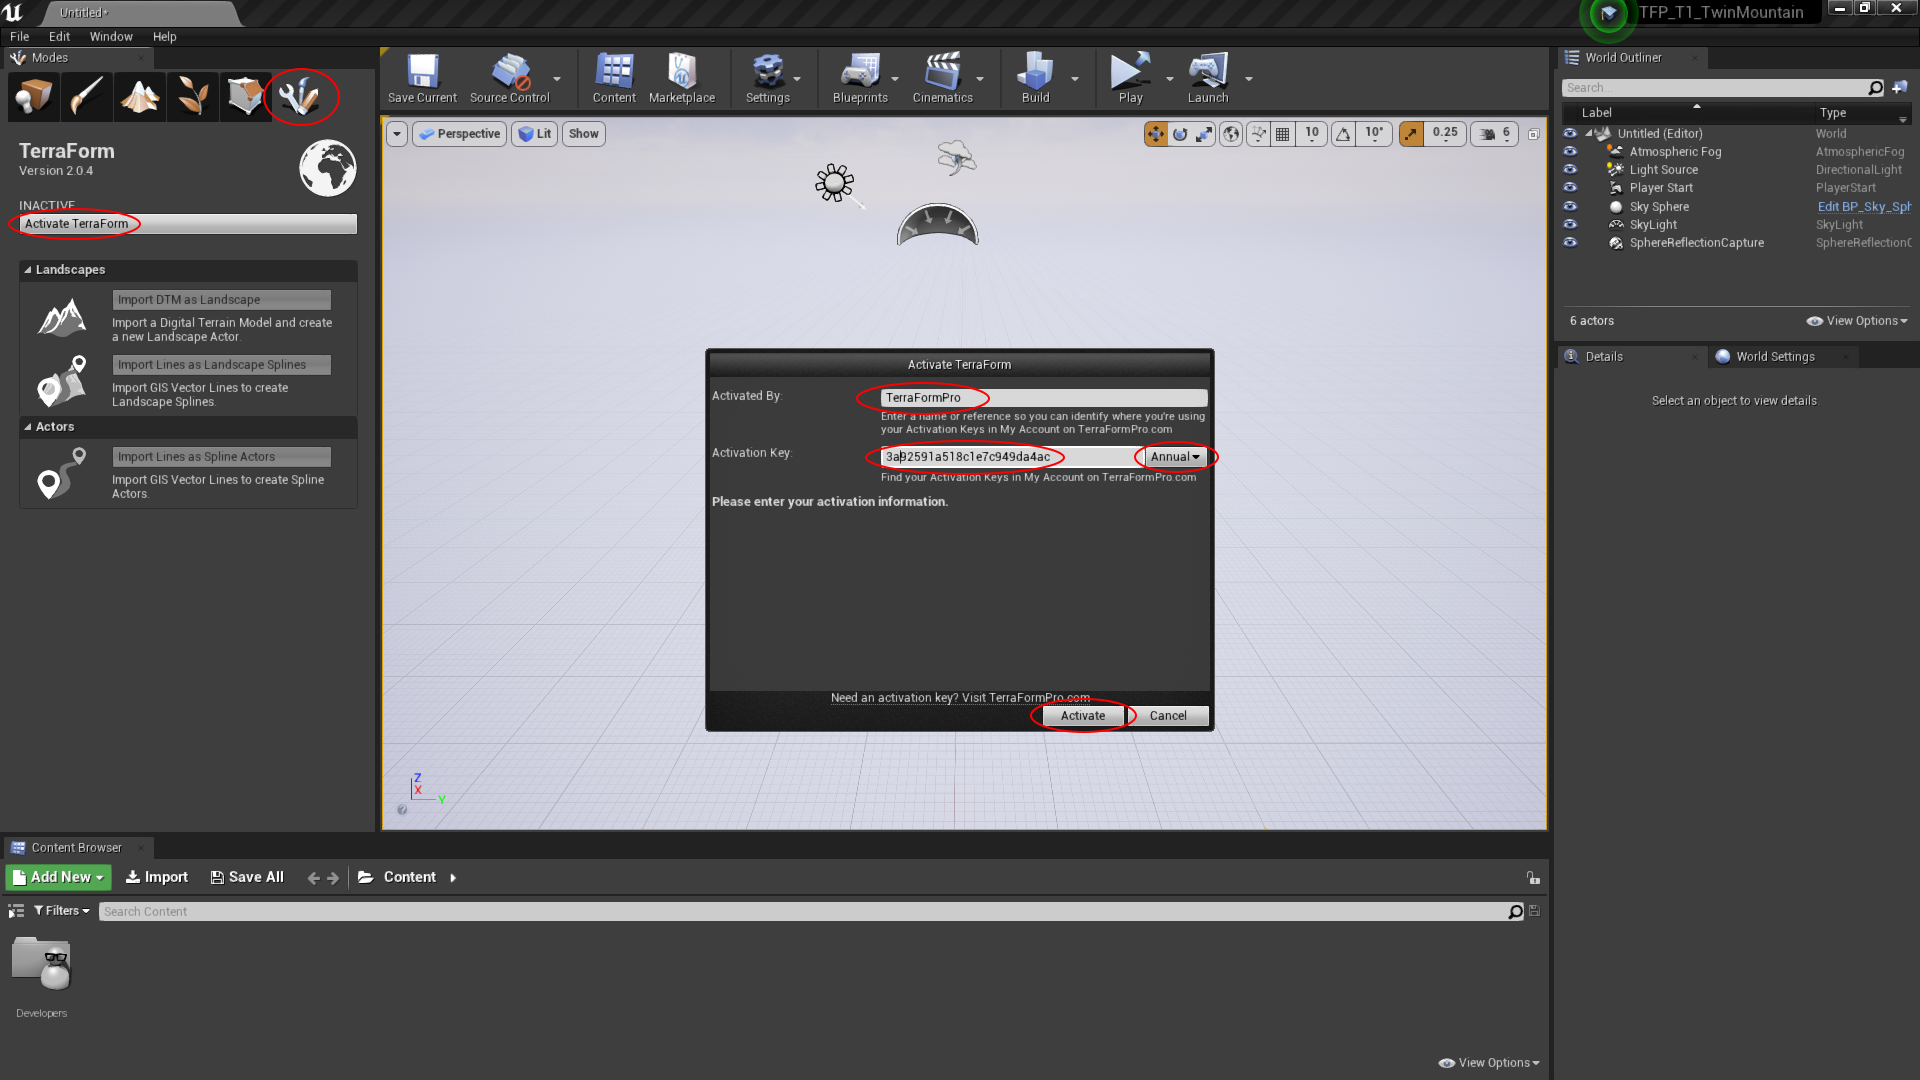
Open the TerraForm modes panel and activate the plugin (if you haven’t already):
- Select the TerraForm mode from the ‘Modes’ Panel.
- Click the ‘Activate TerraForm’ button.
- In the ‘Activate TerraForm’ window, type a reference in ‘Activated By’ (this is used to help you figure out which computers/people are using your ‘Activation Keys’ in ‘My Account’ on TerraFormPro.com can be anything as long as it contains only letters and numbers – no spaces).
- Copy your ‘Activation Key’ (from ‘Activation Keys’ in ‘My Account’ on TerraFormPro.com) and paste it into the ‘Activation Key’ field.
- Select ‘Annual’ or ‘Monthly’, depending on which subscription duration you’ve signed up for.
- Click ‘Activate’ to activate TerraForm.
- If you have any problems activating TerraForm, you can get help at: info@terraformpro.com.
Step 8
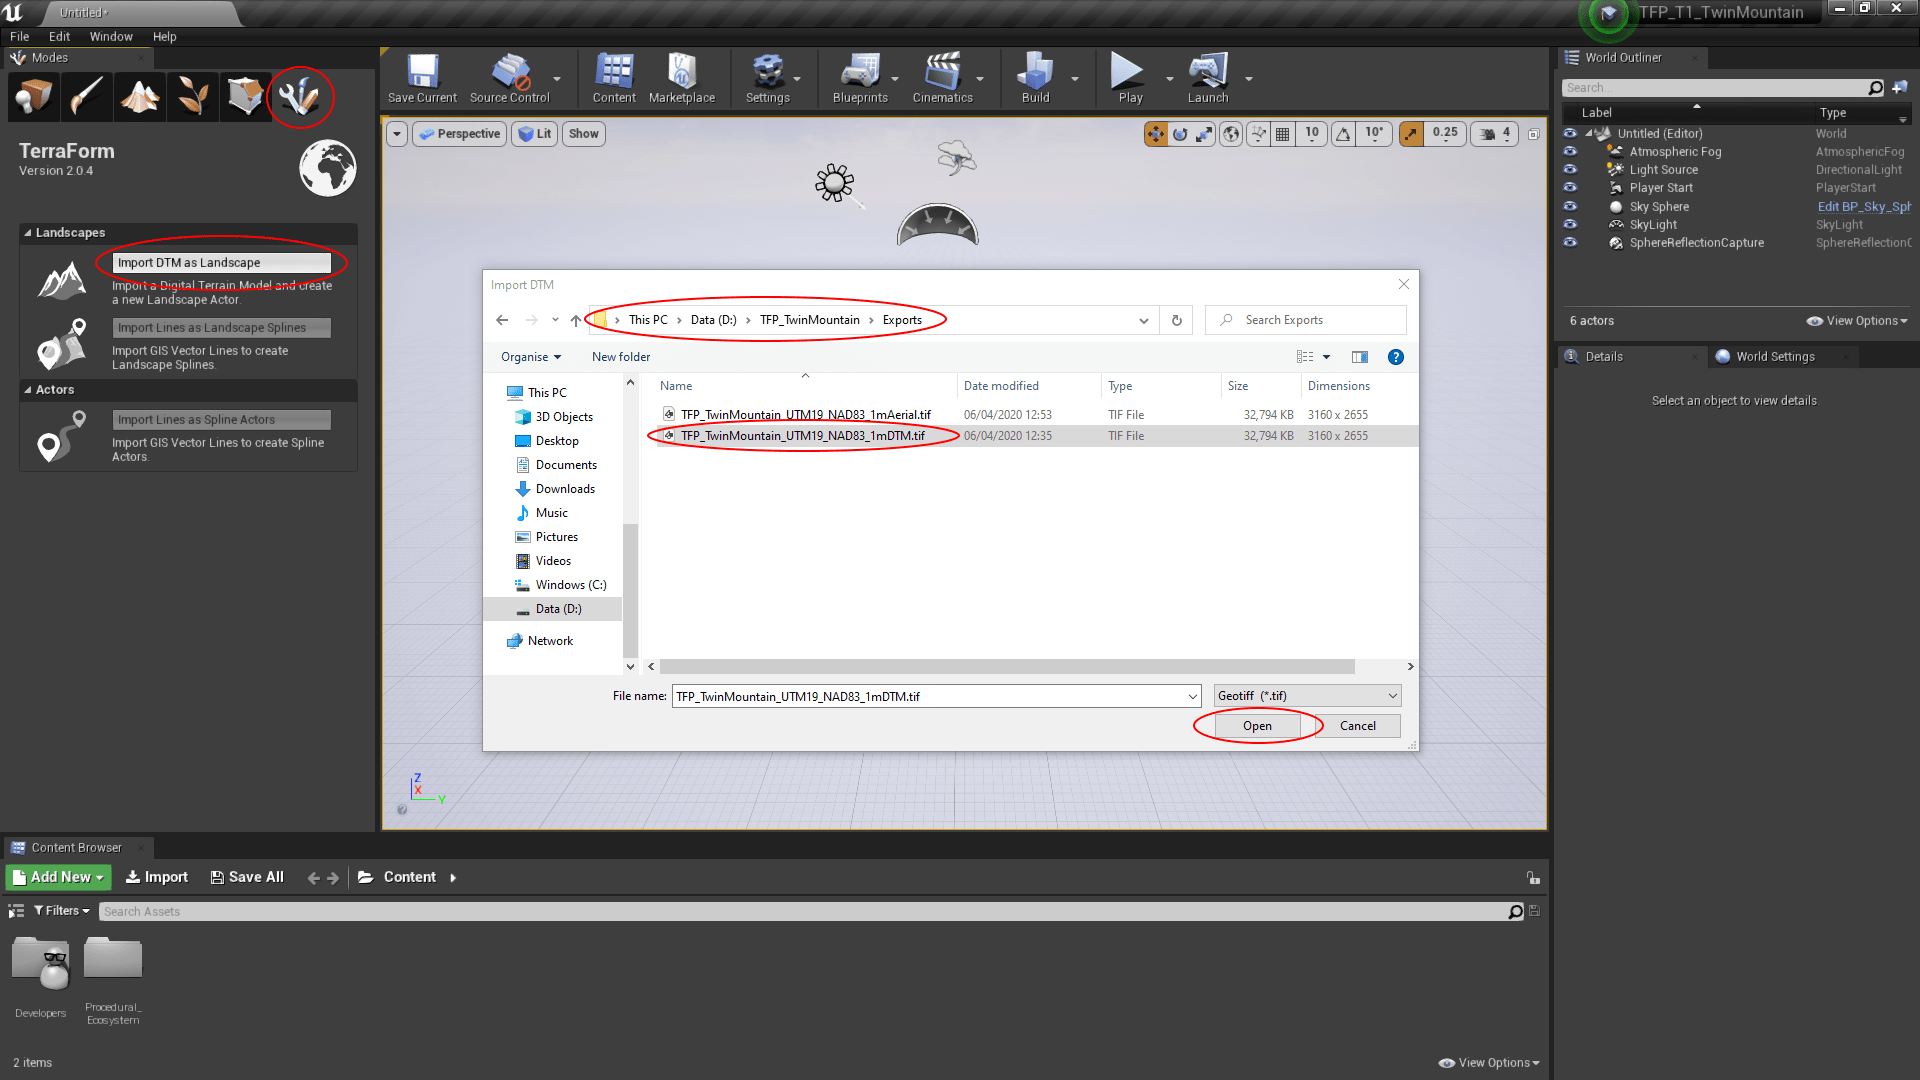
Import your DTM as a height map to create a new landscape in UE4:
- Click the ‘Import DTM as Landscape’ button.
- In the ‘Import DTM’ file browser, navigate to the folder you exported your GIS data to and select the DTM.
- Click ‘Open’.
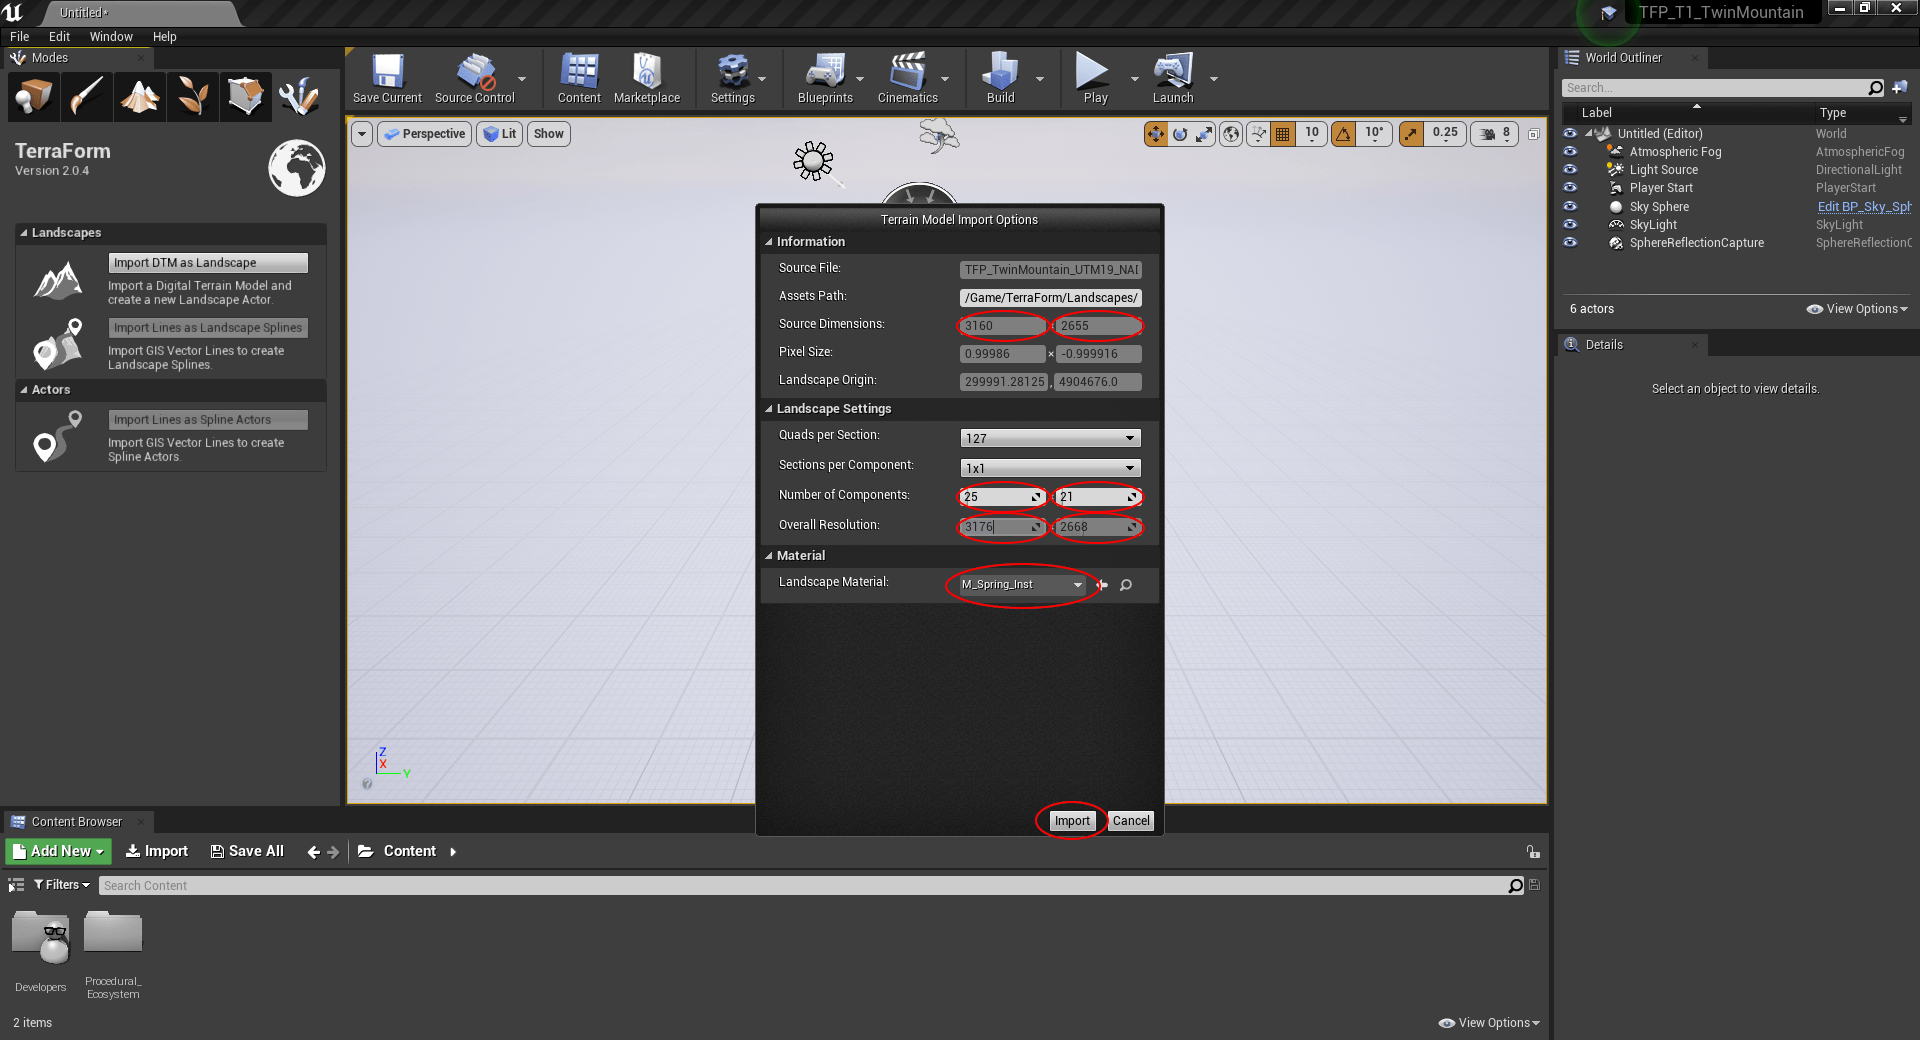
Step 9
Set the options for the landscape you want to create and apply the landscape material:
- The ‘Source Dimensions’ of your DTM source data are shown in the ‘Information’ section. Change the ‘Number of Components’ (and if you like the ‘Quads per Section’ and ‘Sections per Component’) so that the ‘Overall Resolution’ of you new landscape approximately matches the ‘Source Dimensions’ of the DTM data.
- Select ‘M_Spring’ in the ‘Landscape Material’ section.
- Click ‘Import’ to create your new landscape. (Depending on the options you’ve set and the size of your source file, this may take a short while.)
[NOTE: We’re closely matching the Source Dimensions to the Overall Resolution to retain as much accuracy of the DTM as possible, whilst minimising the resolution of the landscape we create. You can equally have a smaller Overall Resolution to improve performance, or a larger one to over-sample the DTM data.]
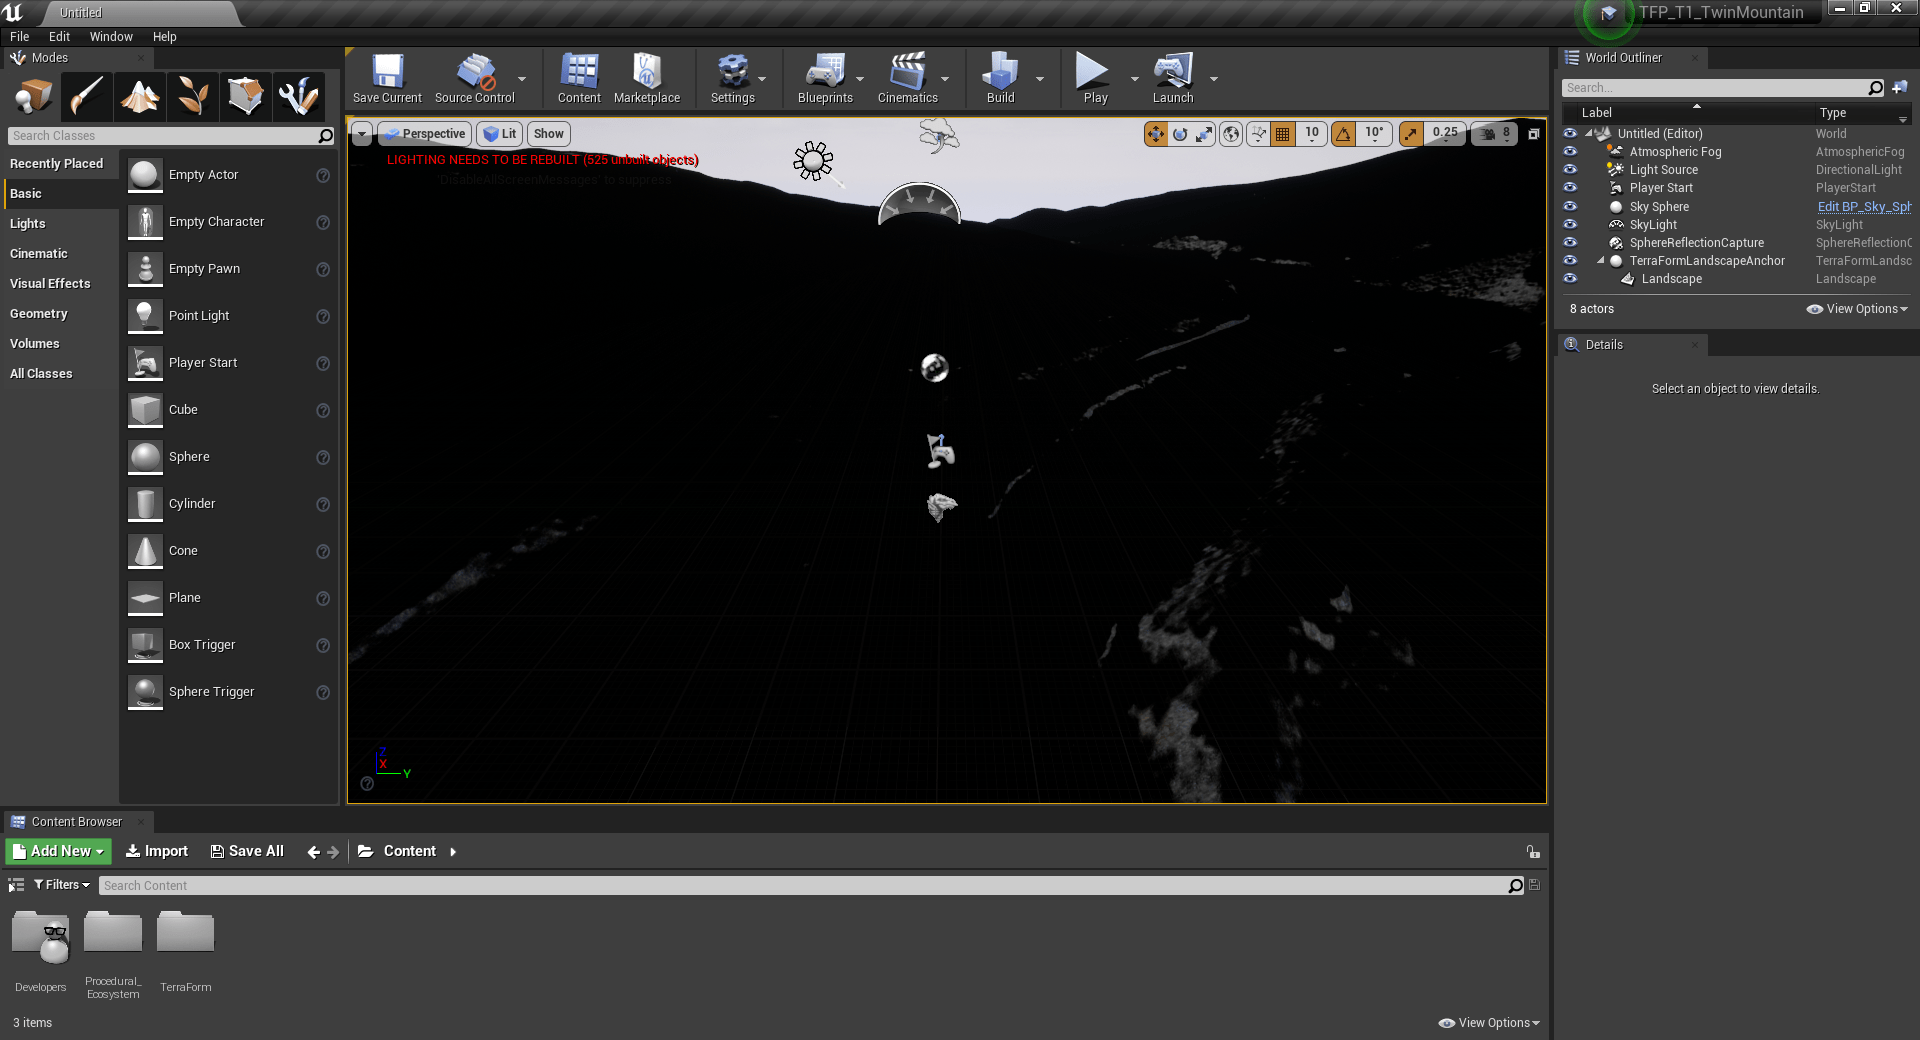
It will look like this:
(Don’t worry that it’s dark – we need to apply the landscape layers, which will sort that out.)
Step 10
Assign Layer Info objects to the landscape material layers:
- Select the ‘Landscape’ mode, then select ‘Paint’.
- Under ‘Target Layers’, you’ll find the ‘Procedural Landscape Ecosystem’ layer list. Initially, each ‘Layer’ will be set to ‘None’.
- Click the drop-down arrow in the field under the ‘Grass_plane’ layer name and select ‘Grass_plane_Layerinfo’.
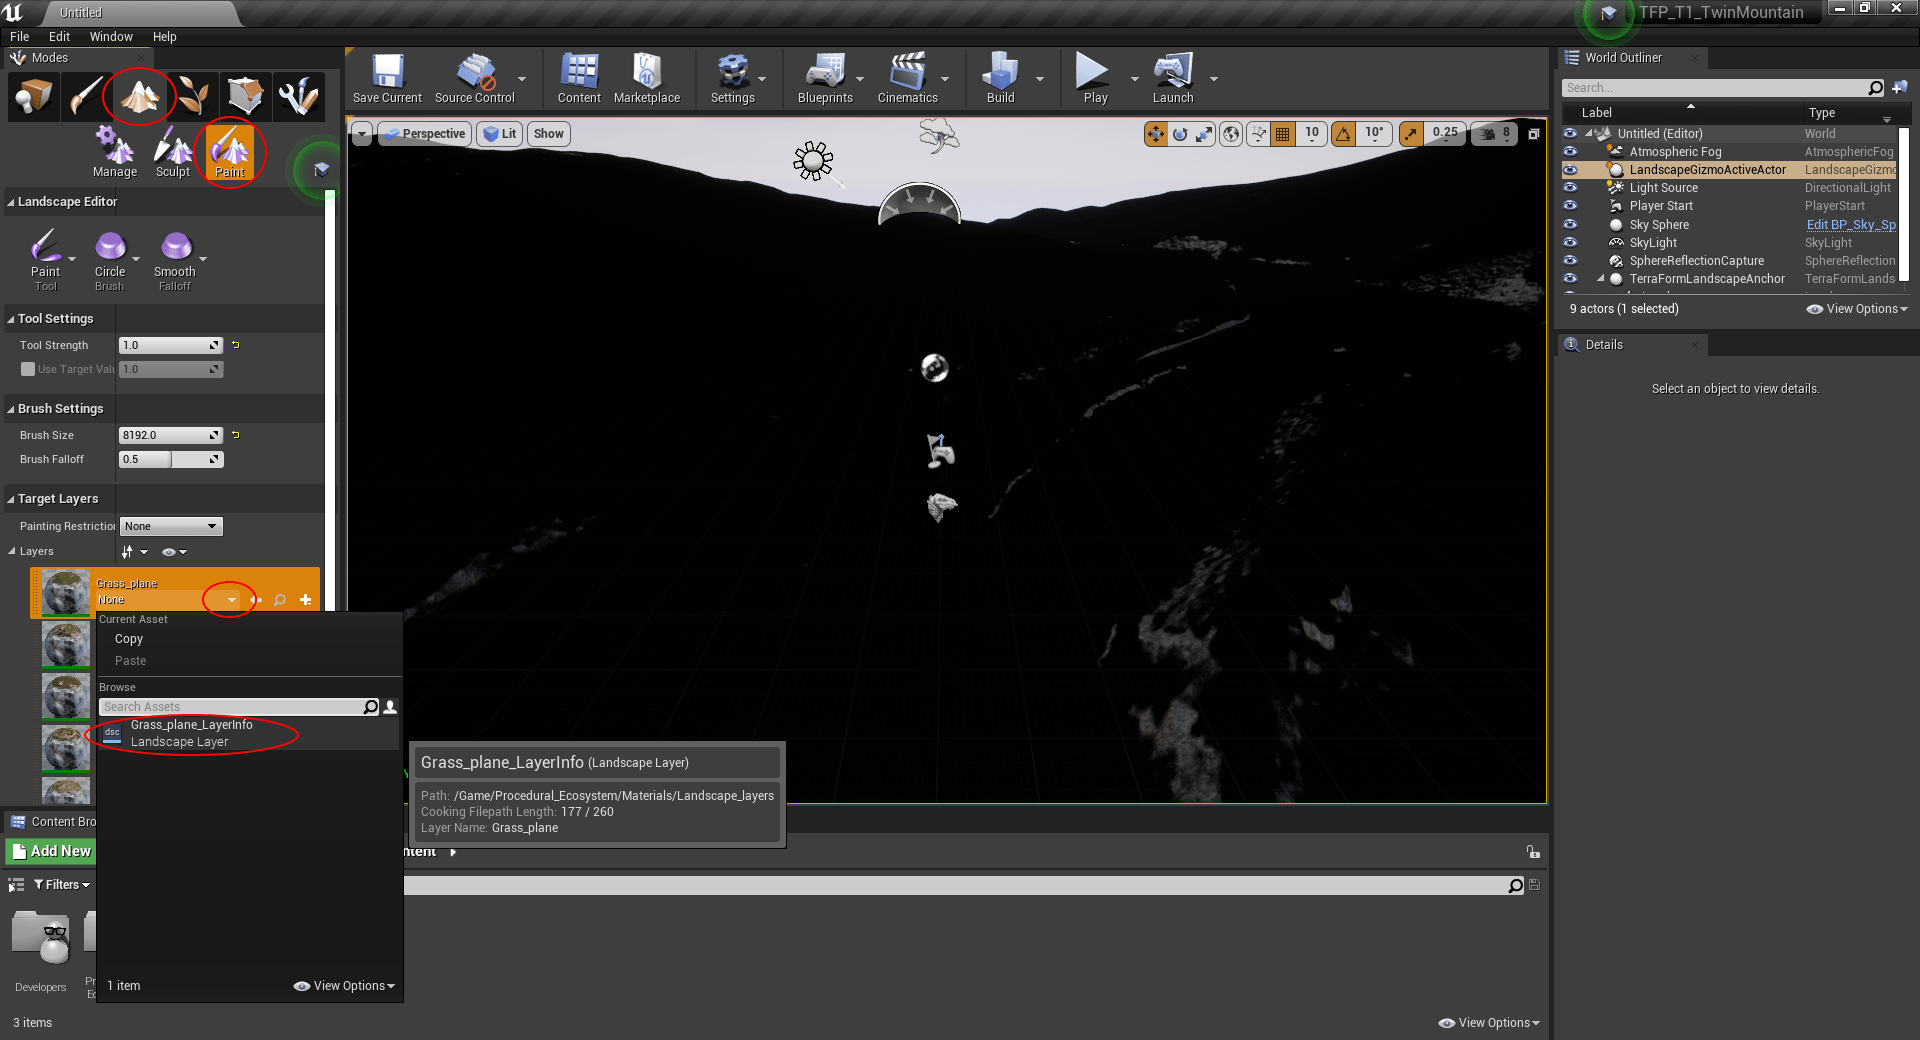
- Repeat this for the other layers in Procedural Landscape Ecosystem.
[NOTE: If you’re using your own landscape materials, you can mimic this step with your own assets.]

Step 11
Eye Adaption provides additional realism in game, but is a bit of a pain when working with large landscapes in the Unreal Editor – continually adjusting brightness as you navigate the scene. At this point we find it easier to fix it to switch it off in the Unreal Editor
- In the Editor Viewport, click ‘Show’ > ‘Post Processing’, then uncheck the ‘Eye Adaption’ check box.

Step 12
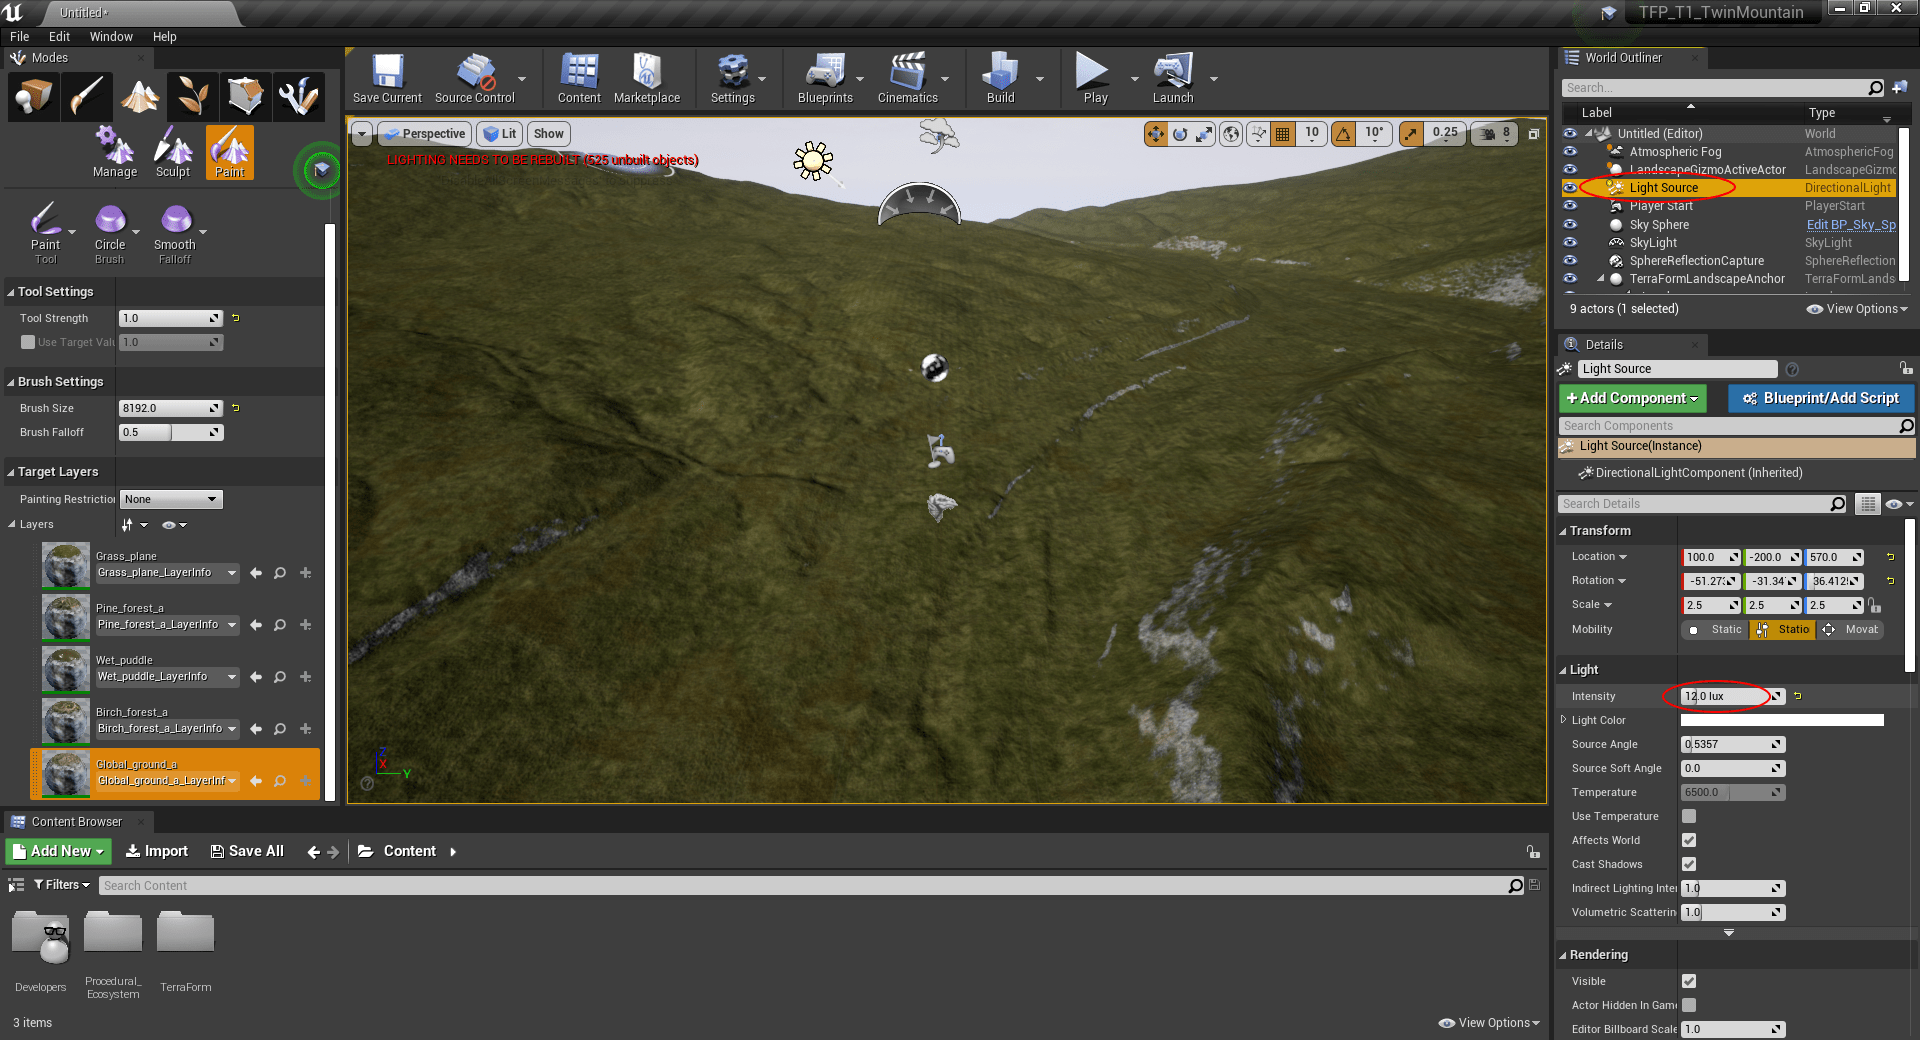
The scene still looks a little dark, so we’ll increase the brightness of the light source:
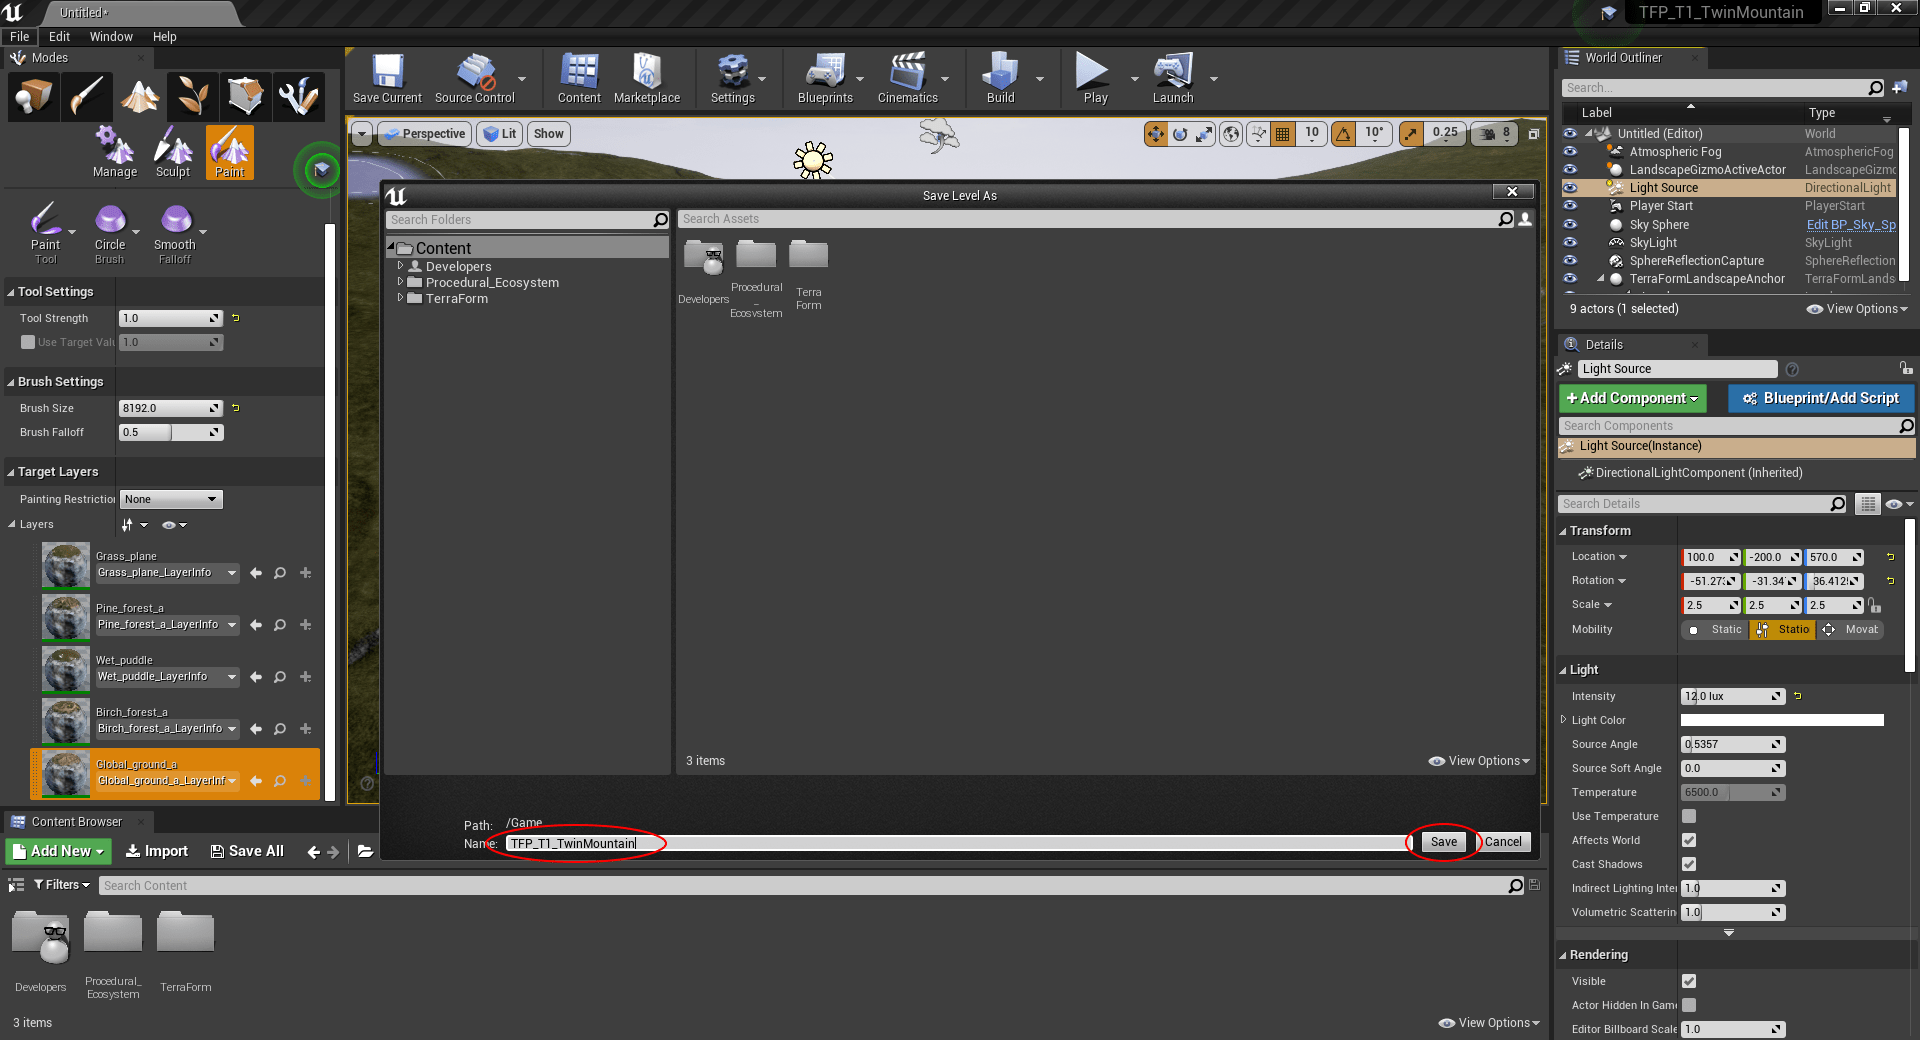
- In the ‘World Outliner’, select ‘Light Source’.
- In the ‘Intensity’ field under ‘Light’, increase the setting. 12.0 lux is about right for our project.
Step 13
Save the project so far:
- Click ‘File’, then ‘Save Current As…’
- In the ‘Save Level As’ window, give your new level a file name and hit ‘Save’.